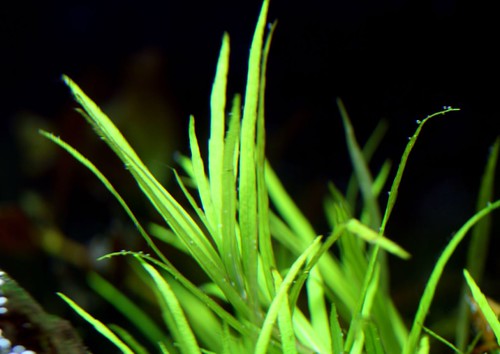
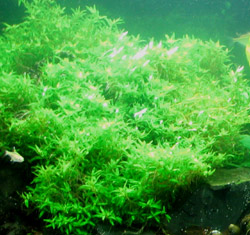
33G: A Few Adjustments…

September 8th, 2010

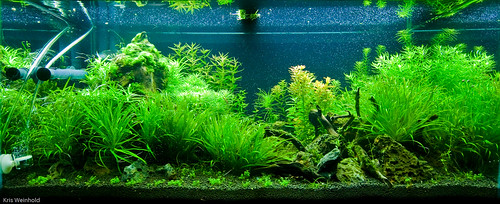
I made a few adjustments to my 33G aquascape since the last post. For starters, I still haven’t removed the Myriophyllum mattogrossense from the right side, as my other tanks are currently full of other plants that I don’t want to get overrun by the fast-growing Myrio. I really think you could see this stuff grow if you sat and watched it! I’ve had differing opinions from folks as to whether or not they like the Myrio. Please let me know what you think in the comments.

33G Rimless Aquarium

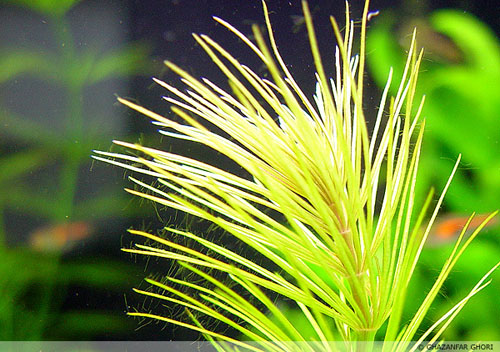
Otherwise, I did remove the rock that was in the front-right, directly in front of the large rock. I felt that the previous one was too big and detracted from the large rock. What do you think of the smaller rock there? I also raised one of the rocks in the back, just left of center, so that it would be slightly more visible, rather than being buried by the Blyxa japonica.

33G Rimless Aquarium

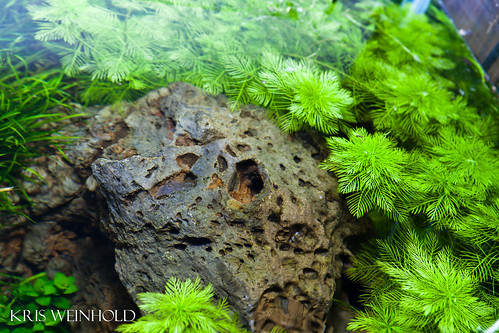
One of the reasons I love this porous mossy rock is that many pieces have small caves in them. The large rock, for example, has two caves, one directly on its peak, with the other on the backside of the rock. In previous scapes, I’ve had both Apistogramma and Ancistrus spawn inside of these tunnels.

33G Rimless Aquarium

I’m really amazed by how quickly this aquascape is shaping up, and filling in. I guess fresh aquasoil, combined with good lights and lots of CO2 are a winning combination. The only problem I’ve had so far is some diatom algae, which was easily gobbled up overnight (literally) by four baby bristlenosed plecos I added from another tank. While they grow to about 6″ in size, right now these plecos are about 1.5″ inches, or similar in size to Otocinclus, so they were the perfect remedy. Comments/critiques welcome!


Business Broker

Growing Garden

June 2nd, 2010

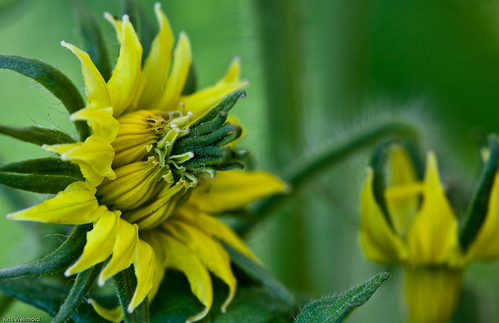
I’d like to share a few photos that I snapped while I was outside in the garden today. The garden itself is really starting to take off with the warmer weather that we’ve been having lately. I have a number of volunteer tomato plants that came up from an heirloom assortment I grew last year. I’m sure they’ve hybridized now, but the outcomes have produced some very unique looking flowers (below).

Tomato Flowers

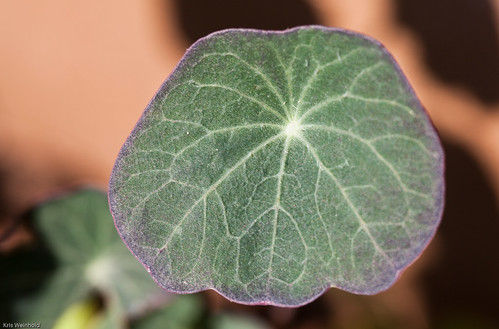
I’ve planted Nasturtium throughout the garden as a pest deterrent, and a wonderful peppery addition to salads. The Nasturtium leaf reminds me an awful lot of pennywort in our aquarium.

Nasturtium

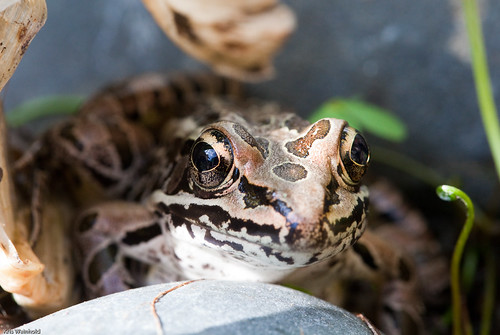
I’m also beginning to put some of my aquarium plants outside in the pond to grow for the summer. Already, at least four frogs have taken up residence in our small watering hole; more than in any previous year. That’s okay with me, however, as they certainly bring more intrigue to the backyard.

Frog

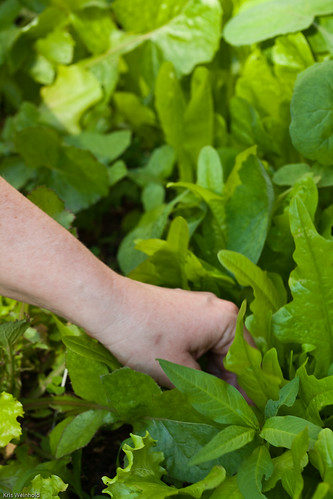
We’ve been picking a huge amount of lettuce greens from the garden. We have 8-9 different varieties, so our salad plates have been very full and tasty. In combination with a handful of strawberries, we’ve loved our early harvest.

Pick'n Lettuce

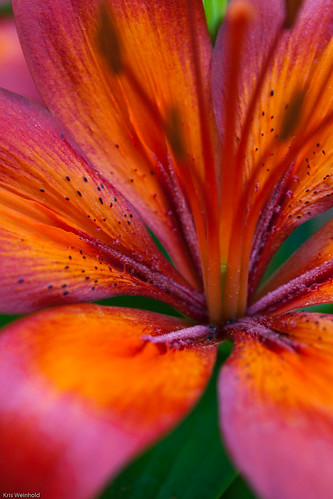
On Monday, our first tiger lily flowers opened up, revealing one of my most anticipated photo subjects each year. The colors that these flowers exhibit is nothing short of breathtaking. Even the unopened pods are pretty with striking orange colors.

Lily

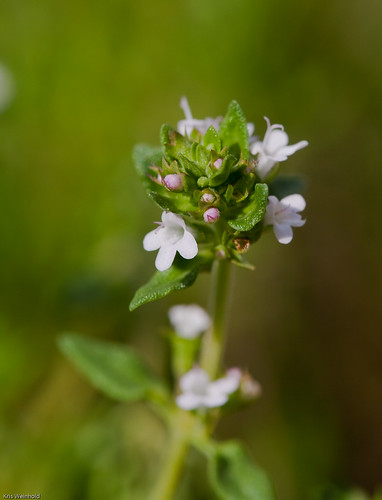
I’ve been spending some time picking the flowers off of our thyme plants in order to encourage them to keep producing more leaves. The small purplish white flowers are abundant and fast replenishing after every picking.

Thyme Flowers

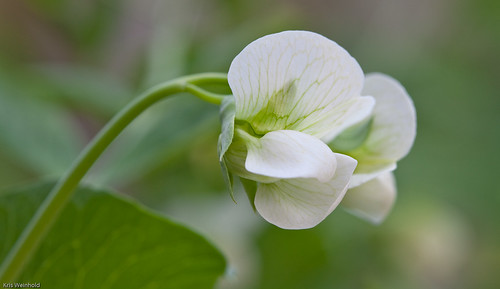
The pea vines are now several feet tall and producing the first pods of the season. The white flowers are a nice precursor to what I hope will be a plentiful yield of peas this year.

Pea Flower

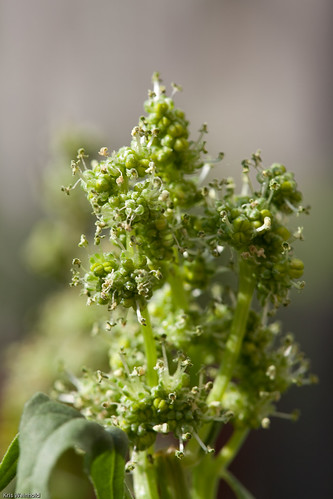
Finally, it looks like our spinach season is over before it really even began. I got the spinach seeds in the ground too late this spring, so we only managed to snag a few flavorful leaves before the plants began to bolt from heat. I will replant in the fall, and try to overwinter them for a great harvest next year. I also have some warm-weather spinach in the ground now, which I hope will soon satisfy our spinach fix.

Bolting Spinach

I would love to hear how everyone else’s gardens are progressing. Please feel free to leave a note in the comment section.

Business Broker

Fertilization

March 9th, 2009

Starting a planted aquarium can seem like a daunting task. Most hobbyists start out small, gradually learning by trial and error what works and what doesn’t, and piece together information from books and websites until they finally either succeed or get frustrated and leave the hobby forever. In this series of posts, I’m going to attempt to outline the most important aspects of setting up a planted aquarium. Hopefully this will become a valuable resource to anyone new to the hobby, or experienced fish-keepers who are looking to setup a planted aquarium.
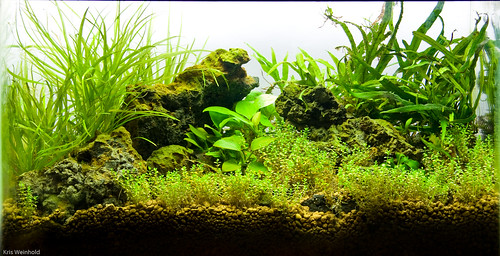
75G

All plants need nutrients in order to grow. This may seem like an obvious statement, however, many aquarists overlook the importance of feeding the plants in their aquarium. If you focus on making sure that your plants eat well, you will be going a long way to minimize algae and keep your fish and plants healthy.

Macro and Micro Nutrients

There are two main groups of nutrients that plants need in order to survive. The first are macro nutrients, often known as NPK, because they consist of the elements nitrogen, phosphorus, and potassium. The other is micro-nutrients, which pretty much sum up all of the other nutrients that plants need in smaller quantities in order to survive. These are sometimes referred to as trace nutrients.

There are two main ways to fertilize your aquarium: enriching the substrate and dosing fertilizers directly into the water column.

Substrate Fertilization

The type of substrate greatly impacts what type of fertilization method should be used throughout the life of your planted aquarium. Soil-based substrates are rich in nutrients, and do not require regular supplementation of fertilizers. All currently available commercial substrates do require fertilization within a few months of setup.

In most soil substrates the bulk of the nutrients are stored in the soil. Commonly, the main exception is potassium, which can be added as needed using potassium sulfate (K2SO4), or other commercially available liquid fertilizers.  Sometimes, certain trace elements can also go missing, in which case a good micro-fertilizer, such as Seachem Flourish Comprehensive, can be used.

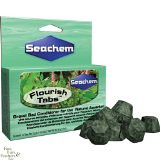
There are times, however, with plants that are heavy root feeders where the nutrition present in the substrate is diminished. At these times, you can use pellets/tabs to add the nutrients back into your substrate. There are several products on the market that can accomplish this. I have used Seachem Flourish Tabs in the past with good success. I have also heard that many aquarists use smaller portions of Jobe’s Fertilizer Spikes with great success. With all of these things, less is more, so start with a little, and gradually increase your fertilization until the proper levels are reached.

Water Column Dosing

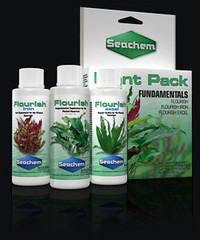
Outside of the soil substrate folks, most of us are left having to regularly dose our aquariums with fertilizers. Many plants do better in nutrient-rich water, rewarding you for the extra effort involved with maintaining a dosing schedule. There are many liquid fertilizers available on the market, of which, I have regularly used Seachem’s Flourish line of products. In addition, I dose dry fertilizers KNO3, for nitrate, and KH2PO4, for phosphate directly to avoid the hassle of mixing them into liquid solutions and save money.

There are a couple of systems out there that can help regiment your dosing schedule. The most popular ones are Estimative Index (EI) and Perpetual Preservation System (PPS Pro). Describing these methodoligies in depth goes beyond the scope of this article, but they are essentially at opposite ends of the spectrum. The thinking behind EI is to overload your water column with nutrients so that a shortage never occurs. This allows plants to grow extremely quickly, but requires weekly water changes to avoid nutrient levels from becoming too high. The Perpetual Preservation System is more about maintaining the proper ratios of nutrients over the long term, which may lead to more frequent testing to ensure those ratios stay in check, and may require a slightly more meticulous regimen that EI. Both are proven systems that are worth experimenting with in order to find something that works for you.

What I Do

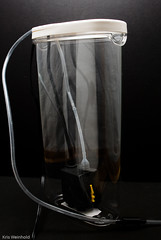
DIY Auto DoserMy method falls somewhere in-between EI and PPS Pro. I use a fraction of the nutrient levels recommended by EI, and am mindful of certain ratios for my nutrients, but I don’t test frequently. I do maintain bi-weekly water changes to help reset my tank periodically, clear the water of tannins, and top off evaporated water. On Mon/Weds/Fri I dose macro-nutrients (nitrate and phosphate), and on Tues/Thurs I dose micros (flourish and iron). Generally speaking, I watch my tank to let it tell me what to do.

Nutrient Imbalance

Nutrient deficiencies or excesses often manifest themselves through clear-cut symptoms, so by keeping an eye on your aquarium, you can adjust your dosing regimen as needed. For example, if you have green spot algae on the glass, your tank needs more phosphate. If you have hair algae, your nitrate levels are likely out of balance with phosphate. Black brush algae often indicates low nitrates or CO2, as does blue-green algae. If your plants are pale or yellowish, they are likely suffering from iron deficiencies. Extremely red or even purple plants often mean your nitrate levels are low. Pinholes in your leaves indicate a pottasium deficiency. While, there is often some overlap between these symptoms and other factor can be at play, getting a feel for these kinds of things make you more adept at adverting tragedy if let to progress.

Driving Factors

When developing your dosing routine, it is very important to realize the other driving forces involved in plant growth. The more intense your lighting, the more your plants are going to photosynthesize. The addition of CO2 becomes necessary to provide the carbon needed to sustain photosynthesis. At this point, the plants will use up more and more nutrients, which is when fertilizers are required. The main lesson to take from this, is that if your plants are growing too fast or if you’re unable to keep your nutrients in balance, the best thing you can do is to reduce the amount of light over your aquarium. This should help you to reduce any algae that’s crept up, and keep a handle on your dosing routine.

Summary

Fertilization is an extremely important piece of maintaining a healthy planted aquarium. It is also often regarded as one of the least desirable aspects of the hobby. Planning ahead, and thinking realistically about the level of commitment you’re willing to make to dosing, will ultimately lead to success. Don’t be intimated by the chemical names and ratios. I recommend starting with a commercial line of fertilizers, and as you get more comfortable, start using the dry nutrients for macros. Good luck!

Further Reading

Estimative Index

Perpetual Preservation System

APC’s Fertilator

Mineralized Soil Substrates

Building an Autodoser

Fertilizing the Planted Aquarium

Seachem’s Plant Dosing Chart

Business Broker

Lighting

February 13th, 2009

Starting a planted aquarium can seem like a daunting task. Most hobbyists start out small, gradually learning by trial and error what works and what doesn’t, and piece together information from books and websites until they finally either succeed or get frustrated and leave the hobby forever. In this series of posts, I’m going to attempt to outline the most important aspects of setting up a planted aquarium. Hopefully this will become a valuable resource to anyone new to the hobby, or experienced fish-keepers who are looking to setup a planted aquarium.

2.5G - 08-31-2008

More than any other factor, lighting is the driving force that determines plant growth rates and fertilizer/CO2 requirements. Before purchasing a light for your tank, you need to determine what your ultimate aspirations in the hobby are. Do you want to be able to grow any type of plant? Do you mind spending time trimming your plants every week? Do you want to inject CO2 or add fertilizers on a regular basis? Lighting doesn’t completely determine all of these things, but it definitely has a significant impact on them.

Light Levels

The amount of light placed over your tank is often measured in watts (W). There are many resources that recommend a range of watts per gallon ratios (WPG) for categories called “low light,” “medium light,” and “high light” tanks. Unfortunately, the whole WPG paradigm is not a perfect formula for success. Instead, the height of the aquarium is more important than the volume. Water diffuses light so it is very difficult for light to penetrate deep into a body of water. This is why the tops of your plants near the light are often red and vigorous growers, but lower leaves remain green, or melt away altogether. Infer from this that the taller your aquarium is, the more light you will need to adequately grow plants, especially foreground plants near the substrate.

To demonstrate how the WPG rule falls apart, on a 2.5G aquarium, 26W of light would be 10.4 WPG. On a 75G aquarium, 220W would be 2.93WPG. Both are considered high light tanks, with relatively equivalent plant growing capacity. For a smaller tank, the WPG ratio is likely to be skewed due to the fact that plants need a base level of light to grow. Combine that with the smaller stature of a 2.5G tank relative to the 75G aquarium, and you don’t need a ton of light. A 75G aquarium is 20 inches tall, so much more light is required to penetrate to the bottom of the aquarium. Much less and the foreground plants could be leggy, and reach for the surface instead of crawling along the substrate.

Keeping the height and volume discrepancies in mind, in general, light levels for fluorescent fixtures can be determined as follows:

  • 0-1 WPG Low Light
  • 1-2.5 WPG Medium Light
  • 3-4+ WPG High Light

LED fixtures are an entirely different beast. A 25w fixture can output light superior to a 350W HOT5 and metal halide fixture. As such, for LED fixtures you must rely on PAR (Photosynthetically active radiation), the measurement of the amount of photosynthetically active wavelengths in light. To define light levels, you should figure out how much PAR you have at the substrate. Here is a rough guideline. These guidelines are true for florescent and incandescent fixtures as well:

  • 0 – 30 PAR – Low Light
  • 30 – 80 PAR – Medium Light
  • 80-120 PAR – High Light

If you have at least 80 PAR at the substrate, you should be able to meet the lighting requirements for almost any plant in the hobby.

Choosing the Right Plants

Taiwan Moss

It is very possible to have a beautifully planted aquarium with very low light levels. In order to achieve this, you must choose only plants that are predisposed to growing with less light. Some examples of these plants are Anubias, Cryptocoryne, Bolbitus, Java Fern, Swords, Vallisneria, most mosses, and a small handful of stem plants. While there are a large number of species within these genera, your plant selection is quite curtailed from that of higher light levels. These plants will grow extremely slowly in low light, which means that they will not require frequent trimming, but if you suffer from an algae outbreak, it will likely take longer to recover since new growth will not as quickly replace the old algae-laden leaves. Some other plants will grow, but may exhibit larger leaves, leggy growth, and green coloration. Of course, the low-light tanks are inexpensive to setup and maintain, so they do have some appealing qualities.

As you increase the light levels over your aquarium, the number and types of plants that will grow expands rapidly. Hundreds of different stem plants become viable, as do several foreground plants that are impossible to grow under lower light levels. Of course, the added light also causes plants to grow faster, thus using more nutrients and requiring more frequent trimming. While CO2 is used most readily in higher light tanks, I recommend CO2 supplementation for all light levels.

Kelvin Ratings

So far, we’ve only talked about the intensity of the light, but not the quality. Plants use specific colors within the light spectrum for photosynthesis, so it makes sense that not every bulb will adequately supply the type of light needed for plant growth. The color of a bulb is determined by the bulbs’ Kelvin rating. There are many different Kelvin ratings that will work, but the most popular are 6500K, 8000K, and 10,000K. Bulbs in the 6500K range are usually a little bit yellow-cast, while 10,000K bulbs are more bluish. I prefer to mix colors, which tends to illuminate the tank in a more natural way. If the bulb isn’t labeled with a Kelvin rating, most “daylight” or “full spectrum” bulbs will work, as will “plant grow” bulbs. Stay away from most “cool white” or general purpose bulbs. Even within the Kelvin ranges, one 6500K bulb may be more or less yellow than another manufacturer’s 6500K bulb. Experiment with a few different brands to find the one that looks the best to your eye. (Don’t be surprised if more expensive bulbs last longer, and produce a more appealing type of light.)

Degradation of Quality Light

To make matters even more complicated, the quality of light that is produced by a light bulb decreases over its lifespan. Generally speaking, a brand new bulb will appear much brighter, and produce a more photosynthesis-friendly light source than bulbs that are more than a year old. The type of bulb makes a difference, as does the daily operating temperature of the bulb, but a good rule of thumb is to replace your light bulbs yearly regardless of whether or not they have burned out. Obviously, if you can reuse these bulbs in household fixtures that would be ideal. If not, be sure to dispose of them properly (not in your regular trash), as most of these bulbs contain mercury. LED generally have a much longer degradation period, lasting 5 or more years, however, unlike bulbs, they continue to emit the same quality of light, just at a decreased brightness. You can extend the life of your LEDs by dimming them over their lifetime.

Photo Periods

Intermatic Digital TimerThe photo period is the amount of time that you have the light turned on over your planted aquarium. The recommended time for most aquariums is 10-12 hours. If you notice that your stems plants are closing up toward the end of the day, they’re done photosynthesizing, and there’s no benefit to leaving the light on any longer. In addition, if the lights are on too long, algae can advantageously utilize the extra light. Lighting systems containing multiple bulbs or fixtures can be timed to run less bulbs in the morning and evening, and more bulbs during the middle of the day, simulating dawn, mid-day, and dusk light levels. For consistency, I recommend using a timer for your lights regardless of your lighting scheme.

Lighting Options

Once you’ve decided whether you want a low-light or high-light planted aquarium, you now have to choose from a variety of lighting technologies. Fortunately (and unfortunately) there are lots of options to choose from, allowing you to customize your light solution to the specific needs of your aquarium. I’m going to give a brief overview of the most common options:
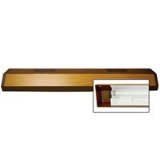
AGA Strip LightNormal-Output Fluorescent

Normal-output fluorescent lights are the standard fluorescent light tubes that are common in business ceiling lights, and the type of light fixture that’s often bundled with new aquarium purchases. Unfortunately, these fixtures are not appropriate for anything but low-light setups. Be sure to purchase plant-appropriate bulbs, and replace them yearly. Even for low-light tanks, you will likely want to invest in a double or triple tube solution. The reflectors in most of these fixtures are not very good, so a lot of light is not properly directly into the aquarium.

Power Compact Fluorescent (PC)

Just as power compact bulbs are growing in popularity for household use, they are also widely used with planted aquariums due to better efficiency and intensity than their normal fluorescent counterparts. They do produce a moderate amount of heat, and due to the width of the bulb, they suffer from some restrike problems. (Restrike is when light is emitted from the bulb, bounces off of a reflector, and goes right back toward the bulb, instead of going into the aquarium.) Overall, cost wise, PC fixtures often give you the best bang for your buck.

T5 Fluorescent Lighting
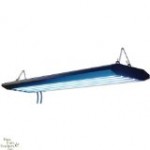
TEK T5 Lighting SystemT5 lighting is immensely popular in the planted aquarium arena. T5 bulbs are smaller in diameter than normal-output fluorescent bulbs, but otherwise look similar. The difference is that high-output (HO) bulbs and fixtures are available that produce far more light. In addition, due to their smaller diameter, less heat is generated and restrike is not as much of an issue. In a fixture where each bulb is wrapped in its own individual reflector, the efficiency is very high, producing extremely good results.

Metal Halide (MH)
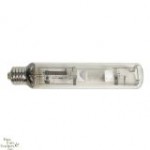
Iwasaki 6500K MH BulbMetal Halide lighting is commonly used in the hydroponics industry as grow lights. The technology has been in the aquarium hobby for a number of years, particularly on the reef side. These lights are very good at penetrating to the bottom of tall tanks, and produce an incredibly bright light. They also produce a mesmerizing shimmer on the bottom of the aquarium. The biggest downside to metal halides is the heat that they generate, making them less efficient than most other forms of lighting. Of course, the amount of light produced can really drive plant growth and colors to the extremes.

LED Lighting

LED lights are taking the aquarium hobby by storm. There are already a few planted aquarium specific LED fixtures on the market. The benefit of this type of lighting is the extremely high efficiency of the light, with very low heat generated. In addition, LED lights are directionally oriented, so they do not require reflectors, and thus restrike is not an issue. In addition, the directional light combined with any surface ripples create the same shimmer effect that metal halides produce. Many LED fixtures include dimming capability that allow you to convert your lighting from low light to high light at the touch of a button. Finally, high-end lights include all kinds of features ranging from custom color configuration, lighting storm and cloud effects, moon lights, ramping up/down the light to simulate the movement of the sun, and more.

Do It Yourself Solutions

There are many DIY solutions to lighting a planted aquarium. The simplest DIY method is to purchase a retrofit kit for any of the above technologies, and install that into a custom built canopy or light strip. You can also rewire existing normal-output fluorescent fixtures to overdrive them, producing about 1.5X the amount of light that they normally would produce. I have seen examples of people using regular screw-in light bulbs in a canopy to light the aquarium. There are also excellent LED kits that allow you to completely customize the intensity and color of your light. In all, if you can think it, you can do it. Just be sure that you use good electrical practices, and that the bulbs you use are suited to grow plants.

Combined Solutions

There are several fixtures on the market that combine two types of lighting technology. The most popular is to combine PC/T5 lighting with MH in one fixture. These fixtures are designed to run efficient power compact lights for most of the day, with the metal halide light running in the middle of the day as  a noon-burst. This is supposed to emulate the 3-hour period of the day where the sun is most intense.


Reflectors

While reflectors aren’t part of every lighting solution, they DO make a difference in the effectiveness of your equipment. The shape of the reflector, as well as, the shininess impact its ability to direct more light into the aquarium. Parabolic (rounded) reflectors are generally better than rectangular ones. Polished aluminum is generally better than white or other types. In addition, using one reflector for each bulb in your fixture is generally better than using a single large reflector for all bulbs, as this minimizes restrike.

Summary

Lighting is an important part of every planted aquarium. The more light you have, the more you are pushing your plants to grow, which causes plants to need more resources to sustain that growth. If you do not adequately balance you light levels, CO2 injection, and fertilization schemes, you are asking for poor plant growth and algae problems. Fortunately, there is a lighting solution for every lifestyle and price point, so do your research and choose wisely. At this point, I would recommend any new hobbyist seriously consider investing in an LED fixture as they bring the best balance of light output, energy efficiency, customization, and configuration.

Business Broker

50G – 5 Weeks

December 15th, 2008

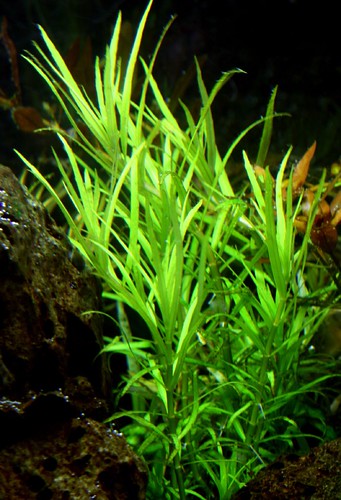
It’s been about 5 weeks since I first planted my 50G aquarium, and as you can see the plants are really starting to grow in. In some ways, I’m starting to think that this isn’t a good thing. I’m reconsidering all of the Blyxa japonica on the left side midground, as it just seems too imposing. I need to come up with a shorter plant there. Previously, I had just jammed the B. japonica down into the substrate prior to photos, but that’s not a great solution.

50G - 5 Weeks

The Hemianthus callitrichoides has finally started to spread a little bit in the foreground, so I’m hopeful that it’ll soon really gain some momentum and fill in. I was also able to get some Fissidens fontanus moss from another GWAPA member, which I attached to the large root ball on the left side. The stems, especially the Rotala macrandra ‘green narrow’, are really growing fast right now. The only disappointment to this point is the Hemianthus micranthemoides in the right midground, which is growing more veritical than bushy. I’m also dealing with a little bit of hair algae, which I’m trying to rectify by starting a small dosing regimen of traces, iron, potassium, and Seachem Excel. Largely, I’m pleased with how things are proceeding, but recognise that a few adjustments will be in order. Comments welcome!

Business Broker

Algae in the Planted Aquarium

February 29th, 2008

Introduction

Every aquarium keeper has likely had to deal with an algae problem. In a planted aquarium, an even more complex set of variables can easily go out of whack, and end in a sad algae state. I’ve combined information from a few different websites, added some personal experience, and have hopefully assembled a complete reference for the most common types of algae seen in the planted aquarium, along with their causes and cures. This is an ever-evolving document, so if you feel anything is incorrect or misleading, please don’t hesitate to leave a comment with your correction.

Table of Contents

Black Brush/Beard (Rhodophyta)
Brown Algae (Diatoms)
Blue Green (Cyanobacteria)
Cladophora
Fuzz Algae
Green Dust Algae (GDA)
Green Spot (Choleochaete orbicularis)
Green Water (Euglaena)
Hair/Thread Algae
Staghorn (Compsopogon sp.)

Black Brush/Beard (Rhodophyta)

Black Brush/Beard Algae

Black brush, or BBA, algae can be one of a number of specific genera of “red” algae in the Rhodophyta family. Most of the algae in this family are actually marine, but a few freshwater species exist that particularly target our planted aquariums. This algae may be black, brown, red, or green in coloration, and can quickly coat your plants and hardscape if not kept in check.

Cause:

  • Nutrient Imbalance – potentially excess N, P, Fe. Strive for the following nutrient levels: N (10-20ppm), P (0.5-2ppm), K (10-20ppm), Ca (10-30ppm), Mg (2-5ppm), Fe (.1ppm).
  • Low pHNeil Frank observes that African Rift tanks never have BBA. It’s believed that BBA thrives in acidic environments, which is unfortunately what most plants prefer.

Cure:

  • Increase CO2 – This will stimulate plant growth, which should help the plants out-compete the algae for resources.
  • Excel/H202 treatment – Use a syringe to spot treat problem areas. Then manually remove when BBA turns grey/white.
  • Manual removal – Use toothbrush to remove as much as possible.
  • Bleach treatment – Dip affected hardscape items/hardy plants in a bleach/water solution using a 1:20 ratio of bleach to water. Before putting them back into the tank, make sure the item is free of bleach odor.
  • OxiClean treatment – Dip affected hardscape items in a OxiClean solution, making sure you only use the original OxiClean with no other additives.
  • Maintain proper water change/dosing schedule – weekly / bi-weekly changes.
  • Algae Crew – Siamese Algae Eaters (SAE) and Amano shrimp are known to eat this algae.
  • Copper (not recommended) – There are commercial algaecides containing copper that will kill BBA, but they will mostly likely also kill your plants.

Brown Algae (Diatoms)

Diatom Algae

Brown Algae, or diatoms, often present themselves as a brown, muddy, muck that covers plant leaves and hardscape items. It is rare to be seen in a fully established aquarium.

Causes:

  • Newly setup tank – Aquariums that have just been setup seem to be prone to diatom algae.
  • Excess nutrients – Silica in particular appears to be a trigger. Contact your water utility company for a report detailing silica concentrations in your water supply.
  • Possibly old bulbs – Sometimes, old bulbs can encourage the conditions for diatom algae.

Cure:

  • Time – Allow it to use up the excess silica, and it will often disappear on its own.
  • Manual removal – Siphon/scrape diatoms manually for quick removal.
  • Algae CrewOtocinclus and Nerite snails are fantastic at clearing a tank of diatoms. They help with other sorts of algae as well.

Blue Green (Cyanobacteria)

Blue Green Algae (BGA)

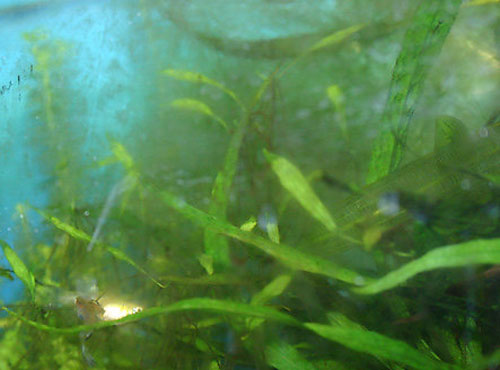
While often referred to by aquarists as an algae, Blue Green Algae (BGA) is in fact a bacterial slime that can easily coat everything in your tank. Appearing as either a green, black, or purple coating, BGA is perhaps best known for the unique earthy smell that it has when pulled from the tank. As a nitrogen-fixing bacteria, it will fully deplete your water column of any available nitrogen.

Causes:

  • Low nitrates – Usually present when all of the nitrogen/nitrate has been removed from the water column. While this is a triggering condition, it is also exacerbated by the bacteria itself using any remaining nitrogen.
  • High organics – Overfeeding, or excess organic matter in the tank can trigger BGA.
  • Old light bulbs – Sometimes present when light bulbs are no longer emitting usable light. This may be more of a matter of your plants no longer being able to out-compete the bacteria.
  • Poor water circulation – Circulation is key in a planted aquarium so that no “dead spots” are present where nutrients have been used up locally, but fresh ones are not being recirculated throughout.

Cures:

  • Increase nitrates – Dose nitrates until the concentration reaches ~5ppm.
  • Add fast growing plants – this helps to out-compete the algae for resources.
  • Blackout – BGA cannot survive without light.
  • Excel/H202 treatment – Use a syringe to spot treat problem areas. Then manually remove dead patches.
  • Erythromycin – use antibiotics at half dosage to kill the bacteria. Mardel Labs’ Maracyn contains erythromycin and has been used effectively without harming most plants.

Cladophora

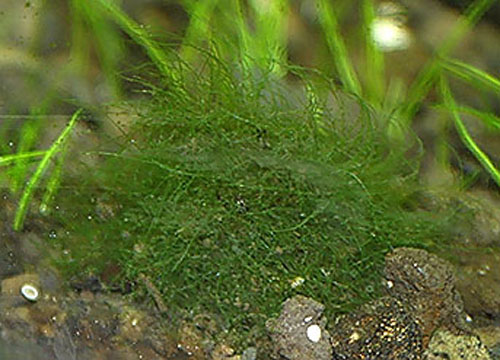
Cladophora

Cladophora is by far the toughest algae to remove from the aquarium. Forming green, tough, wool-like mats, it seems to favor intermingling itself into hairgrass, substrate, and hardscape items.

Causes:

  • Marimo Balls – Being in the same family as these algae balls, they can sometimes introduce Cladophora to your aquarium.
  • Healthy Conditions – Unfortunately, Cladophora seems to favor the same healthy water conditions that your plants require.

Cure:

  • Manual removal – Use toothbrush/tweezers to remove as much as possible.
  • Excel/H202 treatment – Use a syringe to spot treat problem areas.
  • Luck – Very difficult to 100% remove.

Fuzz Algae

Fuzz Algae

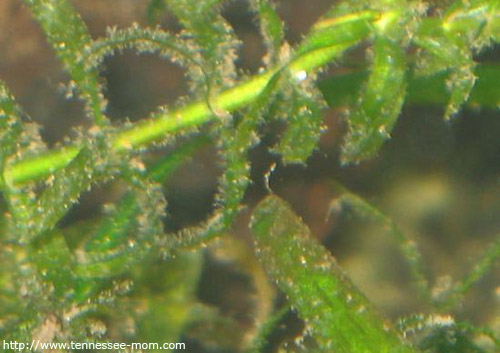
Fuzz algae often shows up on plant leaves giving their edges a slightly fuzzy appearance.

Causes:

  • Nutrient Imbalance – Strive for the following nutrient levels: N (10-20ppm), P (0.5-2ppm), K (10-20ppm), Ca (10-30ppm), Mg (2-5ppm), Fe (.1ppm).
  • Low CO2 – Strive for 20-30ppm concentration of CO2, as permitted by fauna.

Cure:

  • Maintain proper nutrient/CO2 levels
  • Algae Crew – Siamese Algae Eaters (SAE), Amano shrimp, Otocinclus, and Mollys are known to eat this algae.

Green Dust Algae (GDA)

Green Dust Algae (GDA)

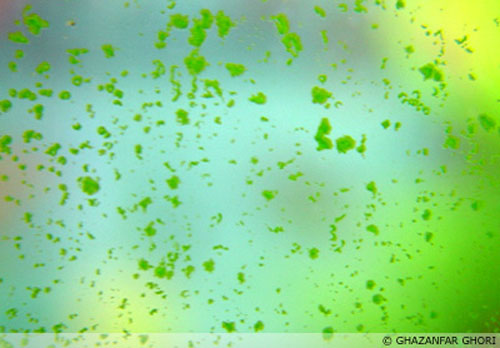
Green Dust Algae (GDA) is a “dusty” green film that appears on the surface of the glass. It’s caused by zoo-spores, and seems to avoid attaching to hardscape items or plant leaves.

Cause:

  • Unfortunately, I haven’t been able to locate a concrete cause for GDA.

Cure:

  • Leave alone – GDA appears to have a finite lifecycle, so that if you allow it to run full cycle without scraping it from the glass, it should harden, and fall off after roughly 21 days. After this time, scrap any remaining GDA from the glass, and do a thorough cleaning and water change.
  • Nerite Snails – Nerite snails can help eat through some of the GDA on the glass, but the approach above will likely have to be undergone for full removal.

Green Spot (Choleochaete orbicularis)

Green Spot Algae

Green spot algae is very commonly seen on the glass of tanks when there hasn’t been a water change in awhile, or when an inadequate fertilization scheme has been conducted. GSA also appears on long lasting leaves, such as Java Fern, Anubias, and Bolbitus.

Cause:

  • Low phosphate (PO4) levels – almost exclusively caused when phosphate levels are depleted.

Cure:

  • Scrap glass – Use a razor blade to most easily remove from the glass.
  • Dose Phosphates – Dose PO4 to a concentration of 0.5-2.0ppm.
  • Nerite Snails – Nerite snails can help you remove green spot from leaves, as well as, the glass.

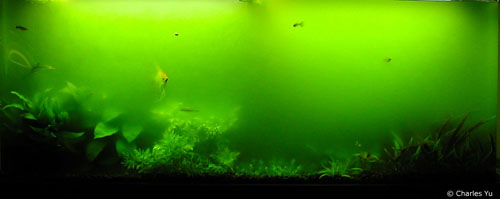
Green Water (Euglaena)

Green Water

Green water is free floating single-celled euglenoid protists. It contains chlorophyll a and b, plus carotenoids, giving them their green coloration, but they are not plants. With over 40 genera of Euglenoids and over 1000 species, this form of algae is one of the most abundant forms of life on the planet, and is an essential part of the food chain. Unfortunately, aquarists don’t want it in their tanks.

Cause:

  • Initial Setup – Usually present shortly after an aquarium is initially setup, prior to the full establishment of the microorganisms (free-swimming plankton that feed upon it).
  • Nutrient Imbalance – Strive for the following nutrient levels: N (10-20ppm), P (0.5-2ppm), K (10-20ppm), Ca (10-30ppm), Mg (2-5ppm), Fe (.1ppm).
  • Medication – if the medicine affects the biofilter of the tank.

Cure :

There are a number of cures for green water:

  • Blackout – leave the lights out, and block out any ambient light from the tank for 5 days. Your plants have reserves that the algae does not, so they will survive, but may look a little ratty for a week or so.
  • Diatom/Micron Filterfine particle filters can clear the water.
  • UV Sterilizer – zaps the algae with ultraviolet light, clearing the water. Some reports say that UV light also affects nutrients in the water column.
  • Flocculants – Clumps small particles together, allowing your mechanical filtration to remove them from the water. i.e. AquaClear
  • DaphniaPlaced in a breeder net, the daphia will consume the algae.
  • Small Water Changes – do small (5-10%) water changes, every day until clear.

Notes:

  • Avoid large water changes, as that prevents microorganisms from establishing themselves.
  • In addition to the cures, make sure to identify and eliminate the source of the problem, or it may return.

Hair/Thread Algae

Hair Algae

Hair/Thread Algae consists of long green filaments reaching as long as 30cm in length. It often mixes itself in among moss, and is sometimes grown purposely as an extra food supplement for tank inhabitants.

Cause:

  • Excess iron levels – Concentrations >0.15ppm

Cure:

  • Manual removal – Use toothbrush to remove as much as possible.
  • Maintain proper water change schedule – weekly / bi-weekly changes.
  • Rebalance Nutrients – Strive for the following nutrient levels: N (10-20ppm), P (0.5-2ppm), K (10-20ppm), Ca (10-30ppm), Mg (2-5ppm), Fe (.1ppm).

Staghorn (Compsopogon sp.)

Staghorn Algae

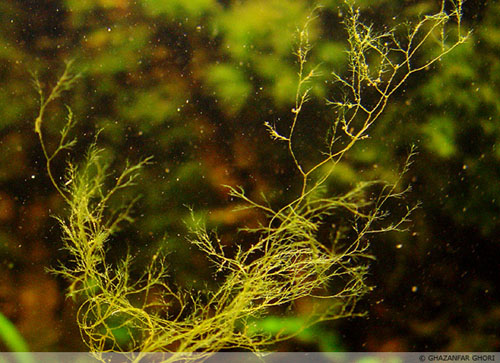
Staghorn algae is aptly named as its branching resembles the antlers of a stag’s horns. They are coarse, branching strands that commonly attach to plant leaves and equipment. The strands can appear white, grey, or green in coloration.
Causes:

  • Nutrient Imbalance – Strive for the following nutrient levels: N (10-20ppm), P (0.5-2ppm), K (10-20ppm), Ca (10-30ppm), Mg (2-5ppm), Fe (.1ppm).
  • Low CO2 – Strive for 20-30ppm concentration of CO2, as permitted by fauna.

Cures:

  • Manual removal – Use toothbrush to remove as much as possible.
  • Water change – Maintain weekly/bi-weekly water change schedule.
  • Increase CO2 – This will stimulate plant growth, which should help the plants out-compete the algae for resources.
  • Bleach treatment – Dip affected items/hardy plants into a bleach/water solution using a 1:20 ratio of bleach to water. Before putting them back into the tank, make sure the item is free of any bleach odor.
  • OxiClean treatment – Dip affected hardscape items in a OxiClean solution, making sure you only use the original OxiClean with no other additives.
  • Maintain proper macro (NPK) dosing scheme

Note:

  • Most fish/inverts will not eat staghorn algae.

Sources:

Aquatic Plant Central Thread
Aquatic Plant Central – Algae Finder
AquaticScape
Fighting Algae with Hydrogen Peroxide
The Skeptical Aquarist

Warface
Business Broker

Algae – Blue Green (BGA) & Green Spot

February 26th, 2008

At the last GWAPA meeting, I gave a presentation called Algae in the Planted Aquarium. While preparing for the presentation, I had to gather a lot of information from a number of different sources on the Internet. I’ve decided to declare this week Algae Week, and share that gathered information by posting about two types of algae each day. This is the second installment featuring Blue-Green (BGA) and Green Spot Algae.

Blue Green (Cyanobacteria)

Blue Green Algae (BGA)

While often referred to by aquarists as an algae, Blue Green Algae (BGA) is in fact a bacterial slime that can easily coat everything in your tank. Appearing as either a green, black, or purple coating, BGA is perhaps best known for the unique earthy smell that it has when pulled from the tank. As a nitrogen-fixing bacteria, it will fully deplete your water column of any available nitrogen.

Causes:

  • Low nitrates – Usually present when all of the nitrogen/nitrate has been removed from the water column. While this is a triggering condition, it is also exacerbated by the bacteria itself using any remaining nitrogen.
  • High organics – Overfeeding, or excess organic matter in the tank can trigger BGA.
  • Old light bulbs – Sometimes present when light bulbs are no longer emitting usable light. This may be more of a matter of your plants no longer being able to out-compete the bacteria.
  • Poor water circulation – Circulation is key in a planted aquarium so that no “dead spots” are present where nutrients have been used up locally, but fresh ones are not being recirculated throughout.

Cures:

  • Increase nitrates – Dose nitrates until the concentration reaches ~5ppm.
  • Add fast growing plants – this helps to out-compete the algae for resources.
  • Blackout – BGA cannot survive without light.
  • Excel/H202 treatment – Use a syringe to spot treat problem areas. Then manually remove dead patches.
  • Erythromycin – use antibiotics at half dosage to kill the bacteria. Mardel Labs’ Maracyn contains erythromycin and has been used effectively without harming most plants.

Green Spot (Choleochaete orbicularis)

Green Spot Algae

Green spot algae is very commonly seen on the glass of tanks when there hasn’t been a water change in awhile, or when an inadequate fertilization scheme has been conducted. GSA also appears on long lasting leaves, such as Java Fern, Anubias, and Bolbitus.

Cause:

  • Low phosphate (PO4) levels – almost exclusively caused when phosphate levels are depleted.

Cure:

  • Scrap glass – Use a razor blade to most easily remove from the glass.
  • Dose Phosphates – Dose PO4 to a concentration of 0.5-2.0ppm.
  • Nerite Snails – Nerite snails can help you remove green spot from leaves, as well as, the glass.

Sources:

Aquatic Plant Central – Algae Finder
AquaticScape

Business Broker

Jamestown Island

November 5th, 2007

I recently spent a few days down in Colonial Williamsburg, where I had the opportunity to visit historic Jamestown Island, the location of America’s first colony. Of course, while I did pay quite a bit of attention to history at hand, I also enjoyed the beautiful watershed that surrounds the entire area.

Jamestown Island Watershed

A number of creeks and rivers come together at this area near the Atlantic Ocean. Much of the area is brackish, with extensive marshes lining the banks all around, providing some really beautiful views.

Jamestown Island Watershed

In the skies, above the pine trees, lots of large waterfowl circled overhead occasionally dive-bombing the water for fish or other tasty critters. I tried to get some pictures of these birds, but I didn’t come away with anything I was proud to show.

Jamestown Island Watershed

We also saw a number of fish jumping from the water, and fisherman on the banks trying to catch them. There were nice beaches to walk along, but unfortunately that serene environment was ruined a little bit by signs reading that the water is unsafe to swim in.

Jamestown Island Watershed

According to some of the roadside signs, the Jamestown area was originally full of hardwood trees, which were quickly cut down by the settlers for building and export. While a few hardwoods still remain, most have been replaced by the fast-growing pines we see all over the eastern United States.

Jamestown Island Pine

I’m not sure if they’re native or not, but in the historic Jamestown area, walnut trees were quite prominent. The walnut fruit and nuts lined many of the pathways and grassy areas under the trees.

Jamestown Island Walnut

A number of swampy areas also were present throughout the island. Where the reeds and rushes were not, there was no shortage of mud, especially during low tide.

Jamestown Island Marsh

As I was walking along a path, I noticed a large number of holes and pits in the muddy banks. Then, I swore that I saw something moving out of the corner of my eye, but every time I looked, there was nothing there. Eventually, I saw clearly what was scurrying along. Fiddler crabs came out of the holes to sit in the sun, until they detected movement, in which case they hurried back into their holes.

Fiddler Crab

While I wasn’t really searching through the water itself, the only freshwater aquatic vegetation I recognized was a plethora of duckweed. Being a national park, it would be illegal to collect any plants there anyways, so I was more than content simply enjoying the beautiful views.

Jamestown Island Watershed


Business Broker

Pogostemon yatabeanus

February 6th, 2007

Pogostemon yatabeanusAt the December GWAPA meeting, I was fortunate enough to obtain Pogostemon yatabeanus in the mini-auction that we have at every club meeting. P. yatabeanus is an Austrailian plant, from the same reknowned genus as Pogostemon stellatus, formerly Eusteralis stellatus. This particular species reminds me more of the broadleaf variety of P. stellatus, in that it’s a little bit larger of a plant, except that it stays a beautiful bright green instead of bronzing under bright light. It doesn’t seem to be particularly demanding if kept in your typical high-tech setup.

I currently have the plant in my 75G, planted in Soilmaster Select ‘Red’, with pressurized CO2, high-light, and regular dosing. In this environment, P. yatabeanus might be the fastest growing plant in the tank. Young stems stay rather slender with narrower leaves. Older stems can grow quite thick, with leaves that become longer and fatter, similar to how P. stellatus ‘broadleaf’ grows. When you trim P. yatabeanus and leave the lower portion in the substrate, 2-3 new stems start to grow out of the incision.

Due to this plant’s size, I don’t know if I’d recommend it for a smaller tank, but in a larger tank I think it’s the perfect ‘green’ companion to plants such as limnophilia aromatica, pogostemon stellatus ‘broadleaf’, etc… If you can get your hands on this plant, please give it a try.

Pogostemon yatabeanus closeup

Business Broker

Ranunculus Inundatus Hill

September 4th, 2006

Elatine Triandra overgrown As you can see to the left, the elatine triandra that I had planted, in hope that it would fill the hill in my 75G has grown unmanagable. It looked fabulous for about a week, and then it overgrew itself, to the point where half of it wasn’t even rooted in the substrate anymore.
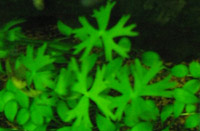
Ranunculus inundatus - overhead view

So, I decided to rip it all out, and instead try ranunculus inundatus as my “hill plant.” This is a funny little plant that is somewhat new to the hobby, and isn’t likely to be found in all but a few local fish stores.

Planting this plant is quite similar to planting glossostigma elatinoides; you break it into sections of 1-2 nodes, and plant them individually. Before long, each node will send out new nodes via runners, covering your substrate. From the picture below, you can tell that the leaves can be a number of inches above the substrate. These plants were transplanted from a more shaded aquarium, so they are quite high. I’m counting on the new growth to hug the substrate a little bit more tightly, as I have 220W overtop of this tank, with the top of the hill only being about 10″ from the lights.
Ranunculus inundatus - just planted on the hill in my 75G
Ranunculus inundatus is a relatively fast growing plant when in the right conditions. Generally speaking, the required conditions are similar to glosso: decent light, plenty of macros, and CO2. You might be able to grow it in less-than-ideal circumstances, but the growth will likely be leggy, with deformed leaves.

Business Broker