Substrate

February 4th, 2009

Starting a planted aquarium can seem like a daunting task. Most hobbyists start out small, gradually learning by trial and error what works and what doesn’t, and piece together information from books and websites until they finally either succeed or get frustrated and leave the hobby forever. In this series of posts, I’m going to attempt to outline the most important aspects of setting up a planted aquarium. Hopefully this will become a valuable resource to anyone new to the hobby, or experienced fish-keepers who are looking to setup a planted aquarium.
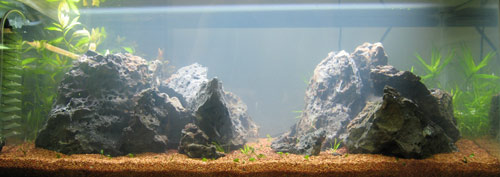
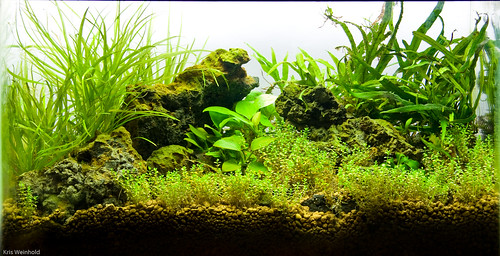
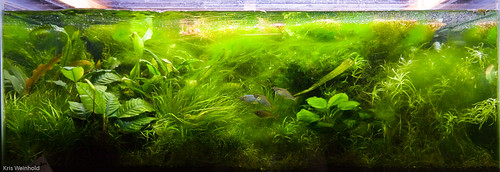
20L using SoilMaster Select

I remember how choosing the proper substrate for an aquarium used to be as easy as picking the color your wanted from a palette of about 10 colors, ranging from black to neon pink. For planted aquariums, the choice isn’t nearly as straight forward, but depending on your decision, the implications are quite significant. Fortunately, there are many right answers to which substrate is used, so it’s just a matter of knowing what each choice requires of you in order to be successful.

What to Look For

There are a few common attributes that should be sought from whatever substrate you choose. In general, you want something that is attractive, and will look natural with the plants and hardscape you are choosing. I would suggest going with browns, grays, and blacks instead of any of the colored substrates. In addition, plain gravel is usually not a great substrate for plants, although it can be done. The main reason is that gravel is 100% inert, meaning that it cannot absorb and store nutrients for the plant roots to later consume. There’s a more technical term for this called the cation exchange capacity (CEC), which defines how easily a given substance can exchange positively charged ions between itself and a solution. Fortunately, you don’t have to worry about the technicalities of this besides trying to avoid plain gravel if possible.

Another thing to consider is the granule size of whatever substrate you are evaluating. Anything much bigger than pea-sized is going to be difficult to physically plant in. In addition, more delicate and smaller plants, may be unable to navigate the larger granule size, making it impossible to plant a field of hairgrass or similar type of aquascape. Very fine sand should also be avoided as it is inert, and can compact on the roots, causing anaerobic conditions.

Commerical Substrates

Fortunately, there are several commercial substrates available that are specially designed for planted aquarium use. Unfortunately, many of these come with a high upfront cost, which should be considered.

Seachem Flourite
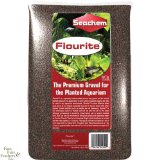
Seachem FlouriteOne of the most widely available substrates on the market for planted aquariums is Seachem Flourite. Originally a course reddish clay-based material, Seachem has now expanded their product line to include several other colors and granule types, including the attractive Flourite Black Sand. For all but the lowest-light tanks, planted aquariums using these products will require supplemental fertilization for plants to get the nutrition they need, but Flourite has an excellent CEC rating, ensuring that these fertilizers will be captured for use by the roots. For the traditional Flourite products, many people prefer to pre-rinse the substrate before putting it into their tank to remove any particulate matter that often initially clouds the tank. In my experience, you can get away with not rinsing, but you must be cognizant of minimally disturbing the substrate when initially filling the aquarium, and when uprooting plants. The original Flourite is sometimes too large for some small foreground plants, but their newer sand product lines correct that.

CaribSea Eco-Complete
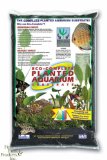
CaribSea Eco-CompleteAnother widely available commericial substrate is CaribSea’s Eco-Complete. Eco-Complete is an attractive substrate, resembling black sand with a small granule size. Differentiating itself from Flourite, Eco-Complete comes with bacterial starting liquid in the bag, so it should not be rinsed prior to use. This substrate also will require fertilization in most aquariums, but should be capable of growing nearly any type of plant you throw at it. The substrate is fairly dense, doing a good job of holding plants down where you plant them.

ADA Substrate Line
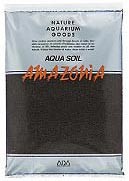
ADA Aquasoil AmazoniaCurrently, the premium line of planted aquarium substrates on the market are made by Aqua Design Amano, operated by planted aquarium and aquascaping guru, Takashi Amano. The ADA substrate line can be confusing to understand at first, but essentially, it consists of 4 components: additives, Power Sand, Aquasoil, and Bright Sand. When setting up an aquarium, you first sprinkle some additives on the bottom of the aquarium. These can include Tourmaline BC, Clear Super, Bacter 100, among others. These additives are designed to provide additional minerals, jump start bacterial colonies, and aide in maintaining clear water. Then, Power Sand, a porous stone mixed with peat and other nutrients is added. Power Sand aides in preventing compaction over time, so that water continues to flow throughout the substrate after years of use. On top, Aquasoil is used either in the whole aquarium, or just in the background. If you want a decorative white sand foreground, you would put Bright Sand there instead of the Aquasoil. The most commonly used product is Amazonia Aquasoil.

Unfortunately, the ADA product line is only sold at a handful of shops in the U.S., but is available online from Aquarium Design Group and Aqua Forest Aquarium. As you can imagine, this product line is more expensive to use in most cases than other more widely available commercial substrates. In my opinion, the main reason to choose the ADA brand is that it comes out of the bag with a ton of nutrients, jump starting your aquascape without the need for dosing. Keep in mind, however, that after 4-6 weeks, additional fertilization will be required after that initial burst. In addition, Aquasoil buffers the water, ensuring a more acidic environment which is proven to facilitate the uptake of nutrients by plants. Finally, as a planting medium the weight, consistency, and granule size is ideal for holding plants in place. I recommend doing several water changes per week for the first two weeks after initially using Aquasoil to ensure that your pH and nutrient levels do not become too extreme. For this reason, you may want to wait a couple weeks before adding fish to your tank. In the end, it’s worth it, as your plants should be healthy, and ready to support the extra bioload that fish bring.

Other Commercial Substrates
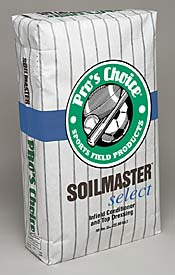
Soilmaster SelectThere are quite a few other substrates available commercially, but the three I have mentioned are the ones I have personal experience with. These other substrates are most likely just fine to use, but be sure to research other aquarists’ experiences prior to using. In addition to  substrates that are specifically designed for planted aquariums, another substrate which has been widely used is SoilMaster Select (SMS). This is actually a turf product designed for use on baseball fields, but through experimentation, it has been found to work very well in aquariums. Like Aquasoil, it slightly reduces the KH of your water, providing a good acidic environment for the roots. It also has fine granules, and an extremely high CEC. The downside of SMS of that it’s fairly lightweight, so strong currents can blow it around. It does a reasonable job at holding down plants, but I would make the substrate a little bit deeper than with some of the other heavier ones available. With no inherent nutritional value, you should expect to provide supplemental fertilization from day one. The main benefit is that a $16-$20/bag of SMS will completely fill a 75G aquarium, while most of the other substrates would cost 5X or more for the same tank. Unfortunately, I’ve heard that SMS has been discontinued by the manufacturer, but hopefully a replacement product-line will arise that is similarly suitable for aquarium use.

Soil Substrate

There is another DIY substrate that is gaining use in the hobby. While traditionally, many people have recommended against using soil in the aquarium due to huge algae outbreaks, recent formulas for success have been developed to make this a viable option. Diana Walstad, author of Ecology of the Planted Aquarium has garnered a following for her low-tech, el Natural, style of soil-based aquariums. One of my fellow GWAPA members, Sean Murphy, has also developed his own mineralized soil substrate recipe, which has attracted much use throughout the hobbyist community. The key benefit to setting up one of these tanks is that very little dosing is required on a day-to-day basis, as all of the nutrients should be present within the soil itself.

Soil substrates are not for everyone. They cannot grow plants that draw nutrients from the water column, instead of via their root systems. In addition, there is a 4-8 week preparation process of breaking down the organic material in your soil, prior to setting up your tank. Finally, even after running this process, you may or may not experience a period of severe algae while the ecosystem of the tank is established. That said, once established, the substrate has been proven to last at least a decade. The full process of setting up a mineralized soil substrate tank can be found here.

Plain Gravel + Additives

Pure LateriteIf none of these other options are amenable to you, it is possible to have some moderate success using plain gravel. I will stress that it is much preferred to use any of the other options detailed above, but if you insist on using gravel, you ought to at least supplement it with a few additives placed underneath. Most importantly, make sure to add laterite, an iron-rich mineral, which can be purchased in most pet stores. In addition, a small amount of peat will help acidify the substrate and provide a material with a decent CEC ratio. I would also encourage you to use form of fertilizer sticks/pellets, such as Seachem’s Flourish Tabs, which will add other trace nutrients to your substrate. Finally, expect to have to add additional fertilization, especially in high-light+CO2 setups. Again, this solution should be your last choice.

Summary

Choosing a proper substrate is an integral part of a successful planted aquarium. There are several out-of-the-box solutions that can get you up and running very quickly. If you would prefer a more natural substrate, topsoil-based substrates can also do the job quite well. There may be some trial and error involved in finding a substrate that fulfills the aesthetic or dosing regimen that you’re striving for. I hope that you now understand the most popular options that other hobbyists are employing.
Business Broker

CO2 Systems

January 30th, 2009

Starting a planted aquarium can seem like a daunting task. Most hobbyists start out small, gradually learning by trial and error what works and what doesn’t, and piece together information from books and websites until they finally either succeed or get frustrated and leave the hobby forever. In this series of posts, I’m going to attempt to outline the most important aspects of setting up a planted aquarium. Hopefully this will become a valuable resource to anyone new to the hobby, or experienced fish-keepers who are looking to setup a planted aquarium.

Carbon is an essential element for plants to grow via photosynthesis. Some carbon will be released from mature substrates through the natural breakdown of detritus and other organic material. Unfortunately, additional supplementation is usually required to provide optimal growth conditions for your plants, especially in high-light tanks. One of the most effective ways to supply carbon to your plants is by injecting Carbon Dixoide (CO2) into your aquarium. There are two main ways of accomplishing this: DIY Yeast CO2 and Pressurized CO2 Systems.

DIY Yeast CO2

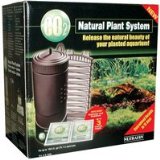
Hagen CO2 Natural Plant SystemWhen yeast consumes sugar, one of the byproducts just happens to be Carbon Dioxide. Therefore, using readily available products from your kitchen, it is possible to capture and inject this CO2 directly into your aquarium. Basically, you take a 2L bottle (I recommend rigid bottles like orange juice bottles that won’t compress), drill the cap to insert an airline hose, add a check valve, and run it into your tank. In the tank, you can attach the airline hose to an air-stone or inject it directly into the intake of your filter or powerhead. Personally, for DIY CO2, I prefer Hagen’s ladder style reactor because you can easily see all of the bubbles, and tell when you need to refresh the solution in the bottle. As for the solution, put 2 cups of sugar, 1 tsp baking soda, and 1/2 tsp yeast into the bottle. Fill about 2/3 way with warm water, and shake. In 12-24 hours, a steady stream of CO2 should be flowing from the bottle. Depending on the amount of sugar, temperature, and size of your container, the solution should last for 1-3 weeks, before needing to be replaced. There are a few things to keep in mind with this method:

  1. DIY CO2 is really only appropriate for smaller tanks, approximately 30 gallons and less. It can be done on larger tanks, but you often require multiple bottles running at the same time, which becomes laborious.
  2. Never physically place the bottle above the tank, as the fermented solution is definitely something you do not want in your tank.
  3. Always use a check valve on your airline hose to prevent a backward syphon from emptying tank water into your bottle, or worse, onto your floor.
  4. The bubble stream from DIY CO2 is not constant. You will have a ramp up period and a decline in bubbles, so you should account for this difference when fertilizing.
  5. If you do not want to build the unit yourself, there are commercially available systems, which work very well. Do not be fooled into using their expensive refills, however, as those refills packets are simply baking soda and yeast.
  6. While DIY CO2 is inexpensive to setup, in the long term, sugar, yeast, and baking soda is more expensive and labor intensive to mix then pressurized CO2.

Pressurized CO2 Systems

CO2 Canister & Regulator

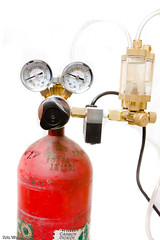
Most hobbyists start with a DIY CO2 setup, and soon grow tired of remixing the yeast/sugar solution every week or two. Fortunately, pressurized CO2 systems eliminate the need for much maintenance, outside of getting the bottle refilled every so often. There are countless different products on the markets surrounding CO2 systems, but in general, all you need is a CO2 tank, a regulator, and needle valve.

CO2 tanks come in a variety of sizes, but the most commonly used sized is the 5 pound tank. As named, this holds 5 pounds of liquid carbon dioxide, which once released, converts back to CO2 gas. For me, a 5 pound tank lasts about 9-12 months on a 75G aquarium. You could get a larger tank to further reduce the frequency of needing a refill, or if you wish to distribute CO2 to multiple aquariums from a single source tank.

The regulator is the piece of equipment that allows you to control the pressure coming out of the tank. Inside of the tank, the pressure is very high, approximately 800psi. In general, you want the output pressure to be between 5-40 psi, and then further reduced through a needle valve. The needle valve allows you to fine tune, getting you down to bubbles per second. Many regulators come with solenoids, which can be hooked up to a timer, so that you don’t waste any CO2 by injecting it at night when the plants are not photosynthesizing. There’s nothing wrong with injecting CO2 24/7, but you’ll likely have to visit the refill store more frequently.

Hooking up the equipment is really simple. Usually, it’s just a matter of using a wrench to screw the regulator onto the tank. Then, open the tank, adjust the regulator to the desired bubble count, and forget about it. In truth, with newly filled tanks, you may need to readjust the knobs a couple times during the first week, before the pressure evens out and stays relatively constant thereafter. If your regulator does not come with a bubble counter attached, you can add an in-line bubble counter to the airline which will let you determine the bubble rate.

Inside the aquarium, there are countless methods of diffusing CO2. Recently, glass diffusers containing ceramic disks that break up the CO2 into tiny micro-bubbles have become popular. These work well, allow you to easily see whether or not CO2 is being injected into the tank, but do require cleaning to keep the ceramic disks from becoming clogged. (An easy way to clean these diffusers is to raise them above the water surface, fill with hygroden peroxide, and let sit for 20-30 mins before putting them back into the tank.) There are also many different types of reactors that essentially use a pump to diffuse the CO2 into water. I prefer to simply inject the CO2 into a canister filter’s intake line, and allowing the gas to diffuse inside of the canister.

How Much CO2 is Needed?

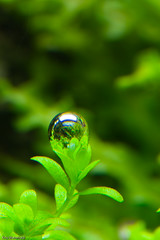
Hemianthus callitrichoides Oxygen BubbleThe only question left is how much CO2 to inject. With DIY CO2, you don’t have any control over this, but usually the amount of CO2 generated will never reach levels that endanger your fish. With pressurized CO2, it is most definitely possible to inject too much, suffocating your livestock and/or acidifying the water so much that your plants melt. There is a way to approximate the CO2 levels in your tank using pH and KH measurements, using an excellent chart made by Chuck Gadd. As you inject CO2, the pH will drop. By calculating that drop, and knowing your carbonate hardness (KH), you can figure out how many ppm of CO2 are present in your water. Unfortunately, this relationship only holds true if there are no other buffers in the water that could affect the water chemistry.

Personally, I don’t use this measurement to calculate CO2. In general, for each aquarium I usually start at about 1 bubble/second. Then, I watch the tank closely for a day, and see how the fish/plants are doing. If I don’t see any ill-effects, I’ll turn it up slightly, and continue to observe. Usually, I’ll look for the plants to pearl at the end of the day. Pearling is when the water is super-saturated with gas, so the oxygen produced by plants during photosynthesis literally bubbles from the plant. If at any point, I notice any fish swimming wobbily or gasping at the surface, I turn down the CO2. After doing this process, I usually have a pretty good handle on how many bubbles per second I need for each of my aquariums.

There is also another method to determine how much CO2 to add, where you can inject CO2 into your aquarium water. If you measure the pH of that water, you’ll get one reading. Then, let another vile of that water sit out over night. Measure the pH. If the pH raises about 1 degree, then you probably have the CO2 levels about where you want them. If it raises much more, you may want to tone down your CO2. If it hasn’t raised a degree, you can increase the amount of CO2 injected.

There are a few things to note with pressurized CO2 systems.

  1. Regardless of the method, watch your fish. If you ever notice any problems, either do a water change, or temporarily put an air-stone into the aquarium to quickly oxygenate the water.
  2. CO2 tanks are highly pressurized. While they do have safety valves, I highly recommend that you strap the tank to a secure object, such your tank stand. I’ve never had a tank blow on me, but I’ve heard stories of tanks turning into torpedos and busting through walls. Again, this is very, very rare, but precautions should be taken.
  3. Tanks can often be refilled by oxygen suppliers, paintball stores, or commercial beverage shops. Refills usually cost between $10-$15.
  4. Total equipment cost to start up with pressurized CO2 is usually between $150 and $200. There are, of course, more expensive high-end systems. Used systems are a great way to get start on a budget.

Summary

Carbon dioxide is an essential component for plant growth. While pressurized CO2 may seem daunting, it really is the cheapest and most reliable long term solution. There are many different options for accomplishing this, however, but I hope you now have the basis for further investigating those options.

Business Broker

Flow: Filters / Powerheads

January 28th, 2009

Starting a planted aquarium can seem like a daunting task. Most hobbyists start out small, gradually learning by trial and error what works and what doesn’t, and piece together information from books and websites until they finally either succeed or get frustrated and leave the hobby forever. In this series of posts, I’m going to attempt to outline the most important aspects of setting up a planted aquarium. Hopefully this will become a valuable resource to anyone new to the hobby, or experienced fish-keepers who are looking to setup a planted aquarium.

Algae Filled 40G

Algae can set in without adequate flow.

Flow is one of the most important things to consider when setting up a planted aquarium. As plants use up CO2 and nutrients in the surrounding water, adequate flow ensures that fresh water and nutrients are circulated around the plants so that they can continue growing. Without this, your aquarium can have dead zones where algae adventitiously steps in. To prevent this, add filters and powerheads to your aquarium to clean and circulate the water.

Filtration

While filters do provide circulation within an aquarium, they also perform the task of cleaning the water. There are many different types of filters on the market, but some are much better suited for a planted aquarium than others. Since CO2 is an important addition to any planted aquarium, you should ensure that the filter you choose will not work against this addition. Carbon dioxide can easily be driven out of the aquarium through surface ripples created by equipment. Inherently, hang-on-the-back filters such as the very popular Hagen AquaClear series is ill-suited for a planted aquarium for this reason.

Eheim Pro II FilterCanister filters are the ideal filter for a planted aquarium. Not only do they efficiently clean the water due to their ability to easily customize the cleaning medium used (sponges, carbon, bacteria balls, etc…), but their intake and outtake lines can be position well below the water line to prevent surface disturbance. Of course, there are many types of canister filters on the market. I prefer to use filters that will not air-lock when injecting CO2 into their intake, as a means to diffuse the gas into the water column without adding extra CO2 equipment inside of the tank. (A filter with air-locking problems is one where the impeller stalls when a gas is introduced into the impeller chamber.) In addition, most canister filters can easily be hooked up to external heaters, U.V. sterilizers, or other equipment.

Currently, I successfully use several Eheim Pro II series of canister filters on my aquariums. If you do not plan on injecting CO2 into your filter, virtually any canister filter is appropriate. I’m also successfully using the Hagen Fluval series of filters in this way. When purchasing your filter, it’s often better to buy the next model up for your size of aquarium because when a filter is rated for a certain gallon tank, they generally do not take into account that much of that tank will be obstructed by plant mass.

There are other types of filters that are a little bit less appropriate for the planted aquarium. Sponge filters tend to get plants stuck to them, add too much surface agitation, and do not provide any flow. Additionally, undergravel filters should be avoided as they interfere with plant root systems.

Powerheads

Hydor Koralia Powerhead

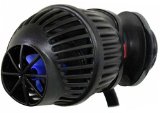
Once you have decided on your filtration method, you may still discover that certain areas of your aquarium are not receiving adequate flow. In these situations, you could add another filter, but it’s usually much less expensive to simply add a powerhead to the aquarium. Powerheads are designed to move a certain amount of water per hour. I’ve recently started using Hydor’s Koralia Powerhead because the design is extremely energy efficient, produces a wide stream, and doesn’t easily clog. There are, however, less conspicuous powerheads on the market that work very well, such as the Hagen AquaClear series. These also have the added benefit of being able to drive a quick filter, which does a great job at clearing micron-level debris from the water column.

Sumps and Pumps

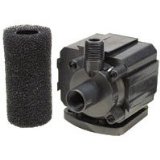
There are other ways to add circulation to your planted aquarium. While, in general, adding a sump (a large hidden aquarium underneath Supreme Mag-Drive Utility Pumpyour visible aquarium to add overall water volume to your system) is not ideal in planted setups, I have seen it done. The key is to make the path from the main aquarium into the sump as smooth as possible so that CO2 is not lost. The benefit of a sump is that you can put extraneous equipment such as your heater down there. You can also dose fertilizers into the sump, and have them dissolve and subsequently migrate back into your main aquarium. A submersible pump, like the Supreme Mag-Drive Utility Pump moves the water back into the main aquarium. These pumps can also be used externally, in conjunction with PVC pipe or hoses to act as an external powerhead. In this way, I have seen some people create a closed-loop from their aquarium through a DIY CO2 reactor, and then back into their aquarium via an external pump. This setup is advantageous if your canister filter does not have enough horsepower to use an external CO2 reactor without losing too much flow.

Summary

In conclusion, having adequate circulation is extremely important in a planted aquarium. There are a number of ways to achieve this, while also accomplishing some other goals, such as filtration, heating, CO2 injection, etc. Hopefully, you now have the knowledge needed to obtain the right circulation system for your planted aquarium.

Business Broker

Choosing the Right Aquarium

January 23rd, 2009

Starting a planted aquarium can seem like a daunting task. Most hobbyists start out small, gradually learning by trial and error what works and what doesn’t, and piece together information from books and websites until they finally either succeed or get frustrated and leave the hobby forever. In this series of posts, I’m going to attempt to outline the most important aspects of setting up a planted aquarium. Hopefully this will become a valuable resource to anyone new to the hobby, or experienced fish-keepers who are looking to setup a planted aquarium.

2.5G - 08-31-2008

Perhaps an understatement, the actual physical aquarium is very important to a planted aquarium. The dimensions will impact the type of aquascape that you can implement, the design can influence its integration into your room, and the features can determine how equipment will function within the aquarium.

Dimensions

In general, larger aquariums (40+ gallons) are easier to upkeep than smaller aquariums. In addition to having the space to fit all sizes of plants, larger aquariums are not as prone to wild swings in water chemistry. Of course, larger aquariums have higher costs/space requirements than smaller setups, so if these things are issues, try not to start with anything smaller than 10-20 gallons. Nano aquariums are very much in style right now, but they’re more difficult to maintain, so I would recommend that beginners save those for another time.

Once you have selected the general volume of your aquarium, it is important to consider the actual dimensions. While any aquarium can be aquascaped, there are certain dimensions that are especially easy to work with. In general, aquariums with near equal ratios of depth and height are considered great aquascaping tanks. Some excellent aquarium sizes are 20L (30 x 12 x 12), 50G (36 x 18 x 18), and 75G (48 x 18 x 20). There are good reasons for this. For example, a popularly sold aquarium size is the 55G (48 x 13 x 20) tank. While the width and height are nice, the tank is only 13″ deep, making it extremely difficult to fit a complete foreground, midground, and background that transition smoothly between one another. In this case, I’d recommend getting a 75G because the extra 5″ of depth you gain are invaluable when aquascaping. Try to avoid extremely tall tanks, as you may need to purchase more intense (and expensive) lighting to adequately light from top to bottom. That said, I prefer an aquarium at least 16″ tall so that the stem plants have room to grow and branch toward the surface. I consider the perfect planted aquarium, the 50G aquarium, as it is not so wide that it is difficult to provide a coherent aquascape from left to right, and has sufficient depth and height to design a nicely proportioned aquascape.

Design & Stand

Finished AmanoScape at AGA 2008A very important thing to establish up front is whether or not you want your planted aquarium to be a centerpiece that is integrated into the design elements of the rest of the room. Planted aquariums have a potential to really light up a room, and provide that wow factor when people enter. If this is your intention, you may wish to consider a rimless aquarium, which is a tank without the plastic trim along the top and bottom, and without the visible silicon lines along every seam. In addition, the stand that you place your tank on can impact the impression that your planted aquarium conveys. The cheapest possible stand is probably cinder blocks with plywood, which can have a fairly modern look to it. There are a number of nicely finished wood stands available, and I’ve seen some very well done DIY stands using cabinet doors and hardware over-top of a 2×4 support structure. All-in-all, make sure not to look past the design aesthetic of the tank and stand when planning your planted aquarium.

Aquarium Features

There are many different types of aquariums, and while all can be used for planted aquariums, some are more suitable than others. When choosing between an acrylic or glass aquarium, I prefer glass. The reason is that your planted aquarium will inevitably get algae on the glass that will need to be removed. While it’s possible to scratch a glass tank, it’s much easier to do so with acrylic. In addition, the clarity of many of the glass tanks are unsurpassed by acrylic, especially in the corners where distortion is often present. That said, acrylic does have advantages in weight and strength for large aquariums, but if given the choice, I choose glass.

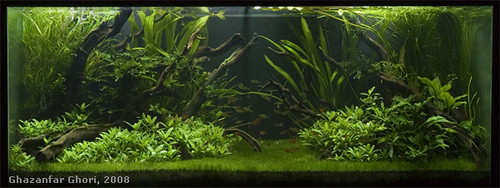
Ghazanfar Ghori’s 215G with Hidden Overflows

Additionally, some aquariums come outfitted with overflows, standpipes, bulkheads, etc… These items are often required if you plumb your aquarium into your house’s drain or water supply, or if you intend to place the tank in the center of your room, and do not want visible hoses or cords on one side of the tank. However, if you do not intend to do any of these things, and you do not plan to use this same aquarium for a reef-tank later in its life, I would recommend avoiding them. These features take up space within the aquarium itself, and are usually not that attractive. This means that when aquascaping you will want to try and cover them up as best you can with tall plants, which could limit your options.

Summary

While it’s possible to simply run out to your local aquarium store and buy whatever aquarium they have in stock, some forethought about the matter is definitely required to ensure a successfully designed planted aquarium. Of course, there are an infinite number of possibilities that could work, but the most common principles have been outlined in this article. Good luck shopping!

Business Broker

Knowing What You Want

January 21st, 2009

Starting a planted aquarium can seem like a daunting task. Most hobbyists start out small, gradually learning by trial and error what works and what doesn’t, and piece together information from books and websites until they finally either succeed or get frustrated and leave the hobby forever. In this series of posts, I’m going to attempt to outline the most important aspects of setting up a planted aquarium. Hopefully this will become a valuable resource to anyone new to the hobby, or experienced fish-keepers who are looking to setup a planted aquarium.

40G - 3.5 Weeks

One of the most important things you can do to ensure a successful planted aquarium should be done before you ever start the project. There are a number of factors that must be determined that will impact the time required to upkeep the aquarium, the cost of your final setup, and type of fish/plants you can keep.

Time spent per week

Hemianthus callitrichoides Oxygen BubbleThere are many different styles of planted aquariums, and some require far more day-to-day effort than others. Upfront, you should determine how much time every week you would like to devote to this hobby. Remember, that in addition to the plants, living creatures will be dependant upon your care, so it’s not fair to them or you if your aquarium goes south due to your inactivity. Realistically decide whether you have 2 hours every week or an hour once a month, or less. Much less than that, and you may wish to reconsider all but the most modest endeavors into the planted aquarium hobby.

The beauty of this hobby, is that often, time spent is rewarded with healthy, hriving plants, and a magnificent aquascape. It is also possible to spend less time, and allow the nature of the plants themselves to grow and develop into more of a jungle aquascape. Obviously, there’s also something in-between.  The types of plants you are attracted to may also help influence this decision. In general, stem plants, or plants that grow vertically from a stalk, usually require more upkeep than plants that are rooted with rosette leaves coming from their base.

Cost

You knew that cost had to enter the equation at some point, right? In general, planted aquariums are fairly expensive, although they do not have to be. If you buy everything new from your local aquarium store, you could easily spend $500-$1,000 for a mid-range setup. Of course, tempering your ambitions, and being willing to buy used equipment, can significantly lower your total expenditure. If you are fortunate enough to have a local aquarium society in your area, this is a great place to acquire equipment, plants, fish, and lots of great advice.  If you are handy, there are plenty of Do-It-Yourself possibilities in the aquarium hobby, which can help save some cash.

Inhabitants

Ancistrus sp. L279The type of fauna that you wish to have in your planted aquarium can go a long way in determining what type of plants you should grow along side them. In general, smaller fish (0″-6″) are the best fish to keep. Much larger, and they can unknowingly uproot plants when swimming by. Fish that dig, eat plants, or rearrange their territory should be avoided in nearly all situations. Do your research and make sure that the 3″ Plecostomus algae-eating catfish at your fish store will not turn into a foot-long beast.

Plants

Finally, you must decide whether you want to be able to grow just about any plant out there, or whether you are willing to trade a more limited plant selection for less upkeep, fertilization, and equipment costs.

Summary

In conclusion, the ideas introduced in this article should be kept in the back of your head when reading future installments of this series. I will further expound upon these topics, introducing all of the complexities of various equipment and techniques, but do not lose sight of what you ultimately want to get out of this hobby.

Business Broker

  Next Entries »