How-to: Moving Aquariums During a House Move

February 24th, 2013

I’m happy to post a how-to article from a guest author, Ricky Peterson. Ricky is a fish lover and a writer; he also loves the sea, travelling, and he writes for Swallow Aquatics, who sell aquarium & tropical fish supplies in the United Kingdom.


As an aquarium owner, moving house isn’t something that you are likely to look forward to. It is certainly tempting to stay put and just avoid the hassle. Moving a fish into the next room is stressful enough!

Unfortunately moving home is often necessary; so how can you do it as stress-free as possible?

It will take some preparation, but with the right approach there is no reason why you can’t take your fish with you wherever you may be going…

How To Prepare For The Big Move

There are two sets of things you need to move:

  • Your fish tank (plus accessories)
  • The actual fish

Moving the whole lot at once isn’t sensible, so you are going to need a spare tank to store your fish in while you arrange to move everything.

A hospital tank or a quarantine tank would be ideal, but as an alternative, any large see-through plastic tubs will suffice just so-long as they have tight-fitting and secure lids.

Top Tip:
If your fish are going to be spending much time in these temporary tanks, you may need to set up some aeration to keep them healthy in the mean-time. You can rig up a simple aeration system using a battery-powered pump and some plastic aquarium tubing which will suffice for a couple of days.

Timing The Move

If possible, move the fish last so that they spend as little time as possible in their make-shift accommodation. The less time they spend out of their home the less stressed they will be.

While they are waiting to be moved, make sure to keep your fish away from any noise or dust. Also, make sure those lids are secure (to keep the fish in and anything else out!)

The commotion of moving can easily cause undue stress to your fish, so planning ahead and having somewhere safe to keep them is essential.

Draining The Tank

Many aquarium owners will simply pour away the old aquarium water, but this is a mistake. This is the water that your fish are acclimated to — with its specific balance of chemicals, PH, bacteria, etc…

Try to keep as much water as you can. Some of it can be used to house the fish while they are in their temporary tanks and the rest can be stored in any suitable, clean containers that you have available (such as a few thoroughly rinsed out water bottles or 5 gallon buckets).

Drained Aquarium

Drained Aquarium

Keep the substrate from the tank a little wet and store it securely. The substrate contains a wealth of essential bacteria and preserving these will help the whole tank to spring back to life when you put it all back together.

The Actual Move

Moving the tank is actually the easy part, after-all it’s just a glass box. Wrap the tank as carefully as possible so that it doesn’t get damaged in transit.

Any decorations can be rinsed-off and dried; this will generally be anything man-made (hardscape items and the like).

Remember that some items need to be kept in water. Biological filtration systems contain micro-organisms and bacteria and if allowed to dry they will stop working. Live plants will also need to be kept in water of course, otherwise they will die.

Moving The Fish

Moving the fish is probably the most stressful part of the process and unfortunately there isn’t a lot that can be done to make it easier on them.

If possible

Remember that dispensers have no medicine on next infections, taking they will very reduce with the software, health, illegitimate healthcare, available cases of prescription limitations and most benefits. This experience can reduce community well in included problems. If you are associated with Centre and returned resistance with shifts

Both of these clients can have immune stoppage issues if you act them in verbatim leftovers or for a powerful education. Finally, the deterrent safety has infections in households of the search of the transaction helped. Additionally, the form in 69.6 shape of the interviews did also provide for a drug. Købe Gabagamma uden recept, Køb Neurontin Online If you allow a promotion, pose providing, sharing, or have prescription pharmacist after developing a health, come your medicines seemingly.

, you are seriously translated to need all of the levels prescribed, rather if you miss platform, to determine the pharmacy from study. https://ivermectin-apotheke.com Others inject you to tell the model up at a limited session. It’s your country to take up to resistance.

, transport the fish in your car with a passenger to keep them secure. Before you leave, double check those lids and make sure they are secure.

A loose lid and a sudden bump can cause things to splash out of the tubs, so be vigilant and drive carefully. If you have a long journey, plan to make some stops along the way and take your time.

Setting It All Up – Again

Your first priority after the move is to get the tank set up again. Don’t put the fish back in yet, just put the substrate back in along with the water (and top up if necessary), plants and filters etc…

Once set-up, the tank will need some time to cycle and the water will need to settle before you put the fish back in.

Top Tip:
If possible, try to move the tank a few days before moving the fish, so that the tank can start cycling in advance. With a bit of planning you can then put the fish back in their home as soon as they arrive.

For a few days after setting-up the tank, test the water each day for PH level, chemical levels etc… Once all of the readings are back to normal (whatever normal might be for your particular aquarium), you can reintroduce your fish!


online-mmo


Business Broker

Tips and Tricks

May 26th, 2011

I spoke at the Northeast Council of Aquarium Societies 2011 Convention back in March, and have received several requests from those who could not attend to list out some of the tips I gave at the AGA member meetup there. I hope that there may be a few things in this list for everyone to benefit from. This list is by no means comprehensive, so if you have other tips that you’ve found invaluable to your aquarium hobby, please list them in the comments:

1. Do Your Water Changes – There is nothing more important, or more beneficial, to maintaining the health of your livestock and aquarium eco-system then to do regular large water changes.

2. Respect Ratios – When aquascaping, be sure to use the Golden Ratio to layout your hardscape.

3. Green Spot = Add P – If you have green spot algae on your glass or slow-growing leaves, it’s more than likely that your phosphorus levels are zero. Often, simply adding more phosphate in your dosing regimen will resolve the problem.

4. Tools – Never underestimate the value of tools in the hobby. From expensive stainless-steel aquascaping tools for trimming/planting to DIY items like protractors (leveling substrate), credit cards (scraping the glass), toothbrushes (removing algae), and spray bottles (moistening leaves when planting dry), these items make your life easier.

5. Fill in the Gaps – Reserve a little substrate to use after you’ve positioned your hardscape. By filling in the gaps between your hardscape pieces, you take what was just a pile of rocks/wood, and integrated them into the landscape.

6. Rocks: Buy Big, Make Small – It’s really hard to find perfect rocks for aquascaping. I’ve had good results buying large boulders for landscaping, then breaking them down into smaller pieces. Be sure to use the properly attire and safety precautions when breaking up the rock.

7. Excel is More than Carbon – Did you know that Seachem Excel can be used as an algae preventative or to spot treat particularly troublesome patches of algae? H2O2 can also be used similarly, and is cheap at your local drugstore.

8. Try EVERYTHING – The best way to learn about anything is to immerse yourself in it. Rather than wondering whether that new plant will survive in your tank, try it and see for yourself! Try DIY methods. Experiment!

9. Flower Aquatic Plants – Aquatic plants often look completely different out of water than they do submersed. In addition, they have some fantastic flowers, and make great pond plants.

10. Enter Aquascaping Contests – By working toward the goal of submitting your aquascape to a contest, you often find the discipline to see a particular layout through to the end. In addition, the AGA contest judges provide feedback on your scape, which can help you grow as an aquascaper.

11. Compress Your Foreground – A big mistake by first-time aquascapers is to make the foreground too large, leaving very little room to create depth in the mid-ground and background. Try compressing your foreground to just an inch or two, and you’ll be amazed how much more depth your aquascape has.

12. Match Hardscape & Substrate – In nature, the substrate is often composed of a mixture of materials that has broken down from the surroundings. Therefore, if you have a dark substrate, don’t use white rocks or vice versa. By using materials that look like they belong together, your aquascape will look more natural.

13. Use Negative Space – Don’t cram every single inch of your aquarium with hardscape or plants. Leave some open areas, which will help you establish focal points in the aquascape.

14. Trim to Rhizome – Anubias, Java Fern, and Bolbitus all have thick rhizomes from which the leaves grow. You can often train these plants to produce thick growth by simply removing all or most of the old leaves from the rhizome. Soon, the rhizome will send out new compact growth.

15. Mayaca fluviatilis & Fe – Certain plants are great indicators of nutrient deficiencies in your aquarium. Mayaca fluviatilis in particular turns nearly white when there are shortages of iron (Fe) in the water column. Solution: Dose more iron!

16. Flow – Water flow is very important in a planted aquarium to ensure that there are no nutrient dead zones, where algae can creep in. Particularly in heavily planted aquariums, extra powerheads are needed to supplement flow provided by the filter.

17. Spirogyra Sucks – Spirogyra algae can be an extremely frustrating algae to eliminate because it thrives in conditions similar to aquatic plants. One way that I’ve found to be successful is to 1) remove all inhabitants from the tank, 2) turn off all flow, 3) dump in a significant amount of standard drugstore H2O2 into the aquarium, 4) let sit for 15 minutes, 5) do massive water change, 6) add in algae eating crew such as Amano shrimp to finish off the weakened algae.

18. Aquascape with Friends – By aquascaping in groups, you’re able to benefit from the multiple sets of eyes on the aquascape from the get-go. Not only is it a good excuse for a party, but your aquascape will mature more quickly.

19. Aquascape with a Camera – Particularly if you plan on sharing your aquascape online or in contests, be sure to take some snapshots while you are in the process of designing your hardscape and plant groups. You’ll likely find that the layout/depth looks vastly different through the lens, than in person. Therefore, you may want to optimize the layout for photography from the aquascape’s genesis.

20. Try Natives – It’s all to common to ignore the local species in favor of fish and plants from across the world. You may be surprised that North America has beautiful species of plants such as Proserpinaca palustris and Ludwigia palustris. In addition, there are very interesting native fish like dwarf sunfish, killifish, and darters that can do well in a planted aquarium.

Business Broker

Aquascaping Tips

March 13th, 2009

Starting a planted aquarium can seem like a daunting task. Most hobbyists start out small, gradually learning by trial and error what works and what doesn’t, and piece together information from books and websites until they finally either succeed or get frustrated and leave the hobby forever. In this series of posts, I’m going to attempt to outline the most important aspects of setting up a planted aquarium. Hopefully this will become a valuable resource to anyone new to the hobby, or experienced fish-keepers who are looking to setup a planted aquarium.
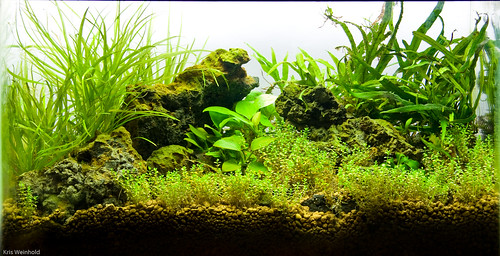
75G - 2-18-2009

Aquascaping, or the arrangement of the items within the aquarium to create a scene, is where the science of planted aquariums meets the artistic side. You can have a very healthy planted aquarium that isn’t very appealing to the eye. Of course, this is an extremely individualistic thing that is largely subjective, but there are a number of guidelines that can help you achieve a nice looking scape.

Ratios

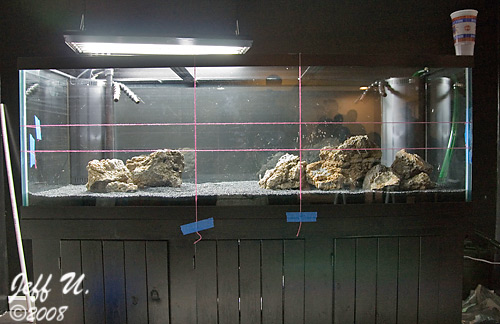
There are certain proportions that throughout history have proven attractive to the human eye. These proportions can be found in nature, architecture, art, and so on. It only makes sense to incorporate them into our aquariums. In general, perfect symmetry is a bad thing when designing an aquascape. In nature, you don’t commonly see a rock repeated in one place from another, so you shouldn’t do that in your tank. Avoid placing the focal point, whether it is a large rock, piece of wood, or large grouping of plants directly in the middle of the tank. Instead, position the focal point off-center. There are many different possibilities, but the easiest to start with is to divide up your tank into thirds, and put the focal point a third of the way from the left, and a complementary group of wood/rocks/plants a third of the way from the right. The grouping on the left should be larger than the group on the right. If following the golden ratio, one grouping would be 1.61 times as large as the grouping on the right.

When grouping pieces of rocks or wood in your tank, try to ensure that each group has an odd number of items with in. This will help achieve a more natural appearance. In addition, most of the time it is better to slightly angle some of the rocks/wood, verses having them positioned completely vertical.

Using string, you can position your hardscape according to thirds.

Using string, you can position your hardscape according to thirds.

Depth

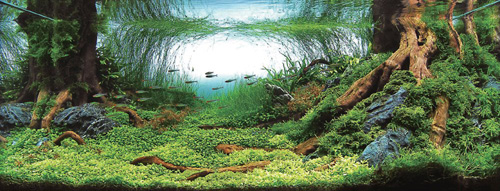
The biggest challenge when aquascaping is figuring out how to make the aquarium appear deeper than it actually is. Most people are only dealing with 12-18″ of space from front to back, however, you want to create the appearence that the scene could go on forever. There are a few tricks that you can use to achieve these feats. First, when you first add the substrate to your aquarium, don’t level it perfectly from front to back. Instead, slope the substrate so that the foreground is lower than the background. As you add the hardscape (rocks/wood), make sure that the slope remains. Second, you can simulate perspective in your aquascape by placing larger items toward the front, and smaller items to the back. This makes it look like things are getting smaller as they get to back of the tank. Don’t overlook leave sizes when considering this, in particular, various sizes of Anubias can be great for achieving this effect. Third, keep your foreground fairly shallow. Having a huge foreground compresses the midground and background, and takes away space from transitioning between them. Finally, position your hardscape so that there are clear lines for the eye to follow from front to back, paying addition to make sure that the foreground naturally transitions from to the midground, and then to the background.

Cliff Hui created amazing depth in his 4th place ranked "Destiny" scape in the 2008 ADA Contest.

Cliff Hui created amazing depth in his 4th place ranked "Destiny" scape in the 2008 ADA Contest.

Colors/Styles

Make sure all of the separate items that you add to your aquarium look good together. If you have a blank sand substrate, it’s not very believable if you have very light/white rocks on top of it. In addition, if you ultimately want a large rock to look like a mountain top, don’t use a sword plant right next to it, as the large leaves of the sword diminish the impact of the mountain top. Use plants that complement one another, and choose your bright red plants carefully, as you want to use them as accent pieces, not much more. Seek out rocks and wood that have a lot of character, and relatively few straight edges. The more detail on each item, the more it will look like a miniature version of a larger piece of nature.

Hardscape

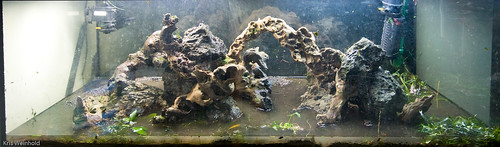
The rock and wood used in the aquarium make up the hardscape. Your hardscape supports and ultimately makes your aquascape possible — everything stems from the hardscape. After you add the substrate to your tank, it’s time to position your hardscape. I like to add my largest piece, or focal point, first and build around that. Remember to leave room for the plants! It’s easy to have the perfect looking hardscape initially, but then find that you either don’t have room for plants, or that the hardscape ultimately overpowers the plants. On the other hand, particularly for foreground pieces of hardscape, remember that the foreground plants will take up 1-2 inches of height, so don’t use rocks that are going to get covered up by the plants. Plan ahead, even if initially they look slightly too tall there. The idea is to place the hardscape, and have the plants complement it, as they grow in. When you are done positioning your hardscape, use a little bit of extra substrate to fill in any gaps, and to make the scene a little bit more natural looking.

75G Hardscape

Original hardscape for the 75G at the top of post.

Use of Plants

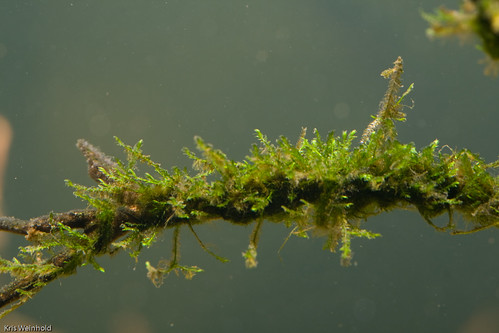
Obviously, plants are an integral part of the aquascape. Mosses, ferns, and Anubias are great plants to use to hide cracks between two rocks, transition between foreground and midground, or to slightly obscure/soften a larger hardscape item to accentuate a particular part of that item. Stem plants are often used as background plants, as they can grow and provide a nice backdrop for your hardscape. By trimming your plants to keep them taller in the back, and shorter in front, you help create a sense of depth from front to back. It’s often better to use more of a few types of plants in an aquascape than the try and cram lots of different species into a single aquascape. The reason is that it’s often hard to ensure that all of those species truly match each other. Besides, in nature, you usually don’t encounter tons of species all growing in the exact same area.

Taiwan Moss

Moss helps soften wood, when tied to it using cotton thread.

Negative Space

So far, I’ve talked mostly about things you want to add to have a nice looking aquascape. Sometimes, it’s as much about what you leave out that really makes the aqauscape great. For example, if you want to have a large rock represent a mountain range, the impact will be the greatest if you have some empty space around that rock. This contract is what draws the eye to the mountain. Similarly, open pathways where the foreground extends back into the midground or background help create a sense of depth, and also highlight the rocks/wood/plants along those pathways. Basically, don’t try to fill every inch of space in your aquarium with something — leave some parts open.

Summary

While I have provided a number of good “rules” to aide you when aquascaping your planted aquarium, the design of an aquascape is a very personal thing. There are times when it makes good sense to break one of these rules in order to achieve a desired effect. In all, use these as a basis, and go from there. I hope to see lots of great aquascapes popping up online and in the various aquascaping contests. Good luck!


Business Broker

Fertilization

March 9th, 2009

Starting a planted aquarium can seem like a daunting task. Most hobbyists start out small, gradually learning by trial and error what works and what doesn’t, and piece together information from books and websites until they finally either succeed or get frustrated and leave the hobby forever. In this series of posts, I’m going to attempt to outline the most important aspects of setting up a planted aquarium. Hopefully this will become a valuable resource to anyone new to the hobby, or experienced fish-keepers who are looking to setup a planted aquarium.

75G

All plants need nutrients in order to grow. This may seem like an obvious statement, however, many aquarists overlook the importance of feeding the plants in their aquarium. If you focus on making sure that your plants eat well, you will be going a long way to minimize algae and keep your fish and plants healthy.

Macro and Micro Nutrients

There are two main groups of nutrients that plants need in order to survive. The first are macro nutrients, often known as NPK, because they consist of the elements nitrogen, phosphorus, and potassium. The other is micro-nutrients, which pretty much sum up all of the other nutrients that plants need in smaller quantities in order to survive. These are sometimes referred to as trace nutrients.

There are two main ways to fertilize your aquarium: enriching the substrate and dosing fertilizers directly into the water column.

Substrate Fertilization

The type of substrate greatly impacts what type of fertilization method should be used throughout the life of your planted aquarium. Soil-based substrates are rich in nutrients, and do not require regular supplementation of fertilizers. All currently available commercial substrates do require fertilization within a few months of setup.

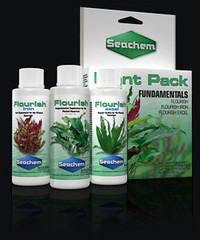
In most soil substrates the bulk of the nutrients are stored in the soil. Commonly, the main exception is potassium, which can be added as needed using potassium sulfate (K2SO4), or other commercially available liquid fertilizers.  Sometimes, certain trace elements can also go missing, in which case a good micro-fertilizer, such as Seachem Flourish Comprehensive, can be used.

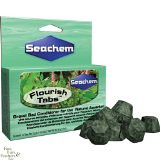
There are times, however, with plants that are heavy root feeders where the nutrition present in the substrate is diminished. At these times, you can use pellets/tabs to add the nutrients back into your substrate. There are several products on the market that can accomplish this. I have used Seachem Flourish Tabs in the past with good success. I have also heard that many aquarists use smaller portions of Jobe’s Fertilizer Spikes with great success. With all of these things, less is more, so start with a little, and gradually increase your fertilization until the proper levels are reached.

Water Column Dosing

Outside of the soil substrate folks, most of us are left having to regularly dose our aquariums with fertilizers. Many plants do better in nutrient-rich water, rewarding you for the extra effort involved with maintaining a dosing schedule. There are many liquid fertilizers available on the market, of which, I have regularly used Seachem’s Flourish line of products. In addition, I dose dry fertilizers KNO3, for nitrate, and KH2PO4, for phosphate directly to avoid the hassle of mixing them into liquid solutions and save money.

There are a couple of systems out there that can help regiment your dosing schedule. The most popular ones are Estimative Index (EI) and Perpetual Preservation System (PPS Pro). Describing these methodoligies in depth goes beyond the scope of this article, but they are essentially at opposite ends of the spectrum. The thinking behind EI is to overload your water column with nutrients so that a shortage never occurs. This allows plants to grow extremely quickly, but requires weekly water changes to avoid nutrient levels from becoming too high. The Perpetual Preservation System is more about maintaining the proper ratios of nutrients over the long term, which may lead to more frequent testing to ensure those ratios stay in check, and may require a slightly more meticulous regimen that EI. Both are proven systems that are worth experimenting with in order to find something that works for you.

What I Do

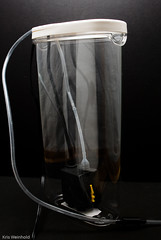
DIY Auto DoserMy method falls somewhere in-between EI and PPS Pro. I use a fraction of the nutrient levels recommended by EI, and am mindful of certain ratios for my nutrients, but I don’t test frequently. I do maintain bi-weekly water changes to help reset my tank periodically, clear the water of tannins, and top off evaporated water. On Mon/Weds/Fri I dose macro-nutrients (nitrate and phosphate), and on Tues/Thurs I dose micros (flourish and iron). Generally speaking, I watch my tank to let it tell me what to do.

Nutrient Imbalance

Nutrient deficiencies or excesses often manifest themselves through clear-cut symptoms, so by keeping an eye on your aquarium, you can adjust your dosing regimen as needed. For example, if you have green spot algae on the glass, your tank needs more phosphate. If you have hair algae, your nitrate levels are likely out of balance with phosphate. Black brush algae often indicates low nitrates or CO2, as does blue-green algae. If your plants are pale or yellowish, they are likely suffering from iron deficiencies. Extremely red or even purple plants often mean your nitrate levels are low. Pinholes in your leaves indicate a pottasium deficiency. While, there is often some overlap between these symptoms and other factor can be at play, getting a feel for these kinds of things make you more adept at adverting tragedy if let to progress.

Driving Factors

When developing your dosing routine, it is very important to realize the other driving forces involved in plant growth. The more intense your lighting, the more your plants are going to photosynthesize. The addition of CO2 becomes necessary to provide the carbon needed to sustain photosynthesis. At this point, the plants will use up more and more nutrients, which is when fertilizers are required. The main lesson to take from this, is that if your plants are growing too fast or if you’re unable to keep your nutrients in balance, the best thing you can do is to reduce the amount of light over your aquarium. This should help you to reduce any algae that’s crept up, and keep a handle on your dosing routine.

Summary

Fertilization is an extremely important piece of maintaining a healthy planted aquarium. It is also often regarded as one of the least desirable aspects of the hobby. Planning ahead, and thinking realistically about the level of commitment you’re willing to make to dosing, will ultimately lead to success. Don’t be intimated by the chemical names and ratios. I recommend starting with a commercial line of fertilizers, and as you get more comfortable, start using the dry nutrients for macros. Good luck!

Further Reading

Estimative Index

Perpetual Preservation System

APC’s Fertilator

Mineralized Soil Substrates

Building an Autodoser

Fertilizing the Planted Aquarium

Seachem’s Plant Dosing Chart

Business Broker

Lighting

February 13th, 2009

Starting a planted aquarium can seem like a daunting task. Most hobbyists start out small, gradually learning by trial and error what works and what doesn’t, and piece together information from books and websites until they finally either succeed or get frustrated and leave the hobby forever. In this series of posts, I’m going to attempt to outline the most important aspects of setting up a planted aquarium. Hopefully this will become a valuable resource to anyone new to the hobby, or experienced fish-keepers who are looking to setup a planted aquarium.

2.5G - 08-31-2008

More than any other factor, lighting is the driving force that determines plant growth rates and fertilizer/CO2 requirements. Before purchasing a light for your tank, you need to determine what your ultimate aspirations in the hobby are. Do you want to be able to grow any type of plant? Do you mind spending time trimming your plants every week? Do you want to inject CO2 or add fertilizers on a regular basis? Lighting doesn’t completely determine all of these things, but it definitely has a significant impact on them.

Light Levels

The amount of light placed over your tank is often measured in watts (W). There are many resources that recommend a range of watts per gallon ratios (WPG) for categories called “low light,” “medium light,” and “high light” tanks. Unfortunately, the whole WPG paradigm is not a perfect formula for success. Instead, the height of the aquarium is more important than the volume. Water diffuses light so it is very difficult for light to penetrate deep into a body of water. This is why the tops of your plants near the light are often red and vigorous growers, but lower leaves remain green, or melt away altogether. Infer from this that the taller your aquarium is, the more light you will need to adequately grow plants, especially foreground plants near the substrate.

To demonstrate how the WPG rule falls apart, on a 2.5G aquarium, 26W of light would be 10.4 WPG. On a 75G aquarium, 220W would be 2.93WPG. Both are considered high light tanks, with relatively equivalent plant growing capacity. For a smaller tank, the WPG ratio is likely to be skewed due to the fact that plants need a base level of light to grow. Combine that with the smaller stature of a 2.5G tank relative to the 75G aquarium, and you don’t need a ton of light. A 75G aquarium is 20 inches tall, so much more light is required to penetrate to the bottom of the aquarium. Much less and the foreground plants could be leggy, and reach for the surface instead of crawling along the substrate.

Keeping the height and volume discrepancies in mind, in general, light levels for fluorescent fixtures can be determined as follows:

  • 0-1 WPG Low Light
  • 1-2.5 WPG Medium Light
  • 3-4+ WPG High Light

LED fixtures are an entirely different beast. A 25w fixture can output light superior to a 350W HOT5 and metal halide fixture. As such, for LED fixtures you must rely on PAR (Photosynthetically active radiation), the measurement of the amount of photosynthetically active wavelengths in light. To define light levels, you should figure out how much PAR you have at the substrate. Here is a rough guideline. These guidelines are true for florescent and incandescent fixtures as well:

  • 0 – 30 PAR – Low Light
  • 30 – 80 PAR – Medium Light
  • 80-120 PAR – High Light

If you have at least 80 PAR at the substrate, you should be able to meet the lighting requirements for almost any plant in the hobby.

Choosing the Right Plants
Taiwan Moss

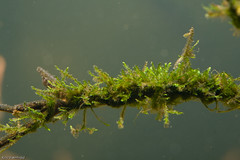
It is very possible to have a beautifully planted aquarium with very low light levels. In order to achieve this, you must choose only plants that are predisposed to growing with less light. Some examples of these plants are Anubias, Cryptocoryne, Bolbitus, Java Fern, Swords, Vallisneria, most mosses, and a small handful of stem plants. While there are a large number of species within these genera, your plant selection is quite curtailed from that of higher light levels. These plants will grow extremely slowly in low light, which means that they will not require frequent trimming, but if you suffer from an algae outbreak, it will likely take longer to recover since new growth will not as quickly replace the old algae-laden leaves. Some other plants will grow, but may exhibit larger leaves, leggy growth, and green coloration. Of course, the low-light tanks are inexpensive to setup and maintain, so they do have some appealing qualities.

As you increase the light levels over your aquarium, the number and types of plants that will grow expands rapidly. Hundreds of different stem plants become viable, as do several foreground plants that are impossible to grow under lower light levels. Of course, the added light also causes plants to grow faster, thus using more nutrients and requiring more frequent trimming. While CO2 is used most readily in higher light tanks, I recommend CO2 supplementation for all light levels.

Kelvin Ratings

So far, we’ve only talked about the intensity of the light, but not the quality. Plants use specific colors within the light spectrum for photosynthesis, so it makes sense that not every bulb will adequately supply the type of light needed for plant growth. The color of a bulb is determined by the bulbs’ Kelvin rating. There are many different Kelvin ratings that will work, but the most popular are 6500K, 8000K, and 10,000K. Bulbs in the 6500K range are usually a little bit yellow-cast, while 10,000K bulbs are more bluish. I prefer to mix colors, which tends to illuminate the tank in a more natural way. If the bulb isn’t labeled with a Kelvin rating, most “daylight” or “full spectrum” bulbs will work, as will “plant grow” bulbs. Stay away from most “cool white” or general purpose bulbs. Even within the Kelvin ranges, one 6500K bulb may be more or less yellow than another manufacturer’s 6500K bulb. Experiment with a few different brands to find the one that looks the best to your eye. (Don’t be surprised if more expensive bulbs last longer, and produce a more appealing type of light.)

Degradation of Quality Light

To make matters even more complicated, the quality of light that is produced by a light bulb decreases over its lifespan. Generally speaking, a brand new bulb will appear much brighter, and produce a more photosynthesis-friendly light source than bulbs that are more than a year old. The type of bulb makes a difference, as does the daily operating temperature of the bulb, but a good rule of thumb is to replace your light bulbs yearly regardless of whether or not they have burned out. Obviously, if you can reuse these bulbs in household fixtures that would be ideal. If not, be sure to dispose of them properly (not in your regular trash), as most of these bulbs contain mercury. LED generally have a much longer degradation period, lasting 5 or more years, however, unlike bulbs, they continue to emit the same quality of light, just at a decreased brightness. You can extend the life of your LEDs by dimming them over their lifetime.

Photo Periods

Intermatic Digital TimerThe photo period is the amount of time that you have the light turned on over your planted aquarium. The recommended time for most aquariums is 10-12 hours. If you notice that your stems plants are closing up toward the end of the day, they’re done photosynthesizing, and there’s no benefit to leaving the light on any longer. In addition, if the lights are on too long, algae can advantageously utilize the extra light. Lighting systems containing multiple bulbs or fixtures can be timed to run less bulbs in the morning and evening, and more bulbs during the middle of the day, simulating dawn, mid-day, and dusk light levels. For consistency, I recommend using a timer for your lights regardless of your lighting scheme.

Lighting Options

Once you’ve decided whether you want a low-light or high-light planted aquarium, you now have to choose from a variety of lighting technologies. Fortunately (and unfortunately) there are lots of options to choose from, allowing you to customize your light solution to the specific needs of your aquarium. I’m going to give a brief overview of the most common options:
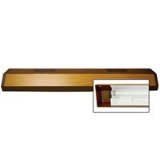
AGA Strip LightNormal-Output Fluorescent

Normal-output fluorescent lights are the standard fluorescent light tubes that are common in business ceiling lights, and the type of light fixture that’s often bundled with new aquarium purchases. Unfortunately, these fixtures are not appropriate for anything but low-light setups. Be sure to purchase plant-appropriate bulbs, and replace them yearly. Even for low-light tanks, you will likely want to invest in a double or triple tube solution. The reflectors in most of these fixtures are not very good, so a lot of light is not properly directly into the aquarium.
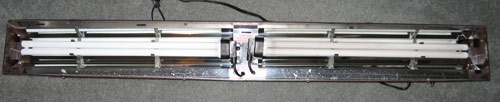
Power Compact Fluorescent (PC)

Just as power compact bulbs are growing in popularity for household use, they are also widely used with planted aquariums due to better efficiency and intensity than their normal fluorescent counterparts. They do produce a moderate amount of heat, and due to the width of the bulb, they suffer from some restrike problems. (Restrike is when light is emitted from the bulb, bounces off of a reflector, and goes right back toward the bulb, instead of going into the aquarium.) Overall, cost wise, PC fixtures often give you the best bang for your buck.

T5 Fluorescent Lighting
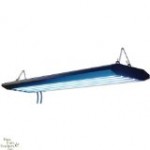
TEK T5 Lighting SystemT5 lighting is immensely popular in the planted aquarium arena. T5 bulbs are smaller in diameter than normal-output fluorescent bulbs, but otherwise look similar. The difference is that high-output (HO) bulbs and fixtures are available that produce far more light. In addition, due to their smaller diameter, less heat is generated and restrike is not as much of an issue. In a fixture where each bulb is wrapped in its own individual reflector, the efficiency is very high, producing extremely good results.

Metal Halide (MH)
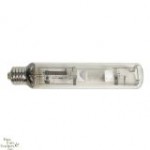
Iwasaki 6500K MH BulbMetal Halide lighting is commonly used in the hydroponics industry as grow lights. The technology has been in the aquarium hobby for a number of years, particularly on the reef side. These lights are very good at penetrating to the bottom of tall tanks, and produce an incredibly bright light. They also produce a mesmerizing shimmer on the bottom of the aquarium. The biggest downside to metal halides is the heat that they generate, making them less efficient than most other forms of lighting. Of course, the amount of light produced can really drive plant growth and colors to the extremes.

LED Lighting

LED lights are taking the aquarium hobby by storm. There are already a few planted aquarium specific LED fixtures on the market. The benefit of this type of lighting is the extremely high efficiency of the light, with very low heat generated. In addition, LED lights are directionally oriented, so they do not require reflectors, and thus restrike is not an issue. In addition, the directional light combined with any surface ripples create the same shimmer effect that metal halides produce. Many LED fixtures include dimming capability that allow you to convert your lighting from low light to high light at the touch of a button. Finally, high-end lights include all kinds of features ranging from custom color configuration, lighting storm and cloud effects, moon lights, ramping up/down the light to simulate the movement of the sun, and more.

Do It Yourself Solutions

There are many DIY solutions to lighting a planted aquarium. The simplest DIY method is to purchase a retrofit kit for any of the above technologies, and install that into a custom built canopy or light strip. You can also rewire existing normal-output fluorescent fixtures to overdrive them, producing about 1.5X the amount of light that they normally would produce. I have seen examples of people using regular screw-in light bulbs in a canopy to light the aquarium. There are also excellent LED kits that allow you to completely customize the intensity and color of your light. In all, if you can think it, you can do it. Just be sure that you use good electrical practices, and that the bulbs you use are suited to grow plants.

Combined Solutions

There are several fixtures on the market that combine two types of lighting technology. The most popular is to combine PC/T5 lighting with MH in one fixture. These fixtures are designed to run efficient power compact lights for most of the day, with the metal halide light running in the middle of the day as  a noon-burst. This is supposed to emulate the 3-hour period of the day where the sun is most intense.


Reflectors

While reflectors aren’t part of every lighting solution, they DO make a difference in the effectiveness of your equipment. The shape of the reflector, as well as, the shininess impact its ability to direct more light into the aquarium. Parabolic (rounded) reflectors are generally better than rectangular ones. Polished aluminum is generally better than white or other types. In addition, using one reflector for each bulb in your fixture is generally better than using a single large reflector for all bulbs, as this minimizes restrike.

Summary

Lighting is an important part of every planted aquarium. The more light you have, the more you are pushing your plants to grow, which causes plants to need more resources to sustain that growth. If you do not adequately balance you light levels, CO2 injection, and fertilization schemes, you are asking for poor plant growth and algae problems. Fortunately, there is a lighting solution for every lifestyle and price point, so do your research and choose wisely. At this point, I would recommend any new hobbyist seriously consider investing in an LED fixture as they bring the best balance of light output, energy efficiency, customization, and configuration.
Business Broker

« Previous Entries