Starting a planted aquarium can seem like a daunting task. Most hobbyists start out small, gradually learning by trial and error what works and what doesn’t, and piece together information from books and websites until they finally either succeed or get frustrated and leave the hobby forever. In this series of posts, I’m going to attempt to outline the most important aspects of setting up a planted aquarium. Hopefully this will become a valuable resource to anyone new to the hobby, or experienced fish-keepers who are looking to setup a planted aquarium.
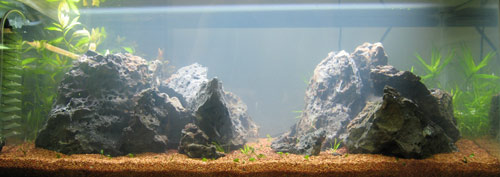
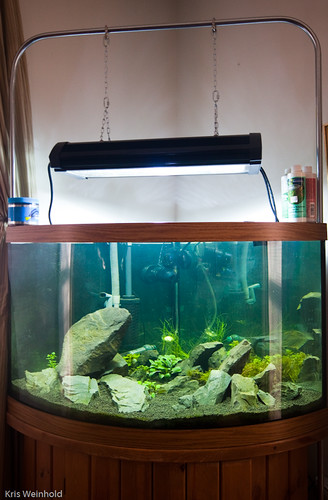
20L using SoilMaster Select
I remember how choosing the proper substrate for an aquarium used to be as easy as picking the color your wanted from a palette of about 10 colors, ranging from black to neon pink. For planted aquariums, the choice isn’t nearly as straight forward, but depending on your decision, the implications are quite significant. Fortunately, there are many right answers to which substrate is used, so it’s just a matter of knowing what each choice requires of you in order to be successful.
What to Look For
There are a few common attributes that should be sought from whatever substrate you choose. In general, you want something that is attractive, and will look natural with the plants and hardscape you are choosing. I would suggest going with browns, grays, and blacks instead of any of the colored substrates. In addition, plain gravel is usually not a great substrate for plants, although it can be done. The main reason is that gravel is 100% inert, meaning that it cannot absorb and store nutrients for the plant roots to later consume. There’s a more technical term for this called the cation exchange capacity (CEC), which defines how easily a given substance can exchange positively charged ions between itself and a solution. Fortunately, you don’t have to worry about the technicalities of this besides trying to avoid plain gravel if possible.
Another thing to consider is the granule size of whatever substrate you are evaluating. Anything much bigger than pea-sized is going to be difficult to physically plant in. In addition, more delicate and smaller plants, may be unable to navigate the larger granule size, making it impossible to plant a field of hairgrass or similar type of aquascape. Very fine sand should also be avoided as it is inert, and can compact on the roots, causing anaerobic conditions.
Commerical Substrates
Fortunately, there are several commercial substrates available that are specially designed for planted aquarium use. Unfortunately, many of these come with a high upfront cost, which should be considered.
Seachem Flourite
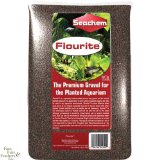 One of the most widely available substrates on the market for planted aquariums is Seachem Flourite. Originally a course reddish clay-based material, Seachem has now expanded their product line to include several other colors and granule types, including the attractive Flourite Black Sand. For all but the lowest-light tanks, planted aquariums using these products will require supplemental fertilization for plants to get the nutrition they need, but Flourite has an excellent CEC rating, ensuring that these fertilizers will be captured for use by the roots. For the traditional Flourite products, many people prefer to pre-rinse the substrate before putting it into their tank to remove any particulate matter that often initially clouds the tank. In my experience, you can get away with not rinsing, but you must be cognizant of minimally disturbing the substrate when initially filling the aquarium, and when uprooting plants. The original Flourite is sometimes too large for some small foreground plants, but their newer sand product lines correct that.
CaribSea Eco-Complete
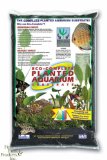 Another widely available commericial substrate is CaribSea’s Eco-Complete. Eco-Complete is an attractive substrate, resembling black sand with a small granule size. Differentiating itself from Flourite, Eco-Complete comes with bacterial starting liquid in the bag, so it should not be rinsed prior to use. This substrate also will require fertilization in most aquariums, but should be capable of growing nearly any type of plant you throw at it. The substrate is fairly dense, doing a good job of holding plants down where you plant them.
ADA Substrate Line
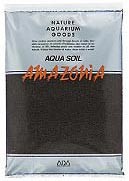 Currently, the premium line of planted aquarium substrates on the market are made by Aqua Design Amano, operated by planted aquarium and aquascaping guru, Takashi Amano. The ADA substrate line can be confusing to understand at first, but essentially, it consists of 4 components: additives, Power Sand, Aquasoil, and Bright Sand. When setting up an aquarium, you first sprinkle some additives on the bottom of the aquarium. These can include Tourmaline BC, Clear Super, Bacter 100, among others. These additives are designed to provide additional minerals, jump start bacterial colonies, and aide in maintaining clear water. Then, Power Sand, a porous stone mixed with peat and other nutrients is added. Power Sand aides in preventing compaction over time, so that water continues to flow throughout the substrate after years of use. On top, Aquasoil is used either in the whole aquarium, or just in the background. If you want a decorative white sand foreground, you would put Bright Sand there instead of the Aquasoil. The most commonly used product is Amazonia Aquasoil.
Unfortunately, the ADA product line is only sold at a handful of shops in the U.S., but is available online from Aquarium Design Group and Aqua Forest Aquarium. As you can imagine, this product line is more expensive to use in most cases than other more widely available commercial substrates. In my opinion, the main reason to choose the ADA brand is that it comes out of the bag with a ton of nutrients, jump starting your aquascape without the need for dosing. Keep in mind, however, that after 4-6 weeks, additional fertilization will be required after that initial burst. In addition, Aquasoil buffers the water, ensuring a more acidic environment which is proven to facilitate the uptake of nutrients by plants. Finally, as a planting medium the weight, consistency, and granule size is ideal for holding plants in place. I recommend doing several water changes per week for the first two weeks after initially using Aquasoil to ensure that your pH and nutrient levels do not become too extreme. For this reason, you may want to wait a couple weeks before adding fish to your tank. In the end, it’s worth it, as your plants should be healthy, and ready to support the extra bioload that fish bring.
Other Commercial Substrates
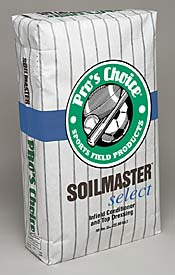 There are quite a few other substrates available commercially, but the three I have mentioned are the ones I have personal experience with. These other substrates are most likely just fine to use, but be sure to research other aquarists’ experiences prior to using. In addition to substrates that are specifically designed for planted aquariums, another substrate which has been widely used is SoilMaster Select (SMS). This is actually a turf product designed for use on baseball fields, but through experimentation, it has been found to work very well in aquariums. Like Aquasoil, it slightly reduces the KH of your water, providing a good acidic environment for the roots. It also has fine granules, and an extremely high CEC. The downside of SMS of that it’s fairly lightweight, so strong currents can blow it around. It does a reasonable job at holding down plants, but I would make the substrate a little bit deeper than with some of the other heavier ones available. With no inherent nutritional value, you should expect to provide supplemental fertilization from day one. The main benefit is that a $16-$20/bag of SMS will completely fill a 75G aquarium, while most of the other substrates would cost 5X or more for the same tank. Unfortunately, I’ve heard that SMS has been discontinued by the manufacturer, but hopefully a replacement product-line will arise that is similarly suitable for aquarium use.
Soil Substrate
There is another DIY substrate that is gaining use in the hobby. While traditionally, many people have recommended against using soil in the aquarium due to huge algae outbreaks, recent formulas for success have been developed to make this a viable option. Diana Walstad, author of Ecology of the Planted Aquarium has garnered a following for her low-tech, el Natural, style of soil-based aquariums. One of my fellow GWAPA members, Sean Murphy, has also developed his own mineralized soil substrate recipe, which has attracted much use throughout the hobbyist community. The key benefit to setting up one of these tanks is that very little dosing is required on a day-to-day basis, as all of the nutrients should be present within the soil itself.
Soil substrates are not for everyone. They cannot grow plants that draw nutrients from the water column, instead of via their root systems. In addition, there is a 4-8 week preparation process of breaking down the organic material in your soil, prior to setting up your tank. Finally, even after running this process, you may or may not experience a period of severe algae while the ecosystem of the tank is established. That said, once established, the substrate has been proven to last at least a decade. The full process of setting up a mineralized soil substrate tank can be found here.
Plain Gravel + Additives
 If none of these other options are amenable to you, it is possible to have some moderate success using plain gravel. I will stress that it is much preferred to use any of the other options detailed above, but if you insist on using gravel, you ought to at least supplement it with a few additives placed underneath. Most importantly, make sure to add laterite, an iron-rich mineral, which can be purchased in most pet stores. In addition, a small amount of peat will help acidify the substrate and provide a material with a decent CEC ratio. I would also encourage you to use form of fertilizer sticks/pellets, such as Seachem’s Flourish Tabs, which will add other trace nutrients to your substrate. Finally, expect to have to add additional fertilization, especially in high-light+CO2 setups. Again, this solution should be your last choice.
Summary
Choosing a proper substrate is an integral part of a successful planted aquarium. There are several out-of-the-box solutions that can get you up and running very quickly. If you would prefer a more natural substrate, topsoil-based substrates can also do the job quite well. There may be some trial and error involved in finding a substrate that fulfills the aesthetic or dosing regimen that you’re striving for. I hope that you now understand the most popular options that other hobbyists are employing.