Nova Scotia Bogs

June 10th, 2008

You may have noticed that I haven’t posted in awhile. I just returned from a nice vacation in the wonderful Canadian province of Nova Scotia. We spent two weeks exploring every corner of the province, so while I get my aquariums back into presentable shape, I’m going to share some of the nature pictures from my trip. (This is incentive for me to sort through over 1000 photos that we took.)

The two Canadian national parks in Nova Scotia are Kejimkujik and the Cape Breton Highlands. We visited the two parks, and found carnivorous plants in both! First, at the Keji Seaside Adjunct park, there is a wonderful trail that winds through a bog, and eventually takes you to a rocky beach where seals perch themselves on small islands offshore. Today, I’m just going to cover the bog.
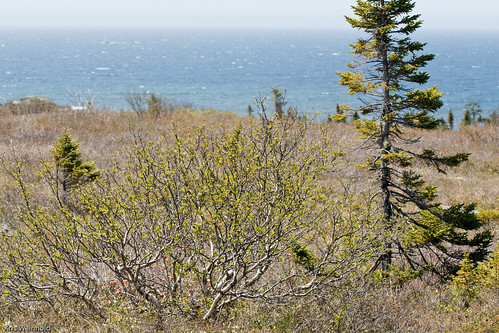
Keji Seaside Adjunct

All along the path, pitcher plants were mixed in among the moss and bushes. The patch below wasn’t the best looking bunch there, but unfortunately, this was one of the better pictures I got. These plants were mostly yellow and orange in color.
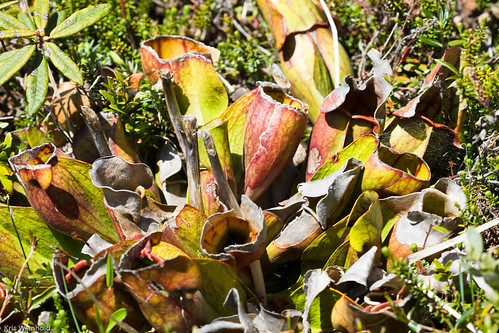
Pitcher Plant

And of course, the plants were feeding. While ants were a popular food found floating in the pitchers, this lucky plant got a fairly large beetle.
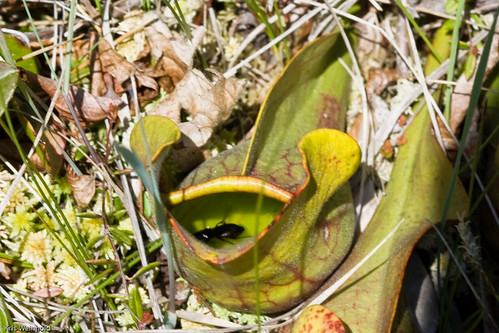
Pitcher Plant

Still being early in the season, none of the pitcher plants were flowering yet, but a few were starting the process, sending flower stalks toward the sky. Eventually, these flower heads will unravel revealing a rather unique looking flower. The ground in this bog wasn’t inundated with water, but the moss kept it just damp enough. We also saw some sundews, but I didn’t get any good shots.
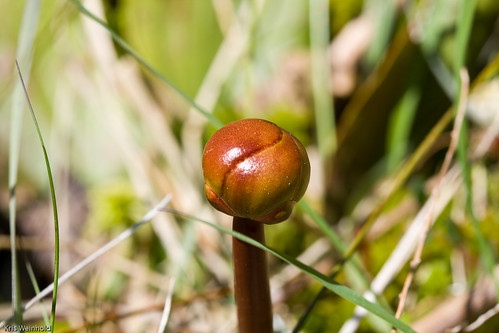
Pitcher Plant Flower Stalk

Up in the Cape Breton Highlands Park, they have a trail aptly named the “Bog Trail.” Of course, the first sign on the trail explains that it’s actually a fen because unlike a true bog, it also sources some of its water from groundwater. This fen is more heavily covered by grasses and doesn’t have the same amount of bushes that the one in Keji did. Also, it’s impossible not to notice the large moose hoof prints and droppings throughout the area.
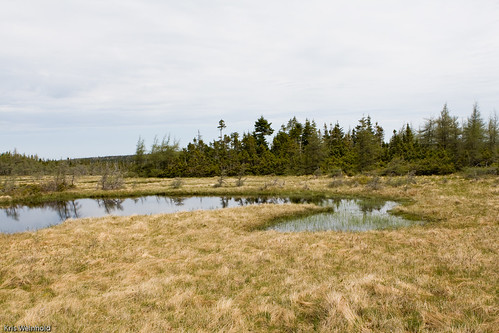
Cape Breton Fen

One of the most startling things about the pitcher plants in this area is how red they were. Brilliantly colored, and in standing water, they were beautiful!
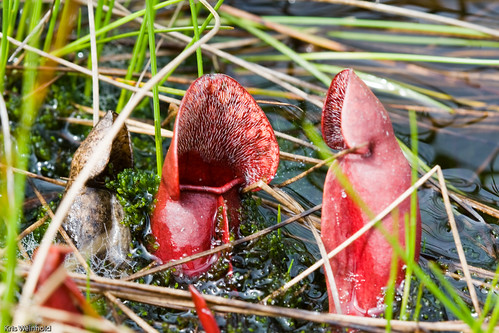
Pitcher Plant

Not to be outdone, the sundews here were quite pretty as well, sending sticky red fronds out of their yellowish foliage to trap unsuspecting insects. There were far more sundews in this area then their were in Keji, but they looked relatively similar.
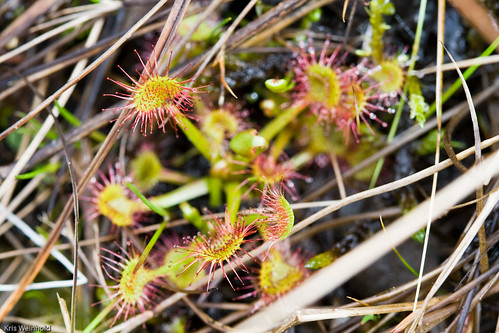
Sundew

In addition, the Cape Breton Bog trail also contained a species of Utricularia floating in the water. A blatterwort, Utricularia traps tiny organisms in the bladders shown below.
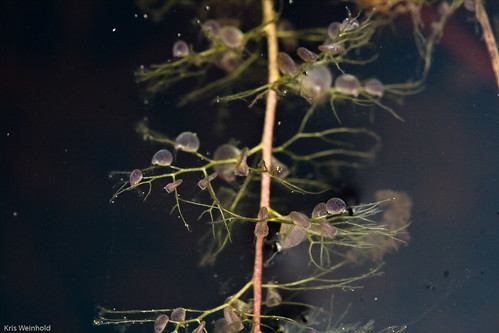
Utricularia sp. in Cape Breton

Carnivorous plants have always fascinated and I was so pleased to have been able to see so many in my trip around Nova Scotia. Comments welcome!

Business Broker

Apistogramma similis

May 31st, 2008

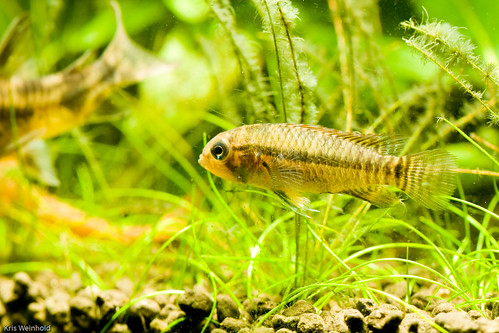
At the last CCA meeting that I attended, I picked up a pair of Apistogramma similis that the speaker had collected himself when in Bolivia. I’m hoping that they really are this species because they don’t exactly look like the pictures in my Cichlid Atlas Vol. 2, but they aren’t that far off either. In any case, Apistogramma similis is quite similar to Apistogramma inconspicua, with a different number of dorsal spines. The extent to which this species is distributed is unknown, being found a couple jungle rivers in the Bolivian province of Beni.

Apistogramma similis

I don’t expect these guys to be terribly difficult to breed in my 75G aquarium, and hope that I’m able to garner a small population of them. These aren’t the prettiest apistos available, but still have their appeal, and if my juvenile specimens color up a bit, they’ll be nice to look at nevertheless. I’ll post updated pictures of these guys as they mature.

Business Broker

Photographing an Aquarium

May 28th, 2008

Photographing a tankPhotographing your aquarium is not an easy thing to do, as I’m sure anyone who has ever tried has quickly found out. Often times, the fish or plants are blurry, the tank is too dark, there’s a reflection on the glass, or it just doesn’t look like it does when viewing it in person. I certainly don’t have all of the answers, but I’d like to share a few tips that I’ve picked up from other hobbyists/photographers that have helped me take decent pictures of my tanks.

Often, it is best to plan for photographing your tank, then to simply decide that you want to snap a picture. If photographing for an aquascaping competition, this planning might need to start 2 weeks in advance, ensuring that all of your trimmings are timed perfectly, so that on photo day, all of the plants are in their perfect state. I’m not going to cover how to do that, but just rest assured that it’s something to consider.

At the very least, it’s often helpful to have done a water change the day before so that the water quality is very high, and free of particles. Additionally, when doing the water change, make sure you scrape the glass. Prior to shooting, turn off the filter/powerheads/sumps/etc, allowing enough time for any particles in the water to settle. By temporarily disabling circulation, you’re helping to avoid blurry plants that wave in the current. Finally, the name of the game is light; if you have any extra strip lights that you can put over top of your tank temporarily, do this now.

Now that the tank itself is ready, it’s time to focus on the camera side of things. It’s obviously very helpful to have a nicer camera with lots of manual options and high quality lenses, but if you don’t, that’s still okay. The two most important things to remember: 1) Turn off your flash, 2) Use a tripod, or sit the camera on a stool, etc…

Ideally, you want the camera to shoot quickly, so that the fish in your tank will not be blurry. This is where any extra light you put over the tank will help you. I’d recommend trying to shoot at 1/100 seconds, but nothing slower than 1/40. If your camera only shoots in auto-mode, you may have to take what it gives you. In order to achieve the faster shot, I use aperture-priority mode (Av) on my camera, and usually increase the ISO to 400-800 until the speed is what I want. Admittedly, this will produce a slightly grainier picture, but I’d rather that, then have blurred fish trails across the tank. Again, the more light above the tank, the lower the ISO you’ll need to achieve this. Additionally, I’ll lower the F-stop a little bit, but I much prefer to keep it around 5.6 or higher for depth of field, but again, if you have to shoot at F/2.8, you may as well do it, and see how it turns out.

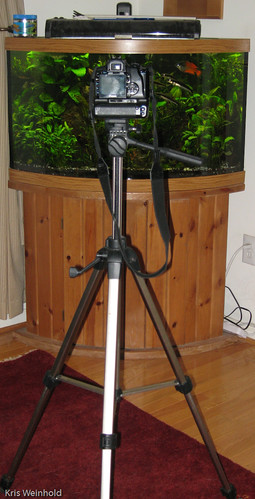
On the tripod, center the camera inline with the center of your aquarium. Then, raise the camera up about 6-8 inches, and angle it down slightly in the front, so that the camera is looking down toward the tank. Through the view finder, you can see that this will make it so the aquarium no longer appears rectangular, but we’ll fix that later. The reason you do this is because it shows a bit more depth of the tank, and provides a more natural viewing angle. Rarely do you ever get down on your knees, and look head on at the aquarium. No, you’re usually standing, and looking from a top-angled view.

Perspective view
Notice how the sides are not vertical.

Now you’re all set. Start shooting, and shoot a lot. You’ll find that the position of the fish makes a big difference to how the overall shot looks, so don’t be afraid to take 100 pictures, waiting for all of the fish to converge in just the right area. Also, as you’re taking pictures, notice whether any of the tops of the plants look overexposed (white). If so, you may want to decrease your ISO, or raise your F-stop, which will result in an overall darker picture, but that’s okay.

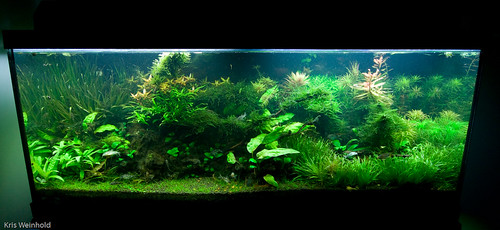
Now that you’ve taken you shots, it’s time to do a small amount of post processing. After you’ve selected the picture that looks best to you, we need to correct the issue where the sides are not vertical. In Photoshop, this is easy. Simply select the whole picture (Ctrl-A), go to Edit -> Transform -> Perspective. Now, drag the bottom corners of the picture outward until the sides of the aquarium line up vertically with the edge of the picture. Once you’ve done that, use the crop tool to cut out any extraneous parts of the photo. You can use the Levels/Curves tools to adjust the brightness/exposure of various portions of the photograph. After all of that, you should end up with a decent picture.

75G - May 21, 2008
The same picture with the perspective adjusted in Photoshop.

Business Broker

GWAPA – May 2008 Meeting

May 24th, 2008

GWAPANancy Rybicki of the US Geological Survey spoke at GWAPA’s May 2008 meeting in Silver Spring, MD. Being the first club meeting held at a meeting hall, rather than a member’s home, we had a pretty good turn out with 27 members showing up. Nancy gave an excellent presentation detailing the current state of submerged aquatic vegetation (SAV) in the Potomac River system, which flows into the Chesapeake Bay.

At first, she described why SAV is so important to the ecosystem. In tests, they have determined that in rivers that are lush with aquatic plant life, 10-60% of all nitrate in the waters are absorbed by the plants. This prevents these extra nutrients from eventually ending up in the Bay. So, her team worked to find out what the ideal conditions for SAV to survive are, and they found that ultimately, light is an important factor. The amount of light (13% needed by freshwater SAV) that reaches the plants is dependent on a number of factors. Water clarity is vital, but can be disturbed by algae blooms, wind storms, or high water flow that stirs up and introduces silt into the water.

Fortunately, since the 1980’s, many areas are experiencing a period of increased SAV. Improved sewage treatment methods have reduced that amount of nitrate that’s introduced directly into the Potomac. Even when faced with threats from exotic plants, such as Hydrilla or water lettuce, beds of Wild Celery (Val. americana) continue to do well in many parts of the river. This can largely be attributed to the fact that Val’s tubers provide energy stores that let them establish themselves in the riverbeds earlier in the season than the exotic plants can. Of course, environmental conditions vary yearly, and the state of the Val./Hydrilla competition does likewise.

I was interested to find out that one of the local native plants Nancy referred to was Stargrass. In the aquarium hobby, this is of course, Heteranthera zosterifolia, but to the local scientific community, they are referring to Heteranthera dubia. In addition, Nancy has helped on many efforts to introduce native plants back into parts of the Anacostia River to ensure a diversified selection of SAV in the river. By ensuring multiple native plants, they are increasing the likelihood that one of them will outcompete the exotic plants, and increase the health of the water ways.

Also, Nancy wanted to stress to all hobbyists that they continue to enjoy the aquatic plant hobby, but properly dispose of their plant trimmings. This means, throwing them in the trash or compost bin, instead of flushing them down the toilet, or dumping them into a local stream or river. Even better, use more native plants in your tanks. All in all, a very interesting talk about the plants/habitat in our own backyard.

Business Broker

75G – Updated Photo

May 21st, 2008

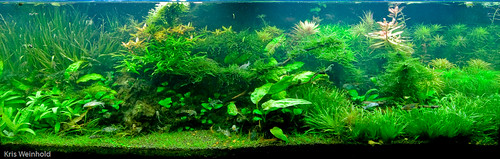
It’s been about a month since the last shot of my 75G aquarium. Since then, the Eleocharis sp. ‘Japan’ has continued to grow in, and is still exhibiting the fantastic downward sloping growth it’s known for. The Cryptocoryne pontederiifolia in the foreground/middle has really started to explode. I suppose the roots have reached critical mass, and now there’s no getting rid of it. (not that I would want to!)

75G - May 21, 2008

Otherwise, I have a few signs of collectoritis showing on the right-hand side of the aquascape with stems of Pogostemon stellatus, Ludwigia sp. ‘Cuba’, Eriocaulen sp. ‘Type 3’, and Ludwigia sp. ‘Pantanal’ all growing in close proximity. I ought to decide on just one of those, and go with that. Not to mention that I’ve totally mixed up Limnophila aromatica and Limnophila hippuroides in the middle of the tank! Honestly, I’m wondering if what I bought as L. hippuroides is really L. aromatica anyways because they look the same to me. Finally, the Java Fern sp. ‘Fingers’ in the top/middle/left is looking fantastic! All-in-all, for not paying much attention to this tank, I can’t really complain too much about its appearance. It could definitely benefit from a couple good trims, but otherwise, it’s maintaining itself pretty well, I think. However, suggestions are always welcome!

Business Broker

« Previous Entries   Next Entries »