Face-to-Face with Catfish

March 31st, 2008

In my 54G corner aquarium, I’ve got quite a few different kinds of catfish. All of them are different looking, and each has a unique character.

The Ancistrus sp. L279 bristle-nose plecos stay around 3-4″, and are usually found sucking on the driftwood in the tank. They’re fairly timid, but do come out often enough to enjoy.

Ancistrus sp. L279

The Siamese Algae Eater, SAE, is a very common algae eating fish. They are commonly confused is the Flying Fox, which is not nearly as effective an algae eater. Becoming popular once they were observed eating black brush algae, they are often recommended to new aquarists as a means of algae control. Unfortunately, most people do not initially realize that the small fish they purchase in the store, turn into 6-7″ blimps. Despite their size, they’re usually lazy enough, lounging around most of the time in their old age, that they do not disturb the aquascape.

SAE

The Botia sidthimunki loach is a fantastic little catfish that stays small, is constantly active, and is very social when kept in a group. I have five of these in the tank, and they’re always scurrying around, chasing each other throughout the aquarium. They do not harass other tank mates, however, well, except for snails or shrimp!

Botia sidthimunki

I have a couple varieties of corydoras in this tank. Cories are also very social catfish, constantly searching the bottom areas of the tank. Occasionally, you will see one shoot from the substrate all the way up to the water surface, and then dart back down. Apparently, cories have adapted to be able to breath air from the surface, allowing them to survive in poorly oxygenated water. I’ve also witnessed them playfully swimming upside-down at the water surface for awhile before swimming back down to the bottom.

Corydora

Overall, I can highly recommend all of these catfish, for different reasons. The A. sp. L279 are great little plecos that eat algae, but don’t overwealm the tank. The SAEs get bigger, but are peaceful, and also eat algae. The “sid the monkey” loaches are a great, active, addition to any tank, and will eliminate snails from your aquarium. And corydoras are just plain fun to watch!


Business Broker

GWAPA – March 2008 Meeting

March 30th, 2008

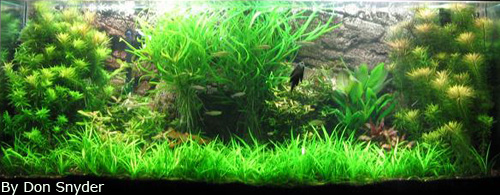
Yesterday, GWAPA conducted its March 2008 meeting at Don’s house in Catonsville, MD. In what is becoming a great trend, we had a couple of new members show up, and a record number of current members attend. Don has a 125G aquarium, with a really nice looking fake-rock background built inside. Normally, I don’t care for these kinds of backgrounds much, but this one was one of the most realistic-looking ones I’ve seen.

125G Aquascape

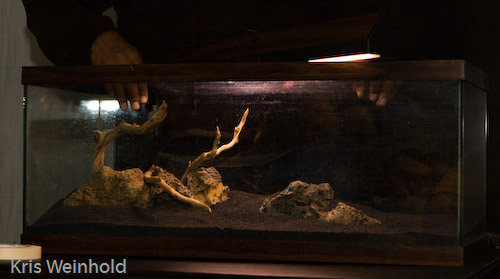
Ghazanfar gave a fantastic, in depth, presentation about the things to consider when setting up an aquascape. He described three types of layouts: concave, mounded, and sloped, with the one below being an example of a sloped layout. Ghazanfar really does have a wealth of knowledge about aquascaping, and I definitely learned a few things from his presentation.

Sloped Aquascape

Afterwards, we brought a few 2.5G aquariums and allowed anyone who wanted to, to try their hand at using Ghazanfar’s aquascaping principles to design a hardscape, and get immediate feedback. It’s fun watching others use similar materials, and come out with hardscape designs that I wouldn’t have thought of myself.

We finished the meeting with a huge auction, containing over 150 items for sale. I came away with another pair of Goo Obo Gudgeons, Cryptocoryne usteriana, Ludwigia peploides, and  Rotala verticillaris. Another fantastic meeting!

Business Broker

Wormstrate or Soil Substrate?

March 26th, 2008

About a week ago, I started a substrate experiment that I’ve been wanting to try for some time. Having always used commercial substrates, often at high expense, I’ve had a lot of success growing plants over the past few years in my aquarium. Of course, nearly all of these substrates, when used in a light-intensive+CO2 setup require supplemental dosing of fertilizers. Hence, my previous entry about automating the dosing of those fertilizers.

Wormstrate and Soil Substrate Experiment

I watched as both local GWAPA members and other enthusiasts around the world started growing beautiful aquascapes with nothing more than garden soil, and a few additives, at probably 1/10th of the cost of my ADA substrate. Not only that, but they aren’t required to dose additional fertilizers as the soil is sufficiently rich for at least a decade. In addition to these soil methods, I wanted to try something different as well — a wormstrate — that is, a substrate based on worm castings. With two empty 2.5G tanks sitting around, I decided to do a side-by-side experiment of the two natural substrate options.

For the soil substrate, I used a method designed and perfected by a local GWAPA member, consisting of mineralized topsoil, potash, dolomite, pottery clay, and an inert top layer. As mentioned, a number of GWAPA members have successfully run high-tech tanks using this method, with the only downside often being an green water outbreak at the beginning of the process.

For the wormstrate, I used Vladimir Simoes Method, which was used successfully by a number of AGA contestant tanks from Brazil. This is essentially just worm castings, mixed with sand, and topped with an inert top layer. The most appealing thing about this method is that I could use my own worm castings, produced from my kitchen scraps, creating a full cycle of food to waste to worms to aquarium to plants to compost. Can anyone else say that they made their substrate from their kitchen scraps? Nerdy, I know, but cool!

So, I setup both 2.5G aquariums within a few days of each other, fit a 24″ 55W light over top of them, outfitted each with a hang-on-the-back filter, and planted each with roughly the same number and type of plants from my other tanks. I started the tanks using water from the same established 20L aquarium, which I believe has helped me avoid the green-water cycle often experienced. The only thing I have been dosing has been Seachem Excel, since I don’t have two extra CO2 diffusers.

Over about a week and a half, I’ve seen some modest growth, zero algae, and clear water. I’m hoping that the growth will pick up, as the plants adjust to feeding from the roots instead of the water column. I’ll be sure to continue providing updates on this experiment as it progresses. My hope is to have one of these two methods convince me to redo one of my larger tanks with a natural-based substrate, so that I can further lessen my fertilizer use. Comments/suggestions welcome!

Business Broker

Auto-dosing Fertilizers – DIY Style

March 24th, 2008

DIY Auto Doser In my last post, I explained how I tested for two weeks to determine the proper amount of fertilizers my 40G tank needed to sustain healthy plant growth, and eliminate algae. With that knowledge in hand, I have now automated my dosing routine on this tank using a few readily available items to build a DIY auto-doser. I cannot take credit for this innovation, as I was following Jeff Ucciardo’s design, who adapted it himself from various designs posted on Aquatic Plant Central.

Building an auto-doser is really quite easy. You only need a container, a powerhead to move the solution from the container to the tank, some airline tubing, a check valve, and a digital timer that is accurate to the minute. You’ll also need some sort of a syringe or pipette to convert the output of the powerhead down to the size of the airline tubing.

For the container, I bought a clear container from the kitchen department of IKEA. A container that is taller will be better than one that is short and fat, as the tall and skinny containers will allow you to more easily differentiate how many days worth of solution it can hold — more on that later.

Powerhead

The powerhead you use has a few basic requirements — it needs to fit in the container, is best to draw water from the bottom so that it will run even partially emerged, and should be strong enough to pump from wherever you plan on storing the unit into the tank. I used the 606 Mini-Jet from Aquarium Systems, and have it set to the lowest setting.

Pipette Sawed Off

To attach the airline tubing to the powerhead, I found that a pipette from Seachem’s fertilizer bottles fits perfectly over the powerhead output if you saw off the large end.

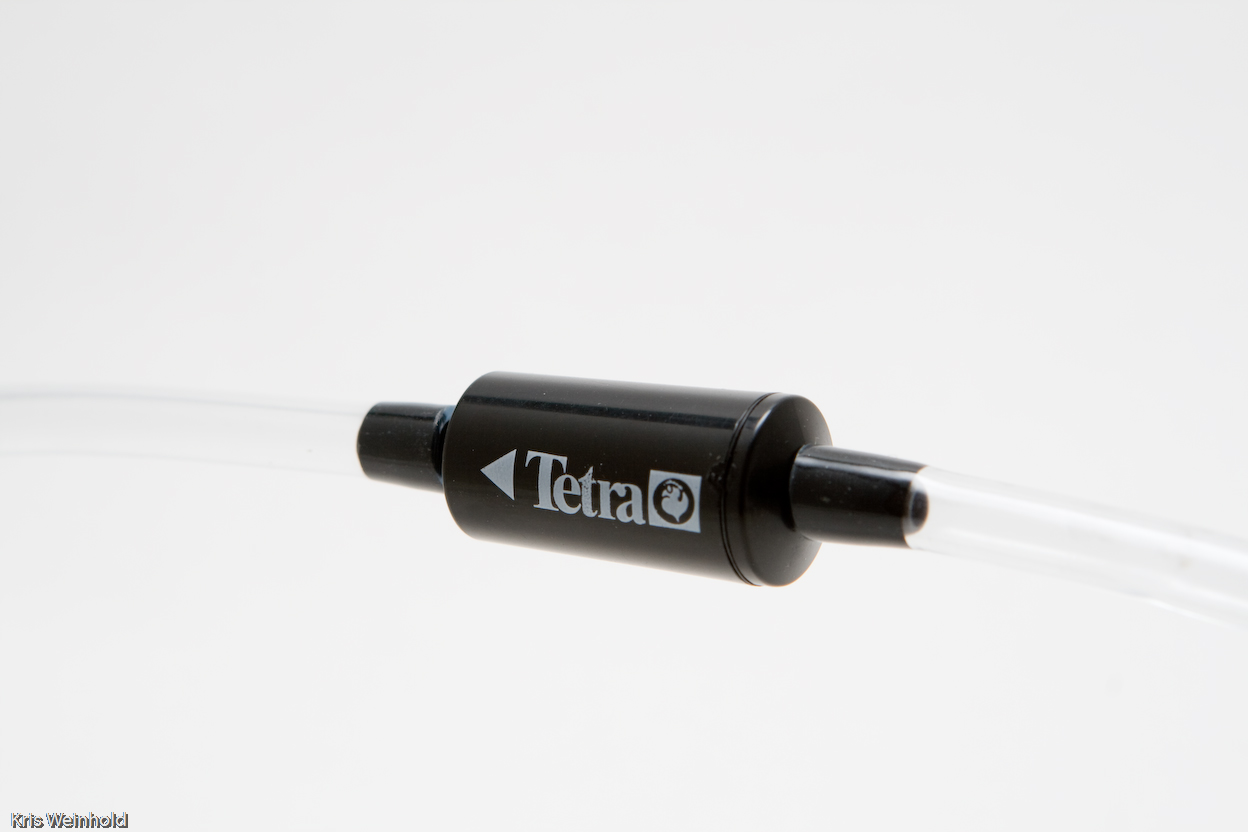
As in any case where you have tubing running into your tank, you definitely want to install a check-valve in the airline tubing to prevent a siphon from forming, and overflowing your aquarium out onto your floor — always a bad thing! I used an inexpensive check-valve from Tetra.

Check Valve

All said and done, I spent $2.99 for the container, $16.99 for the powerhead, $1.99 for the check-valve, and $9.99 for the Intermatic digital timer. I had extra tubing and pipettes on hand, but figure about $35 to build one of these.

Once you have all of your basic components assembled, you need to establish how much solution your powerhead moves every minute, thus figuring out how many total days worth of solution your container will hold. To do this, fill the container with water, and set it exactly where you want it to be next to the tank. This is important because the powerhead will pump different amounts of water depending on the height/distance it is pumping. Now, run the powerhead at 1 minute intervals, using a marker to mark the water level on the container at each interval. Once deplete of water, count the number of marks — that’s how many days you can automate your dosing with a full container. For me, it worked out to exactly 14 days — how convenient!

Now, armed with the previously knowledge of how much I should dose over the same period, I calculated my solution amounts. I put in 100mL of Seachem N and K, and 50mL Seachem Flourish, Iron, and Excel. It’s important not to mix P with Iron in the same container as they interact, so for now, I will have to dose Phosphate separately. Also, for the first time, err on the side of caution, and dose slightly less than what you’d expect. You can always increase it later.

It’s been running for 4 days flawlessly so far, so I’m hoping that this will further help me keep my nutrient levels exactly where they need to be in this tank. I’ll continue to do a few tests to confirm that it’s on target, but I’m looking forward to not having to worry about dosing except for once every two weeks.

Business Broker

Figuring my Ferts

March 22nd, 2008

Recently, after not quite being able to figure out what was going on with the fertilizers and algae in my 40G, I went on a meticulous 2-week testing schedule, where everyday I tested the levels of the two macro nutrients I suspected were out-of-balance, nitrate and phosphate.

DATE N (ppm) P (ppm) Changes:N P K
Day 1 5 .5 0 (WC) 0 (WC) 0 (WC)
Day 2 7.5 .5 15mL 10mL
Day 3 7.5 .5 10mL 15mL 10mL
Day 4 5 1 25mL 5mL 10mL
Day 5 7.5 1
Day 6 2.5 .25 30mL 20mL 20mL
Day 7 10 1
Day 8 5 .5 10mL 15mL 10mL
Day 9 7.5 .5 10mL 20mL
Day 10 7.5 .25 20mL 10mL
Day 11 7.5 1.0
Day 12 0 .5 30mL 15mL 20mL
Day 13 7.5 1.0
Day 14 2.5 .25 30mL 15mL 20mL
DATE What to add
Day 1 4mL Flourish
20mL Excel
4mL Iron
2.5mL N
2.5mL P
Day 2 10mL Trace
4mL Excel
4mL Iron
Day 3 7mL K
4mL Excel
4mL Iron
Day 4 10mL Trace
4mL Excel
4mL Iron
2.5mL N
2.5mL P
Day 5 7mL K
4mL Excel
4mL Iron
Day 6 3mL Flourish
4mL Excel
4mL Iron
Day 7 Water change

I dose my 40G aquarium using Seachem’s full product line of aquarium fertilizers, minimizing my costs by only buying 2L bottles of fertilizer solution, which usually last me some time. Up to this point, I had been following Seachem’s recommended dosing chart, which for a 40G aquarium calls for the dosing schedule on left.

What I essentially confirmed, when comparing the two charts, is that I was vastly under dosing my aquarium, particularly the macro-nutrients. Over the course of my experiment, as I adjusted my dosing levels according to the test results, hair algae disappeared from the tank. The plants really took off, and were looking much more healthy than before, especially plants such as Blyxa japonica that feed mostly from the water column. Although I didn’t document my trace and iron dosing levels, I found that the uptake of N and P are most definitely limited by the availability of those nutrients, as well as K. This was particularly evident between days 9 and 11, as the nitrate levels stayed roughly the same, even without dosing N. By increasing the dosages of the other nutrients, eventually, nitrate went to 0ppm, and I resumed dosing it.

The knowledge learned in this two week test is going to be invaluable going forward with this tank. More to come on that in my next post…

Business Broker

« Previous Entries   Next Entries »