Ecotech Marine Freshwater Radion Gen4

April 18th, 2017

About three years ago, I reviewed Ecotech Marine’s second generation Radion Pro light, and while I loved the configurability of the fixture, I felt the colors were not optimum for planted aquariums and the lens cast too many shadows. Two generations later, Ecotech has resolved both of those issues and has produced one of the most complete lighting systems on the market.

I received three items from the company for this review. A pre-release version of their XR30W light with the freshwater components installed instead of their normal reef configuration. The result is that this fixture is roughly twice as powerful as the XR15FW light that just hit the market. The Reeflink acts as a bridge to your home network so that you can control the light from their EcoSmart webpage or mobile app. The RMS Mounting System is a very nice mount that mounts on the rim of your aquarium.

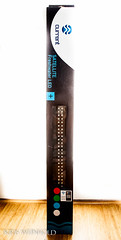
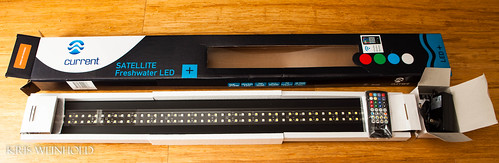
Immediately out of the box, the unit looks an awful lot like the generation 2 light I reviewed three years ago. They replaced the touch-based buttons with more resilent physical buttons. More importantly, they have upgraded their lenses from the TIR lens to the new HEI (Hemispherical Edge Illumination) lens, which does a vastly better job at mixing the various LED colors and distributing the light evenly throughout the tank. I was dubious when I first read about these lenses, but after experiencing them in person, I can vouch that these new lights have far less shadows and a better PAR distribution that the previous version. 

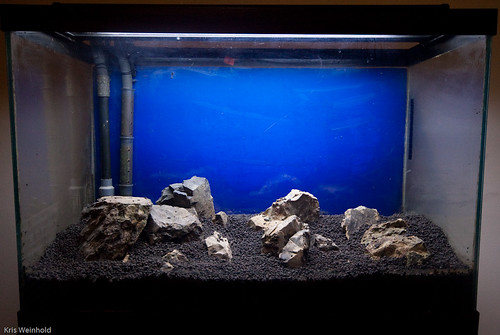
Speaking of PAR, the readings at full power are off the charts! The light is mounted on a 24″x18″x18″ rimless aquarium which puts the light roughly 22″ from substrate. Measuring at that level reads an astounding 351 PAR! As mentioned, this light is roughly twice as powerful as the XR15FW, but the expected 175 PAR that fixture would deliver is still way more than you need. And measuring the power consumption, my unit maxes out around 185 watts, but the XR15FW is half of that at 95 watts at full power. However, the power consumption is based on your output. Hooking mine up to a power meter, it estimates that my yearly electricity costs would be less than $20.

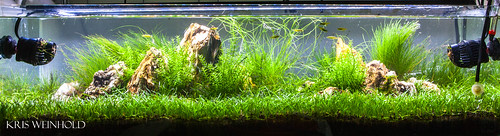
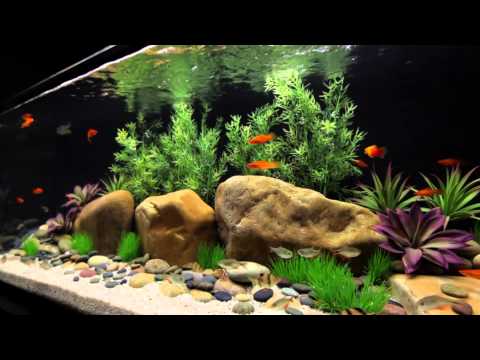
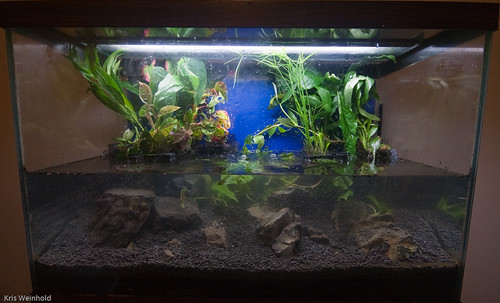
I’ve been running the light since late January, and am just as impressed now as when I set it up initially. Rather than trying to use this on a typical Nature Aquarium Style aquascape that’s mostly green plants, I decided to setup more of a jungle-style aquarium that has plants of various colors to see how they look under the Radion unit.

As you can see above, the greens are very bright and not washed out or too yellow. The red of the Alternanthera is quite brillant, but also the most subtle orange of Rotala rotunifolia is well represented. And of course, as has been the case with all Radion units, you have complete control over the color using the web or mobile applications.

In the fourth generation, Ecotech Marine finally got the message that the old units had way too many blue LEDs. Now, the lights house mostly white LEDs, plus 4 Red, 2 Green, and 2 Blue LEDs, you don’t have to sacrifice PAR to achieve slight variations of the daylight spectrum we prefer in our freshwater planted aquariums.

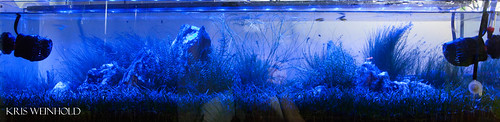
Using their Ecosmart Live software, I configured a full-day schedule that begins to ramp up around 8am and shuts downs at 10pm at night. Normally this would be way too long of a schedule, but the flexibility of this system allowed me to configure very low light in the morning, and a low-light moonlight for much of the evening. I also varied the color spectrum to be more yellow in the morning, and more reds/blues in the evening to better simulate sunrise and sunset coloration and intensity. This creates a very natural lighting scheme and extends the period of time I’m able to enjoy this aquarium with the lights on.

In conclusion, the fourth generation Ecotech Marine Radion is one of the top lights on the market. With the enhanced HEI lenses and improved color configuration, combined with the already impressive EcoSmart Live, the XR15FW Radion is a high-output LED light without any real downside to note. The PAR can be set as high or low as needed for any planted aquarium, multiple lights can be combined for a stronger or more comprehensive setup, and the overall performance is impressive. The XR15FW is currently selling for ~$350, which covers a 36″x36″ footprint, making it pretty economical for the coverage and features. In short, anyone looking for a high-end light for their planted aquarium should look no further than the Ecotech Marine  Radion XR15FW G4 LED light fixture.


Business Broker

Review: Current USA Ramp Timer

November 10th, 2013

SingleRamp-Angle[1]I recently received a Current USA Ramp Timer to test out with my Satellite+ and TrueLumen LED fixtures. The ramp timer is an inexpensive digital timer that plugs in-line to the LED fixture and provides On/Off capabilities as well as a sunrise/sunset option that gradually ramps the light up and down at the beginning and end of the cycle. It also features a nice large clock display that can be helpful if you don’t already have a clock in your fish room.

I initially tested the ramp timer on my Satellite+ LED fixture. The on/off capabilities work as expected with this fixture, however, the sunrise/sunset option has mixed results. When the LED fixture is set to full power modes, the sunrise/sunset feature works perfectly, gradually increasing and decreasing the brightness. I often program my Satellite+ to dim the output slightly. In this mode, at the lowest levels, the ramp timer causes repeated flickering, which can scare your fauna and be distracting. With the TrueLumen fixture, none of this flickering is present. You can see these results correspond to Current USA’s official supported fixture listing:

Compatible LED Lights Single Ramp Timer
Satellite+ LED Fixture ON/OFF Only
Satellite LED Fixture ON/OFF Only
TrueLumen Pro Kits Yes
TrueLumen Pro Strips Yes
TrueLumen Strips Yes
TrueLumen Lunar Lights Yes
Panorama Marine Yes
Panorama Actinic Blue Yes
Panorama Pro LED Yes
Stunner LED Strips Yes

Ultimately, if you’re looking to add some nice effects to your existing Current USA light solution, the ramp timer can provide what you’re looking for. Just understand the limitations with the Satellite fixtures. Finally, see the video below for installation instructions to see how simple it is to hookup and use.

Business Broker

Satellite Freshwater LED+ Review, Part 2 – PAR Readings

May 30th, 2013

I’ve been using the Satellite Freshwater LED+ fixture from Current USA for several weeks now. All of my previous impressions still hold true, so I want to share the actual PAR readings from my bookshelf tank at all of the fixture’s various settings. For a point of reference, the tank is only 9″ tall, so my substrate readings are at 7″. My surface readings are from just below the water surface, with the fixture resting on the rim of the aquarium.

IMG_8653

The remote control that comes with the fixture has two types of presets, simple color presets and dynamic lighting effects. The color effects produce higher intensity output, fixed at a particular color cast. In the pictures below, each button is shown with the surface PAR reading on top, and the substrate (7″) reading below.  For a shallow tank like mine, this fixture has no problem producing enough light to grow just about any aquatic plant you could want. The Full Spectrum mode is the most intense, which makes sense as all LEDs are illuminated in this mode, while the other modes have some color LEDs turned off or dimmed. In Full Spectrum mode, 100 PAR at the substrate should have no problem growing a flat creeping carpet of HC, Lilaeopsis, Glosso, Utricularia, etc.

Satellite LED PAR Readings - Color-Presets

In addition to the color presets, the Satellite Freshwater LED+ fixture has 12 dynamic lighting modes simulating moonlight, passing clouds, lightning strikes, sunrise/sunset, cloudy days, passing showers, and more. Since the light output while in each mode is constantly changing, I listed the range of PAR readings including the highest and lowest readings for each mode. The fading moon mode (B) is the dimmest mode producing just 15 PAR at the surface and a mere 5 PAR at substrate, while the lightning mode have the widest range of readings rapidly going from dark to bright with “lightning strikes”.

Satellite LED+ PAR Readings - Lighting-Effects

I’ve been running the fixture primarily in the fading bright sunlight mode (H), which is growing all of my plants very well. I was previously using full spectrum mode, but started getting a bunch of algae if I didn’t keep up with fertilization. It’s really wonderful to be in this situation and have the ability to lower the amount of light, literally with a push of a button. Due to this flexibility, I highly recommend the Satellite Freshwater LED+ for shallower tanks, as it is a high-light, feature-rich, fixture for between $90-$160. This is really good value!


Business Broker

Satellite Freshwater LED+ Review, Part 1

May 20th, 2013

IMG_8647Recently, I was contacted about testing out one of Current USA’s latest LED fixtures, the Satellite Freshwater LED+. I was already using one of Current-USA’s fixtures, the TrueLumen Pro over my 36″ bookshelf tank, so I thought this would be an excellent comparison.

The Satellite Freshwater LED+ comes nicely packaged with a power adapter and features a remote control to completely customize the lighting experience. The light is very unique in that it contains red, green, blue, and white LEDs that are all separately controlled to allow you to tailor the color and intensity of the output to what looks best to your eyes. In addition, the lighting unit has several predefined effect modes that simulate thunderstorms, cloudy days, moonlight, partial sun, and more.

IMG_8651

Below you can see the full sun daylight mode. The color is actually very nice right out of the box. This is also the most intense mode in terms of PAR, as all (or at least most) of the LEDs are fully illuminated. (Watch for part 2 soon where I’ll detail the PAR for all preset modes.)

IMG_8653

The mode with most striking contrast to the daylight most is appropriately the moonlight mode, which is all blue. What is nice is that you can start with one of the present modes, and then use the remote control to add/subtract a little bit of red/green/blue/white light to it.

IMG_8660

In terms of design, the Satellite Freshwater LED+ fixture is very low profile measuring only 34.8″ x 2″ x 0.44″ and sits just above the rim of the aquarium. Due to the close proximity of the water, the light features a splash guard and has brackets that expand to fit any aquarium between 36″-48″. (I’m testing the 36″ model, but there are several models of different lengths to chose from.) My first impressions of this fixture are very positive. It’s noticeably more bright than my TrueLumen Pro fixture, and my plants started pearling immediately when I put this light over top. I will update my impressions as I continue to use the fixture.

In the meantime, check out Current-USA’s webpage for more product specs, and see the video above for a demo of the various lighting modes.

Dawngate
Business Broker

Riparium Supply Review

October 29th, 2009

About two months ago, Riparium Supply (http://www.ripariumsupply.com) sent me a sample pack of their product line so that I could try them out and talk about my experience. I also received some plants to help get me started in the right direction. Fortunately, I had an empty 20G high aquarium and canister filter sitting around for me to use in this experiment. I’m going to go through my experience, but first let me introduce the Riparium Supply product line.

Large Hanging Planter

The core piece of equipment in a Riparium are these plastic hanging planters. They are designed to hold substrate and plants in place while adhering to the glass in your aquarium. Simply add some of their clay pebbles in the container, followed by your substrate of choice, plant the plant, and fill the rest of the way with substrate.

Smaller Hanging Planter

There are two sizes of hanging planters; smaller ones for medium sized plants, and larger ones for plants with heftier root systems. Both planters also have Velcro-like strips on them, called mushroom-head fasteners, which are used to connect to the floating trellis product.

Trellis Raft

The floating trellises are pieces of foam designed with an insert in the middle. The concept is to position a number of emersed stem plants in the hole, then insert the middle part to lock them in place. The smaller foam pieces attach to the ends of the trellis to add extra buoyancy for large mats of plants. The mushroom-head-fasteners on the trellis lock into the hanging planters so that they don’t float around. Now, let me go through my setup of the past two months…

Riparium

I started by adding a little bit of hardscape that would be totally submersed. The difference between a paludarium and a Riparium is that “the terrestrial portions of paludariums are built up with rocks, driftwood or synthetic materials. In ripariums, on the other hand, the land area is only implied: the above water portion is rendered solely with live plants.” To comply with the concept, I made sure that none of the rocks would come out of the water.

Riparium

I had to alter the outflow of my filter using some extra tubing that I had lying around so that it would reach further down into the aquarium. I ended up using an Eheim spray bay positioned vertically to spray out both above and below the water surface. I also built out an area in the back left which had less substrate in it so that the filter intake would reach low into the aquarium for best filtration and circulation.

Riparium

I planted the plants I had in the hanging planters, and used the floating trellises to suspend a few stem plants that I had. The planters were fabulous to work with, with great instructions on how to fill them to properly secure the plants. The suction cups have held without any issues for the two months they’ve been attached. I suspect that over time, I may need to replace those cups, but that’s not a big deal. The floating trellises, on the other hand, were somewhat difficult to work with. I found it hard to hold several stems in place without them shifting around before being able to lock them in place with the foam insert. I think if it were up to me, I would continue to use the hanging planters, but just plant the stem plants into the substrate of the Riparium, and let them grow emersed naturally.

Riparium

After two months, my Riparium is shown above. I’ve found that I’m not as good scaping a Riparium as a regular aquarium, but I’m sure I would improve with more practice. Also, I’ve been running the tank with a light sitting on the top of the tank. I think you really need to suspend the light so that the plants have room to grow up and out of the tank. I currently have zebra danios and some rainbow darters in this tank, and they’re doing quite well. The foreground still needs to fill in, but that’ll take time since it’s a fairly low-light environment.

In conclusion, I definitely recommend the Riparium Supply Hanging Planters. Both sizes are fantastic, and I think they could even be used creatively in a traditional aquascape. For the Riparium, they work great. As mentioned, I recognize the purpose of the trellis, and they do work as designed, but it takes some work to configure them initially. The owner,  Hydrophyte, has been very responsive to any questions I’ve had, and so I’m sure he would provide similar service to any of his customers. Pricing for each item is reasonable at under $15, with a recommended setup for my 20H costing about $50 to get started. At that price, I think it’s well worth the money to try something different in one of your aquariums. Give them a try!

UPDATE: I initially focused solely on the difficult usability of using the floating trellises to secure stems in a Riparium. In addition, they can provide support for stems planted in the hanging planter that would not otherwise stand upright on their own. Using the trellises in this manner eliminates the problem I described, as the stems purely creep along the trellis. The trellises also help to obscure the hanging planters, especially once plants have grown in, and provide a planting medium for plants whose roots cannot be planted because they require the extra oxygen present when sitting in open aquarium water. Therefore, used in these ways, the trellises can be an integral part of creating a successful Riparium.

Business Broker