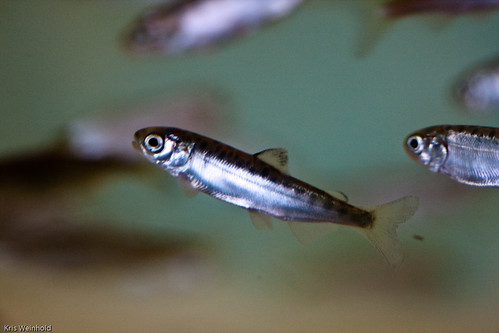
Starting a planted aquarium can seem like a daunting task. Most hobbyists start out small, gradually learning by trial and error what works and what doesn’t, and piece together information from books and websites until they finally either succeed or get frustrated and leave the hobby forever. In this series of posts, I’m going to attempt to outline the most important aspects of setting up a planted aquarium. Hopefully this will become a valuable resource to anyone new to the hobby, or experienced fish-keepers who are looking to setup a planted aquarium.
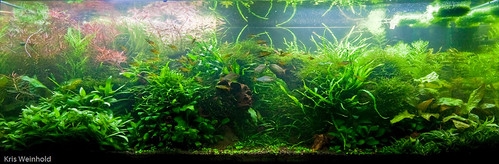
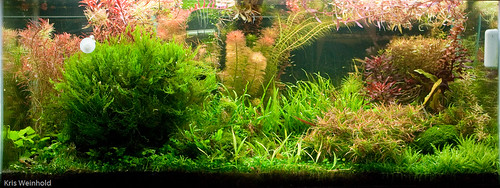
Aquascaping, or the arrangement of the items within the aquarium to create a scene, is where the science of planted aquariums meets the artistic side. You can have a very healthy planted aquarium that isn’t very appealing to the eye. Of course, this is an extremely individualistic thing that is largely subjective, but there are a number of guidelines that can help you achieve a nice looking scape.
Ratios
There are certain proportions that throughout history have proven attractive to the human eye. These proportions can be found in nature, architecture, art, and so on. It only makes sense to incorporate them into our aquariums. In general, perfect symmetry is a bad thing when designing an aquascape. In nature, you don’t commonly see a rock repeated in one place from another, so you shouldn’t do that in your tank. Avoid placing the focal point, whether it is a large rock, piece of wood, or large grouping of plants directly in the middle of the tank. Instead, position the focal point off-center. There are many different possibilities, but the easiest to start with is to divide up your tank into thirds, and put the focal point a third of the way from the left, and a complementary group of wood/rocks/plants a third of the way from the right. The grouping on the left should be larger than the group on the right. If following the golden ratio, one grouping would be 1.61 times as large as the grouping on the right.
When grouping pieces of rocks or wood in your tank, try to ensure that each group has an odd number of items with in. This will help achieve a more natural appearance. In addition, most of the time it is better to slightly angle some of the rocks/wood, verses having them positioned completely vertical.

Using string, you can position your hardscape according to thirds.
Depth
The biggest challenge when aquascaping is figuring out how to make the aquarium appear deeper than it actually is. Most people are only dealing with 12-18″ of space from front to back, however, you want to create the appearence that the scene could go on forever. There are a few tricks that you can use to achieve these feats. First, when you first add the substrate to your aquarium, don’t level it perfectly from front to back. Instead, slope the substrate so that the foreground is lower than the background. As you add the hardscape (rocks/wood), make sure that the slope remains. Second, you can simulate perspective in your aquascape by placing larger items toward the front, and smaller items to the back. This makes it look like things are getting smaller as they get to back of the tank. Don’t overlook leave sizes when considering this, in particular, various sizes of Anubias can be great for achieving this effect. Third, keep your foreground fairly shallow. Having a huge foreground compresses the midground and background, and takes away space from transitioning between them. Finally, position your hardscape so that there are clear lines for the eye to follow from front to back, paying addition to make sure that the foreground naturally transitions from to the midground, and then to the background.

Cliff Hui created amazing depth in his 4th place ranked "Destiny" scape in the 2008 ADA Contest.
Colors/Styles
Make sure all of the separate items that you add to your aquarium look good together. If you have a blank sand substrate, it’s not very believable if you have very light/white rocks on top of it. In addition, if you ultimately want a large rock to look like a mountain top, don’t use a sword plant right next to it, as the large leaves of the sword diminish the impact of the mountain top. Use plants that complement one another, and choose your bright red plants carefully, as you want to use them as accent pieces, not much more. Seek out rocks and wood that have a lot of character, and relatively few straight edges. The more detail on each item, the more it will look like a miniature version of a larger piece of nature.
Hardscape
The rock and wood used in the aquarium make up the hardscape. Your hardscape supports and ultimately makes your aquascape possible — everything stems from the hardscape. After you add the substrate to your tank, it’s time to position your hardscape. I like to add my largest piece, or focal point, first and build around that. Remember to leave room for the plants! It’s easy to have the perfect looking hardscape initially, but then find that you either don’t have room for plants, or that the hardscape ultimately overpowers the plants. On the other hand, particularly for foreground pieces of hardscape, remember that the foreground plants will take up 1-2 inches of height, so don’t use rocks that are going to get covered up by the plants. Plan ahead, even if initially they look slightly too tall there. The idea is to place the hardscape, and have the plants complement it, as they grow in. When you are done positioning your hardscape, use a little bit of extra substrate to fill in any gaps, and to make the scene a little bit more natural looking.
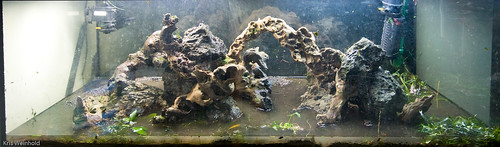
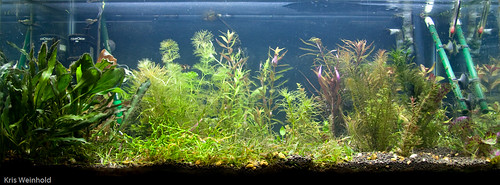
Original hardscape for the 75G at the top of post.
Use of Plants
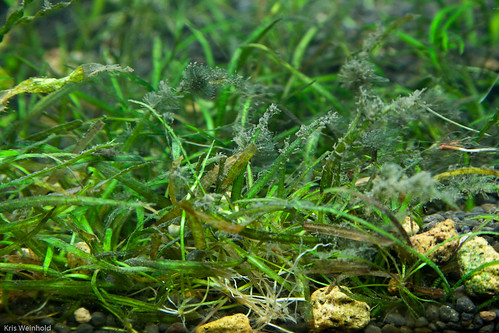
Obviously, plants are an integral part of the aquascape. Mosses, ferns, and Anubias are great plants to use to hide cracks between two rocks, transition between foreground and midground, or to slightly obscure/soften a larger hardscape item to accentuate a particular part of that item. Stem plants are often used as background plants, as they can grow and provide a nice backdrop for your hardscape. By trimming your plants to keep them taller in the back, and shorter in front, you help create a sense of depth from front to back. It’s often better to use more of a few types of plants in an aquascape than the try and cram lots of different species into a single aquascape. The reason is that it’s often hard to ensure that all of those species truly match each other. Besides, in nature, you usually don’t encounter tons of species all growing in the exact same area.
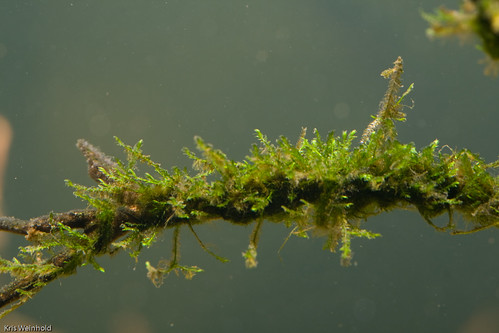
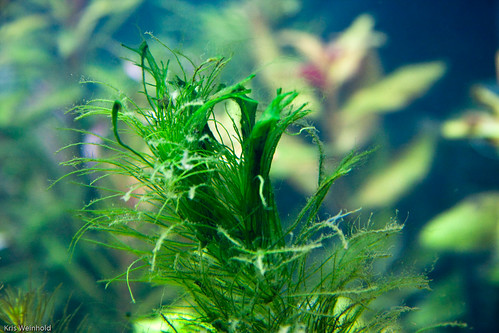
Moss helps soften wood, when tied to it using cotton thread.
Negative Space
So far, I’ve talked mostly about things you want to add to have a nice looking aquascape. Sometimes, it’s as much about what you leave out that really makes the aqauscape great. For example, if you want to have a large rock represent a mountain range, the impact will be the greatest if you have some empty space around that rock. This contract is what draws the eye to the mountain. Similarly, open pathways where the foreground extends back into the midground or background help create a sense of depth, and also highlight the rocks/wood/plants along those pathways. Basically, don’t try to fill every inch of space in your aquarium with something — leave some parts open.
Summary
While I have provided a number of good “rules” to aide you when aquascaping your planted aquarium, the design of an aquascape is a very personal thing. There are times when it makes good sense to break one of these rules in order to achieve a desired effect. In all, use these as a basis, and go from there. I hope to see lots of great aquascapes popping up online and in the various aquascaping contests. Good luck!