AHSupply 2x96Watt Canopy Upgrade
January 14th, 2008On Saturday, I decided to install a new AHSupply 2x96W kit into the canopy over my 40G aquarium. I used to have ODNO lighting on this tank, but I wasn’t comfortable with the amount of energy being wasted to squeeze out a little bit more light from the 36″ 30W bulbs. Below is what that configuration looked like: 4 bulbs driven by 4 ballasts, over cheap shop-light reflectors.

After I removed the existing equipment, I was pretty happy with the condition of the wood. When I built this canopy, I put extra coats of finish to prevent moisture damage. It held up to the moisture and heat pretty well!

I chose to go with AHSupply’s 96W kit because they have fantastic aluminum reflectors, and the 96W bulb fits a 3′ tank perfectly. I know that T5 lighting is all of the rage these days, but I’d prefer to stick with a consistent power compact lineup so that I can buy replacement bulbs in bulk for all of my tanks.

The kit comes with a set of very detailed instructions for installing into a canopy, or building a DIY strip-light enclosure. Everything you need for either configuration is included. To start, I installed the reflectors and bulb clips into the canopy.
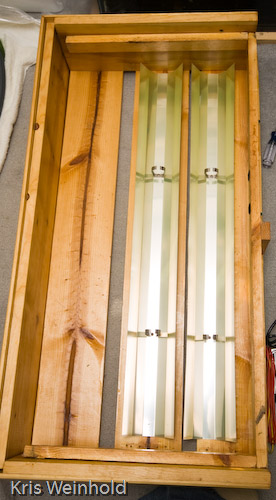
The reflectors come with a yellow plastic film over top of them to avoid scratches during installation. They’re a fantastic parabolic reflector that really focuses most of the light output from the bulb down into the tank. They claim that their reflectors make their setup produce 2.5X as much light as a store-bought solution.

Wiring up the ballast was very straight-forward thanks to the included wiring diagram. The hardest part was trimming the wires to length, and stripping them to use the wire nuts. After screwing down the 2 ballasts, and installing the bulbs, I was all done.

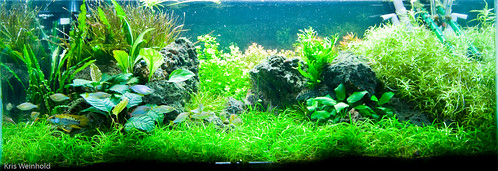
Time to fire them up — Man are they bright! It seems like they’re 10X brighter than my old ODNO lights, using equal or less the wattage. By mid-afternoon, the entire tank was pearling more than I’ve seen it pearl in years. This continued for 3 straight days, so I’ve increased my CO2 injection, and dosing amount to compensate. The fish really pop under these lights as well. I’d recommend AHSupply products to anyone looking for a DIY lighting solution.
January 15th, 2008 at 9:24 am
Awesome outline of installing the AH Supply light kit. I’ve been thinking about adding a similar setup to my own 37 gallon tank. You make the setup look so easy 🙂
January 15th, 2008 at 6:08 pm
Thanks wujimon. It really is quite simple to follow their instructions. All I needed was a wire cutter, drill, and screw driver. Of course, building the canopy/fixture can take a little bit more work.
January 23rd, 2008 at 9:09 am
After looking at your pics again, why did you decide to keep the ballast on the outside of the canopy? Potential heat buildup issues?
January 23rd, 2008 at 9:19 am
More less. Plus, the back lip of the canopy was a convenient place to mount them, as I already had the screw holes drilled from the ballasts I had there before with the ODNO lights, which I was worried about overheating. I could have mounted the ballast underneath the reflector, to the top of the canopy, which is actually how the AHSupply directions recommend for striplight fixtures. So, out of convenience, and the fact that I don’t want to mount fans in my canopy, if heat ever became a problem. (Fan = too noisy)