Tissue Culture Workshop
April 5th, 2009On Saturday, I attended a local workshop on doing tissue culture in your home. The workshop was organized by a local GWAPA member, but was conducted by Dr. Carol M. Stiff of Kitchen Culture Kits, Inc. The nice thing about her workshop was that she custom-tailored it to have an emphasis specifiBAPcally on culturing aquatic plants, in addition, to things like orchids, house plants, and more. You may be asking why tissue culture is at all relevant to the aquatic plant hobby. There are, in fact, a number of reasons:
- To propagate large quantities of otherwise slow to grow species.
- To propagate rarer species so that more hobbyists can try them.
- To preserve plants for long periods of time without keeping them growing in an aquarium or emersed setup.
- To discover new variants that may popup when using various growth hormones.
- To clone identical copies of those variants if they popup.
- Just for the fun of trying something new.
Since cloning has such a high-tech connotation, let me walk you through some pictures from Saturday which demonstrate how feasible it is to do tissue culture in your home.
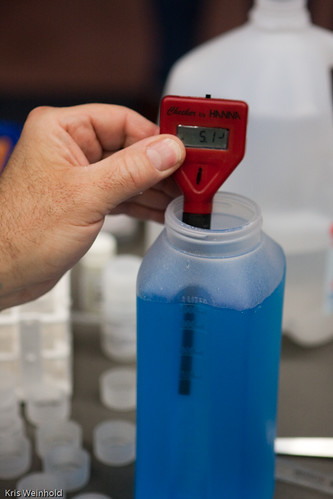
First, you need to mix up the sterile solutions from which the plant cuttings will be suspended and gain their nutrition. These solutions contain some trace and macro nutrients, sugar, plant hormones, and agar as a thickening agent. The pH should be adjusted using vinegar and baking soda to between 5.5 and 6.0 degrees.
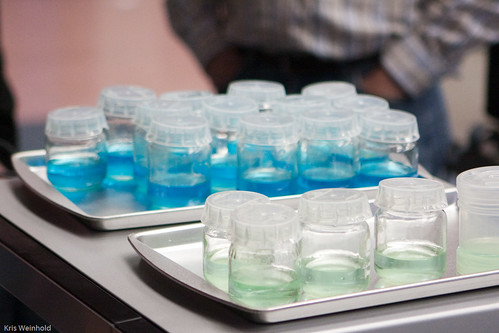
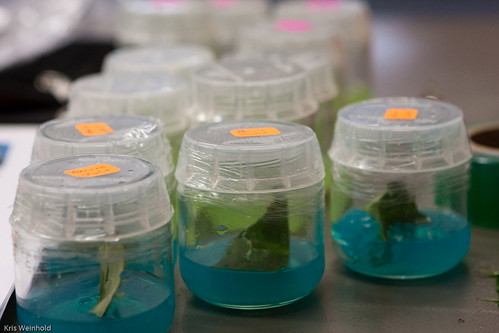
Put 3 tablespoons into suitable jars, and sterilize them in a pressure cooker or microwave to ensure that no bacteria or fungus could contaminate your mini-environment. By the way, food coloring is used to visually seperate solutions with slightly difference ratios of ingredients. For example, some plants do better with 1ml/L BAP hormone (blue jars), while others do just fine with none (green).
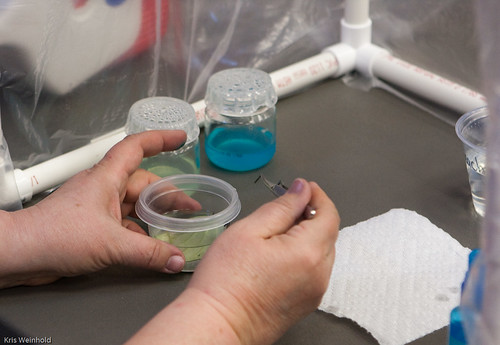
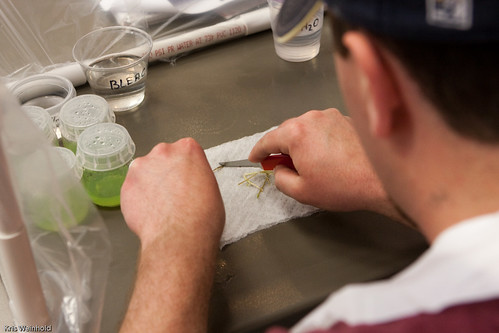
In make-shift sterile hoods made from PVC pipe and garbage bags, we sprayed down the area with isopropyl alcohol. The plant cuttings themselves are sterilized in alcohol, then bleach, and rinsed in water. From there, we further dissected the plants into smaller pieces, suitable for culturing.
In the end, we placed the sections of plant into the agar-filled jars, sealed the jars with plastic wrap, and labeled them. At home, I’ve placed the jars under modest light, and will soon find out if I’ve been successful or not.
We cultured Proserpinaca palustris, Staurogyne sp. ‘Porto Vehlo’, two types of orchids, an African violet leaf, and a few other plants that attendees had brought to try. Overall, it was a very enlightening class, and I hope to try some of the techniques we learned on my own.
April 7th, 2009 at 11:21 am
Wow! You are fast in updating your site. We just did this workshop on Saturday. It was a fun group and very dedicated and very VERY knowledged in their plants. I learned much from this group and will be trying more aquatic plants in my home lab now. Thanks much……..carol
April 7th, 2009 at 6:56 pm
[…] Botanical Gardens Production Facility April 7th, 2009 After our tissue culture workshop on Saturday, one of the attendees offered to take a few of us on a tour of the U.S. Botanical Gardens […]
December 22nd, 2009 at 9:54 am
What is the outcome of the exercise? Any plantlets developed?