About two months ago, Riparium Supply (http://www.ripariumsupply.com) sent me a sample pack of their product line so that I could try them out and talk about my experience. I also received some plants to help get me started in the right direction. Fortunately, I had an empty 20G high aquarium and canister filter sitting around for me to use in this experiment. I’m going to go through my experience, but first let me introduce the Riparium Supply product line.

The core piece of equipment in a Riparium are these plastic hanging planters. They are designed to hold substrate and plants in place while adhering to the glass in your aquarium. Simply add some of their clay pebbles in the container, followed by your substrate of choice, plant the plant, and fill the rest of the way with substrate.

There are two sizes of hanging planters; smaller ones for medium sized plants, and larger ones for plants with heftier root systems. Both planters also have Velcro-like strips on them, called mushroom-head fasteners, which are used to connect to the floating trellis product.

The floating trellises are pieces of foam designed with an insert in the middle. The concept is to position a number of emersed stem plants in the hole, then insert the middle part to lock them in place. The smaller foam pieces attach to the ends of the trellis to add extra buoyancy for large mats of plants. The mushroom-head-fasteners on the trellis lock into the hanging planters so that they don’t float around. Now, let me go through my setup of the past two months…
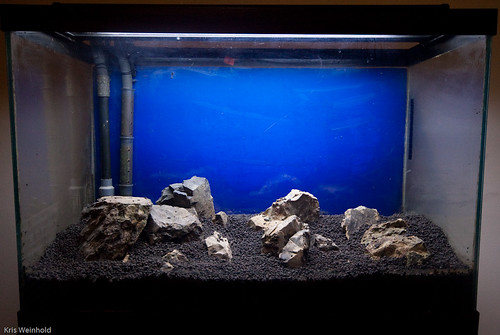
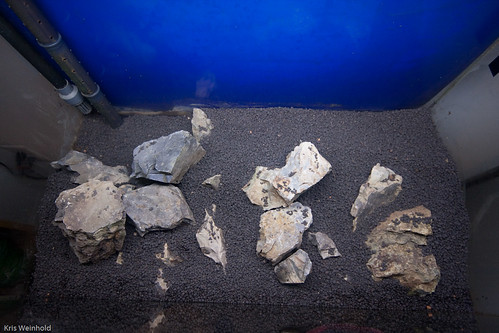
I started by adding a little bit of hardscape that would be totally submersed. The difference between a paludarium and a Riparium is that “the terrestrial portions of paludariums are built up with rocks, driftwood or synthetic materials. In ripariums, on the other hand, the land area is only implied: the above water portion is rendered solely with live plants.” To comply with the concept, I made sure that none of the rocks would come out of the water.
I had to alter the outflow of my filter using some extra tubing that I had lying around so that it would reach further down into the aquarium. I ended up using an Eheim spray bay positioned vertically to spray out both above and below the water surface. I also built out an area in the back left which had less substrate in it so that the filter intake would reach low into the aquarium for best filtration and circulation.
I planted the plants I had in the hanging planters, and used the floating trellises to suspend a few stem plants that I had. The planters were fabulous to work with, with great instructions on how to fill them to properly secure the plants. The suction cups have held without any issues for the two months they’ve been attached. I suspect that over time, I may need to replace those cups, but that’s not a big deal. The floating trellises, on the other hand, were somewhat difficult to work with. I found it hard to hold several stems in place without them shifting around before being able to lock them in place with the foam insert. I think if it were up to me, I would continue to use the hanging planters, but just plant the stem plants into the substrate of the Riparium, and let them grow emersed naturally.

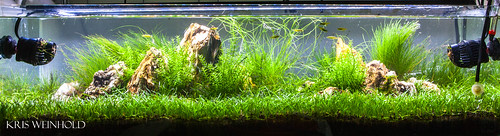
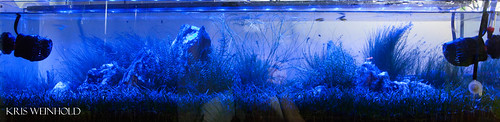
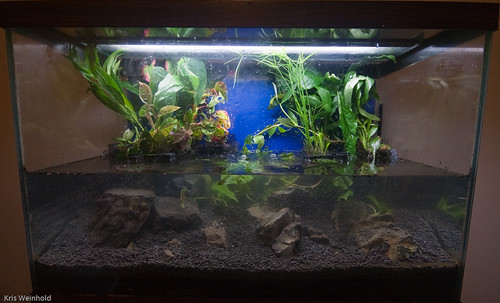
After two months, my Riparium is shown above. I’ve found that I’m not as good scaping a Riparium as a regular aquarium, but I’m sure I would improve with more practice. Also, I’ve been running the tank with a light sitting on the top of the tank. I think you really need to suspend the light so that the plants have room to grow up and out of the tank. I currently have zebra danios and some rainbow darters in this tank, and they’re doing quite well. The foreground still needs to fill in, but that’ll take time since it’s a fairly low-light environment.
In conclusion, I definitely recommend the Riparium Supply Hanging Planters. Both sizes are fantastic, and I think they could even be used creatively in a traditional aquascape. For the Riparium, they work great. As mentioned, I recognize the purpose of the trellis, and they do work as designed, but it takes some work to configure them initially. The owner, Hydrophyte, has been very responsive to any questions I’ve had, and so I’m sure he would provide similar service to any of his customers. Pricing for each item is reasonable at under $15, with a recommended setup for my 20H costing about $50 to get started. At that price, I think it’s well worth the money to try something different in one of your aquariums. Give them a try!
UPDATE: I initially focused solely on the difficult usability of using the floating trellises to secure stems in a Riparium. In addition, they can provide support for stems planted in the hanging planter that would not otherwise stand upright on their own. Using the trellises in this manner eliminates the problem I described, as the stems purely creep along the trellis. The trellises also help to obscure the hanging planters, especially once plants have grown in, and provide a planting medium for plants whose roots cannot be planted because they require the extra oxygen present when sitting in open aquarium water. Therefore, used in these ways, the trellises can be an integral part of creating a successful Riparium.