Aquatic Plants Out of Water

February 21st, 2008

When I got back from Florida last year, I started a small emersed setup in my office to keep some of the cryptocorynes we bought there. First, an emersed setup is one that allows you to grow your plants terrestrially, or out of the water. Really, all that is required is a light, a closed container to maintain proper humidity, and some sort of fertilization plan. It’s not much different from starting seeds or a lite version of hydroponics.
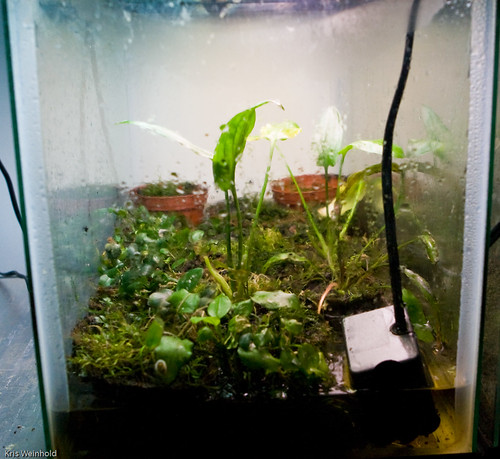
Emersed Setup

Why would any planted aquarium keeper want an emersed setup? There are many reasons, but one good reason is to more quickly grow out enough plants to start a new aquascape. It’s also a good place to store plants that you want to keep, but don’t want in your current aquascape. Or, you can use one to flower your plants for get seeds, or just simply to see what the terrestrial version of a plant/flower looks like.
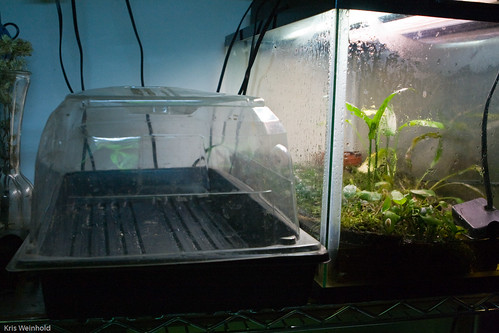
Dome and Emersed Tank

I started with a simple seed-starting tray and dome (above) from the hydroponics store. Make sure to get a high dome so that there’s room for your plants to grow vertically. Just recently, I transferred all of my plants from that dome/tray setup into a 10G aquarium in order to gain even more height.
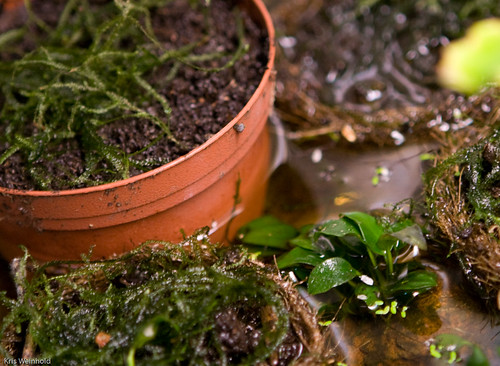
Moss Pot

I use mostly coconut-fiber pots filled with a mixture of leaf compost and ADA Aquasoil. This is especially good for most cryptocorynes, but works for other plants as well. Then, after planting each plant, I lightly cover the surface of the soil mixture with moss. Mosses have a natural anti-fungal agent that helps to prevent your plants from being overwhelmed with white-fuzzy-fungus that can easily ruin the whole setup. After that, I fill the container to a water level of about an inch below the rim of the pots. This supplies the pots with a constant water source. Finally, I’m using plain fluorescent strip lights over top, and a small powerhead to circulate water around the tank.
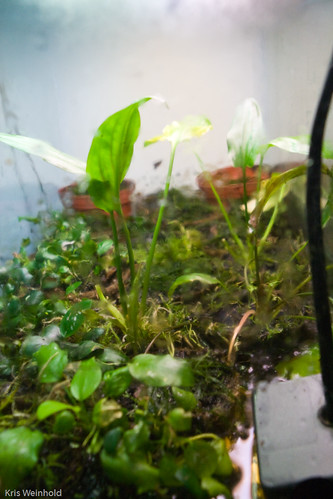
Emersed Tank

CO2 is not a concern because it is abundant in the atmosphere. Algae doesn’t grow out of the water, so all of your leaves will be algae free. These two things are the largest reasons many of the large aquatic plant nurseries grow their plants emersed before they arrive at your local fish store. For fertilizers, you can use hydroponics solutions, dry ferts, or even aquarium liquid ferts.
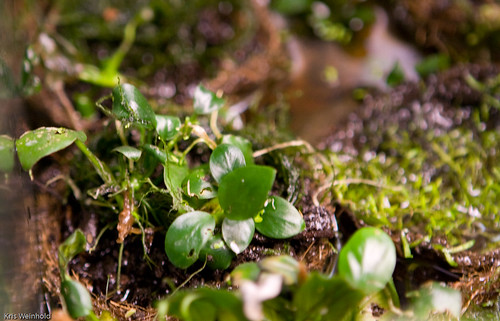
Anubias nana 'petite'

Currently, I’m growing Cryptocoryne moehlmannii, Utricularia graminfolia, and several Anubias barteri nana ‘petite’. I want to build up a nice supply of A. ‘petite’ for some upcoming aquascapes. I’m curious to try and flower the Utricularia, and I just haven’t managed to move the crypt to a tank. I hope to expand the number of plants grown this way now that I have more space in my 10G aquarium.
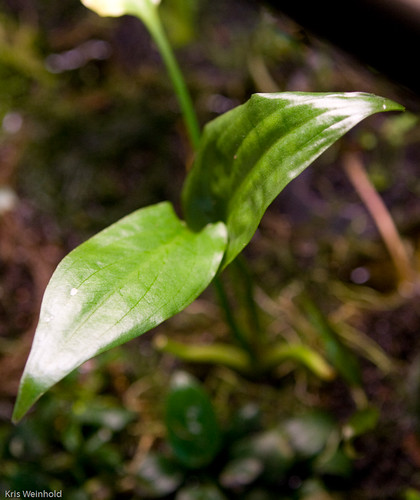
Cryptocoryne moehlmannii Emersed


Business Broker

AHSupply 2x96Watt Canopy Upgrade

January 14th, 2008

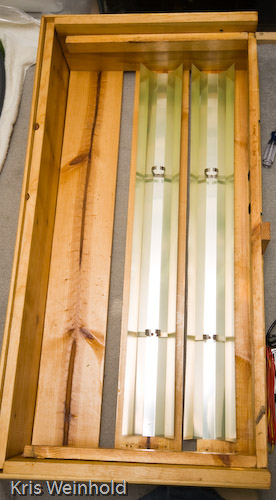
On Saturday, I decided to install a new AHSupply 2x96W kit into the canopy over my 40G aquarium. I used to have ODNO lighting on this tank, but I wasn’t comfortable with the amount of energy being wasted to squeeze out a little bit more light from the 36″ 30W bulbs. Below is what that configuration looked like: 4 bulbs driven by 4 ballasts, over cheap shop-light reflectors.

After I removed the existing equipment, I was pretty happy with the condition of the wood. When I built this canopy, I put extra coats of finish to prevent moisture damage. It held up to the moisture and heat pretty well!

I chose to go with AHSupply’s 96W kit because they have fantastic aluminum reflectors, and the 96W bulb fits a 3′ tank perfectly. I know that T5 lighting is all of the rage these days, but I’d prefer to stick with a consistent power compact lineup so that I can buy replacement bulbs in bulk for all of my tanks.

The kit comes with a set of very detailed instructions for installing into a canopy, or building a DIY strip-light enclosure. Everything you need for either configuration is included. To start, I installed the reflectors and bulb clips into the canopy.

The reflectors come with a yellow plastic film over top of them to avoid scratches during installation. They’re a fantastic parabolic reflector that really focuses most of the light output from the bulb down into the tank. They claim that their reflectors make their setup produce 2.5X as much light as a store-bought solution.

Wiring up the ballast was very straight-forward thanks to the included wiring diagram. The hardest part was trimming the wires to length, and stripping them to use the wire nuts. After screwing down the 2 ballasts, and installing the bulbs, I was all done.

Time to fire them up — Man are they bright! It seems like they’re 10X brighter than my old ODNO lights, using equal or less the wattage. By mid-afternoon, the entire tank was pearling more than I’ve seen it pearl in years. This continued for 3 straight days, so I’ve increased my CO2 injection, and dosing amount to compensate. The fish really pop under these lights as well. I’d recommend AHSupply products to anyone looking for a DIY lighting solution.

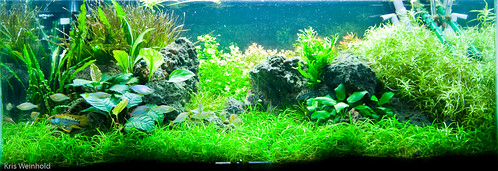
40G - 1/14/2008

Business Broker

Tip: Cleaning Ceramic Disk Diffusers

October 5th, 2007

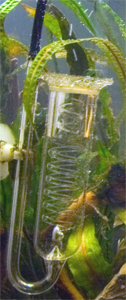
Glass diffuserPerhaps this is old news for some folks, but I wanted to share a fantastic tip I got from another fellow GWAPA member, Ben B., for easily cleaning the ceramic disk on your CO2 glass diffuser. A little background… I run nearly all of my CO2 in-line on my tanks because it’s easy, and because I personally don’t like to put any more equipment in my tank than I need to. But, when the glass diffusers started coming out and becoming quite trendy among planted aquarists, I ordered a couple to see what the fuss was about. For the first month or two, they worked perfectly, spewing small micro-bubbles, but as algae builds on disk, these bubbles turn larger and larger, until eventually most of the CO2 is being lost from the tank before it can be absorbed into the water.
I had been using the routine of grudgingly disconnecting the diffuser, and letting it soak in a diluted bleach solution for a number of hours, before returning it to the tank. This does a great job of cleaning the disk, but I’ve broken more than a couple diffusers performing the simple task of disconnecting/connecting the airline hose from the fragile glass stem.

Enter Ben B’s brilliant solution. Every time you do a water change, pull the glass diffuser above the surface of the water. Pour enough hydrogen peroxide onto the ceramic disk that it keeps the disk submerged in the H2O2. As you’re busy trimming, scraping the glass, and filling the tank back up, that H2O2 is busy oxidizing the algae from the surface of diffuser. By the time you’re done filling up your tank, the diffuser should be good as new. All that’s required is keeping a small bottle of hydrogen peroxide near you tank — something I already am in the practice of doing. Thanks Ben!

Business Broker

DIY Autodosing – GWAPA Sept 2007 Meeting

September 24th, 2007

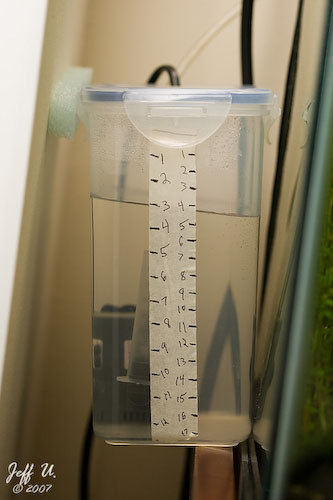
On Saturday, I attended the September GWAPA meeting at Jeff’s house in Ellicot City, MD. In addition to having some awesome sweet/sour meatballs and two gorgeous aquascapes, Jeff also demonstrated how to make the DIY autodoser that he’s been using on his tanks for some time. Made of easily attainable materials, this provides a great solution for the lazy, forgetful, and those looking for consistency in their dosing. I’ve been using an Eheim Liquidoser for awhile, but I think I might try to put together one of these since it holds far more solution than an Eheim does. You can read a short article on how to build one of these on the GWAPA website.

DIY Autodoser

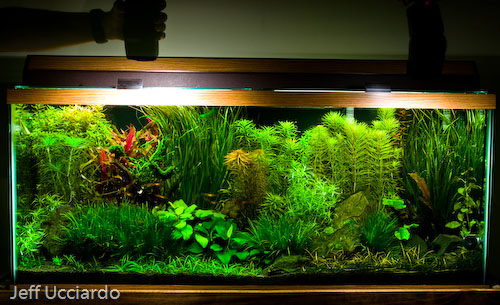
In addition to the meeting itself, Aaron and I stayed afterward to help Jeff get a good picture of his 55G tank. We’re all aspiring to improve our photography skills, so it was great to try a bunch of different techniques to ultimately come up with a nice looking shot. We used two external flashes aimed at some shadowed portions of the tank to try and even out the exposure across the whole picture. While it took us countless tries, we definitely ended up with a better picture than what we would have had without the extra experimentation.

Using flashes to add light to shaded areas

Business Broker

In-Line Hydor Heater Review

January 12th, 2007

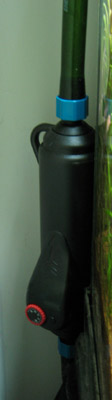
Hydor In-Line HeaterEven though it doesn’t feel much like it in Maryland this year, it’s winter time, and that means that my basement gets pretty chilly. Over the summer, I had previously pulled out a standard submerisible heater in favor of removing as much equipment as possible from my tank. I didn’t want to add my old heater back in, so I decided to try out Hydor’s in-line heater, which hooks right on your canister filter’s out-take line.

Installation couldn’t be simpler with this unit. Out of the box, there’s zero assembly to do. All you do is splice your filter’s output line, connect either end of the line to the heater’s barbs, and plug it in. The temperature is easily set using the red dial. Boom, you’re done.

Since installation, I’ve heard a few “clicks” here and there. That occurs when the heater turns on or off and isn’t audible unless you’re right next to the tank. Otherwise, it’s easy to forget that the heater is even there. The temperature of the water has been kept very stable, so it’s been doing exact what I bought it to do. I’d recommend to anyone with a canister filter who wants to avoid making an in-tank heater part of their aquascape.

Business Broker

« Previous Entries   Next Entries »