August 4th, 2010
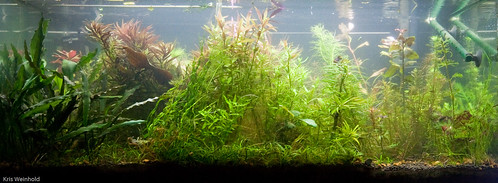
On Monday, I spent a very long overdue 7.5 hours working in my fish-room. The problem is that I have neglected my tanks for too long that duckweed and algae had taken them over. In addition to cleaning them up, I also decided to swap the stands the my 40G and 50G aquariums were sitting on to provide better light to my aquascaping tank (the 50G).
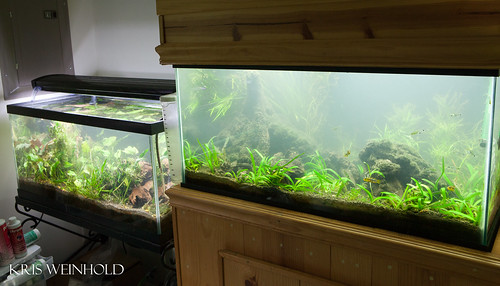
As you can see above, the two tanks sit side-by-side. That doesn’t mean it’s an easy job to swap their positions. I still had to drain the water, remove the plants, remove the rocks, remove the fish, remove the driftwood, and finally get help to physically move them. In other words, it was nearly the same amount of work as if I were moving to another house.
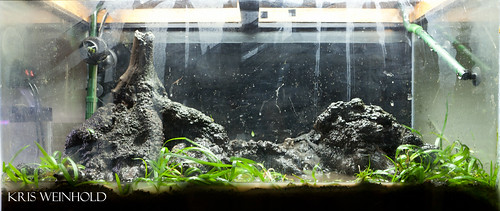
After getting the aquariums into their new resting places, I decided that it was time to re-aquascape the 50G. I didn’t want to change too much from how it was before, but I definitely needed to make some changes. So, I repositioned the wood countless times until I came up with what you see above.
Then, I replanted the Blyxa aubertii on the back left and added Hygrophila sp. ‘Guinea’ to the back right. Hopefully with some time, everything will fill in and look a lot better than it did previously. I’m still toying with the idea of adding the branches back into the scape to give the feel of a riverbank, but I’ll let the plants grow in a bit before doing that. Comments welcome!
Posted in 40G Tank Log, 50G Tank Log, Aquascaping | Comments Off on Moving Around the Fishroom
December 12th, 2009
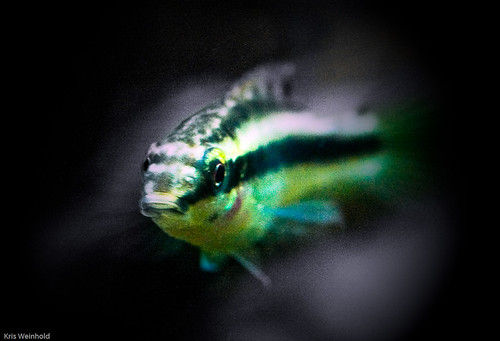
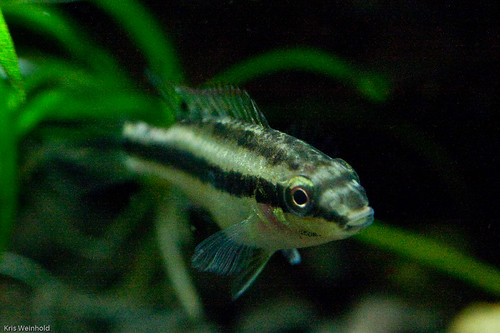
In October, my Pelvicachromis pulcher ‘Super Red’ spawned and I had a whole swarm of little Krib fry swimming around in my 40G farm tank. After only a couple months of paying extra special attention to feeding them, I now have a group of decent sized fish. The largest ones are about 1.5 inches long, with the smallest being about an inch.
The parents have left them to fend for themselves, although so far they are getting along just fine with the parents. I don’t completely know how many young fish I have, however, because they have dispersed throughout the tank, and the only time I ever seen a number of them together is when I’m feeding them. At those times, I’ve counted 7-8 together, but it wouldn’t surprise me to have double that number hiding in the overgrown farm tank.
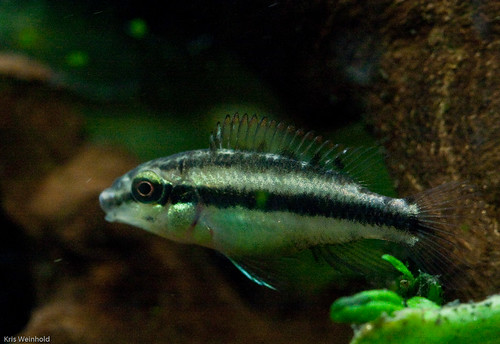
They have yet to get the brilliant colors that the parents display, but you can definitely tell that they’re kribs now. Small patches of color are starting to show up around the gills and fins. They have the distinctive squat (or maybe pear shaped) body where the belly seems a little bit too big in comparison to the rest of the fish. I’m not able to sex them yet, but I’m never great at that anyways with most fish.
I’m really pleased with how easy these fish have been to keep and raise. The only thing I’m worried about is if the parents spawn again, and decide they don’t want their previous brood around anymore. If I see signs of spawning though, I may pull the parents out to their own tank to do their business.
Posted in 40G Tank Log, Fish Fry | Comments Off on Pelvicachromis pulcher ‘Super Red’ Fry Update
March 22nd, 2009
Before I went to Seattle, the 40G had started to show signs of something going wrong. This is the aquarium with worm casting underneath the substrate, but also the aquarium that I moved from another part of my house a few months back. Really, ever since that move, I’ve been dealing with a ton of particles coating a lot of the plants. I thought I could make it go away with regular water changes and extra vacuuming, but that didn’t seem to work. Compounding the situation, I suspected that the Bluespotted Sunfish or Banded Killifish that were in the tank might have been doing a little bit of digging around.
I think the problem stemmed from not rinsing out the top-layer of the substrate when I moved the tank. Anyone who’s ever used ADA Aquasoil before knows that after awhile, parts of the substrate can degrade into mud. I should have washed away this mud when I did the move. Instead, the mud kept getting uprooted into the water column, coating the plants, and causing algae.
So, in effect, that’s what I spent several hours yesterday doing. I removed nearly all of the plants from the tank. Moved the fish into my new 54G native-themed aquarium, and proceeded to empty and fill the aquarium several times in order to vacuum all of the substrate.
I can only hope that now I’m all set to continue getting great growth from this tank. The other benefit of me doing this is that I was able to rearrange all of the plants in the tank, thin some of them out, and free up a lot of room for more plants. Collectoritis here I come!
Posted in 40G Tank Log, Substrate | 4 Comments »
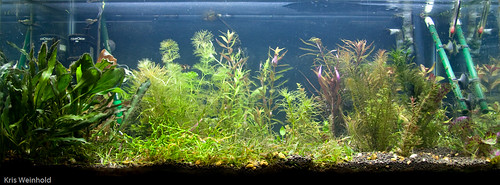
February 8th, 2009
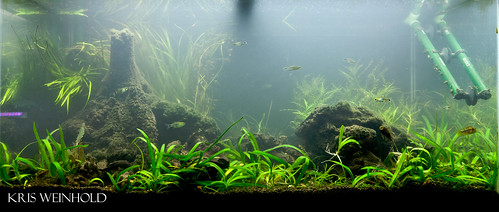
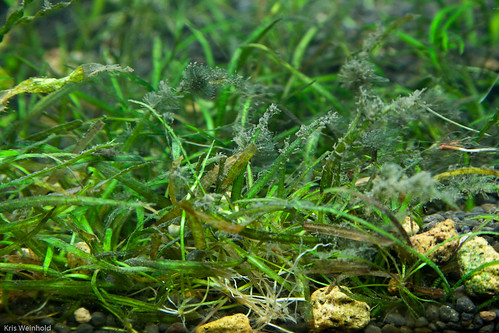
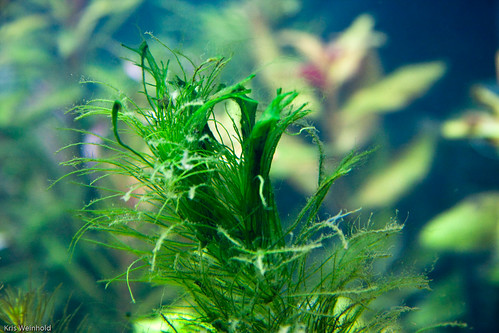
I just wanted to share a picture of my completely non-aquascaped 40G farm tank. This is the aquarium where I grow out plants for use in future aquascapes, or hang onto plants that I don’t want in one of my current aquascapes, but don’t want to get rid of either. This is the 40G aquarium that has earthworm castings underneath a top layer of ADA Amazonia Aquasoil. I dose Flourish and Flourish Iron daily, adding Potassium every once in awhile, but otherwise it does pretty well on it’s own.
One of the benefits of keeping an aquarium like this, as opposed to an emersed tank, is that plants grown in here are immediately ready to go into another aquarium when needed. When plants grow too large in this tank, I just trim them out, and take them to club auctions or sell online. Farm tanks also let you truly use only the plants you want in an aquascape, without feeling the need to cram a plant into the aquarium just so you don’t lose it. I have no idea how many different species of plants are crammed into this tank. I’m convinced that if I had a 1000 gallon aquarium, I’d somehow find a way to fill it with plant mass. The biggest challenge is ensuring that no single group of plants shade out others, as it’s easy to lose track of what’s growing where. Nevertheless, I highly recommend keeping a farm tank of some size as a way of improving the aquascapes in your other aquariums.
Posted in 40G Tank Log | 7 Comments »
December 3rd, 2008
A few days ago, I finally committed the time to completely tear down my 40G aquarium, and move it from the second floor down to my basement. I had long worried that the weight on the second floor, plus the risk of serious water damage if the tank/equipment ever leaked, was too much of a risk. So, I completely tore down the tank, removing all of the plants, fish, and hardscape. I knew the earthworm casting substrate would be problematic to move, so I did my best to scrape off the top layer of ADA Amazonia, but kept the bottommost worm-poop in the tank.

It’s amazing how something that I can describe in a few sentences above can take so long to implement. It was basically an all-day project, and a two-person job to actually move the tank. Then, after I got it setup, the Amazonia that I scraped off the top was so muddy that it turned the water into something resembling milk. After countless water changes, the water is finally clear, but there’s no aquascape in place. I’m going to use this tank as more of a farming tank to hold my extra plants. The blue-spotted sunfish and killies are still enjoying it as their home, however. I’ll post some picture of the tank itself after I’ve had a chance to fully plant and clean it up a little bit.
Posted in 40G Tank Log | 6 Comments »